Home › Drivetrain ยท TX6A AUTOMATIC TRANSMISSION / TRANSAXLE › VALVE BODY ASSEMBLY

VALVE BODY ASSEMBLY > REMOVAL

for Preparation Click here


1. DISCONNECT CABLE FROM NEGATIVE BATTERY TERMINAL

NOTICE:
The power window system utilizes a mechanism in which the door glass moves down slightly when the door is opened, and in which the glass moves up when the door closed in order to prevent the door molding from being damaged. When the negative (-) battery terminal needs to be disconnected for servicing, fully open the driver and passenger door glasses in advance.


2. REMOVE FRONT EXHAUST PIPE ASSEMBLY
(Click here)


3. DRAIN AUTOMATIC TRANSMISSION FLUID
  1. Remove the drain plug and gasket, and drain the ATF.

  1. Install the drain plug and a new gasket.

    Torque:
    20 N*m{ 204 kgf*cm , 15 ft.*lbf }


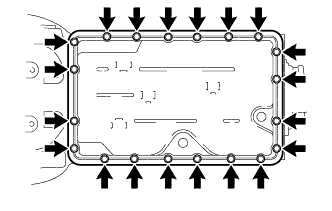
4. REMOVE AUTOMATIC TRANSMISSION OIL PAN SUB-ASSEMBLY


    C256218
  1. Remove the 20 bolts, automatic transmission oil pan sub-assembly and the automatic transmission oil pan gasket.

    NOTICE:
    Some fluid will remain in the automatic transmission oil pan sub-assembly. Remove all the bolts and carefully remove the automatic transmission oil pan sub-assembly.
5. REMOVE TRANSMISSION OIL CLEANER MAGNET


    C109359E04
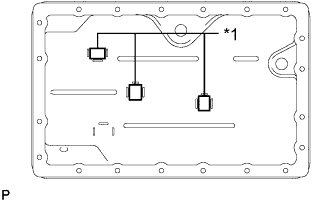
  1. Remove the 3 transmission oil cleaner magnets from the automatic transmission oil pan sub-assembly.
    Text in Illustration 
    *1
    Transmission Oil Cleaner Magnet


    AT00103E05
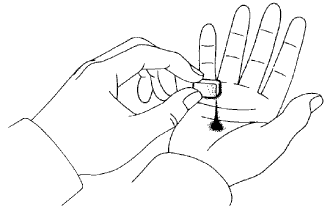
  1. Examine the particles in the automatic transmission oil pan sub-assembly.
    1. Collect any steel chips with the removed transmission oil cleaner magnets. Carefully inspect the foreign matter and particles in the automatic transmission oil pan sub-assembly and on the transmission oil cleaner magnets to anticipate the type of wear you will find in the automatic transmission assembly.
      Steel (magnetic): bearing, gear and clutch plate wear
      Brass (non-magnetic): bush wear


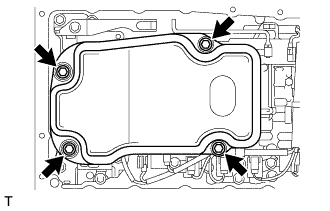
6. REMOVE VALVE BODY OIL STRAINER ASSEMBLY


    C258476
  1. Remove the 4 bolts and the valve body oil strainer assembly.

    NOTICE:
    Be careful as some fluid will come out of the valve body oil strainer assembly.


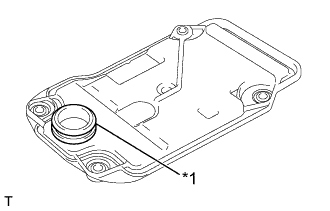
    C258477E01
  1. Remove the O-ring from the valve body oil strainer assembly.
    Text in Illustration 
    *1
    O-ring


7. DISCONNECT TRANSMISSION WIRE


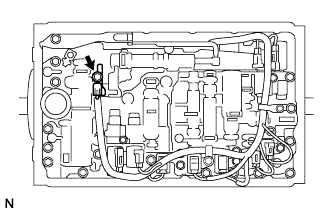
    C231586
  1. Remove the bolt and the temperature sensor clamp.

  1. Separate the ATF temperature sensor.


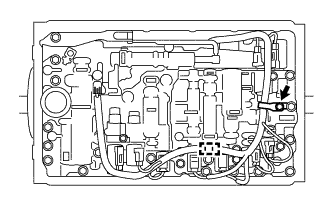
    C257575
  1. Remove the bolt and the valve body wire harness clamp.

  1. Disengage the wire harness clamp.


    C122840
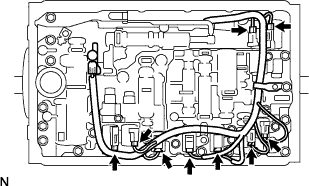
  1. Disconnect the 9 solenoid valve connectors.


8. REMOVE TRANSMISSION VALVE BODY ASSEMBLY


    C106931
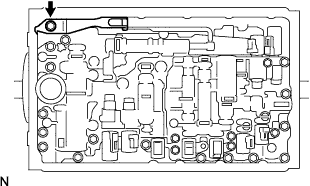
  1. Remove the bolt, detent spring cover and the detent spring.


    C106932
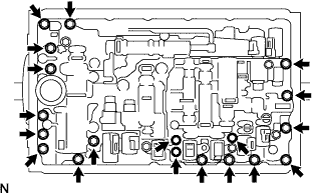
  1. Remove the 19 bolts and the transmission valve body assembly.


    C109330E07
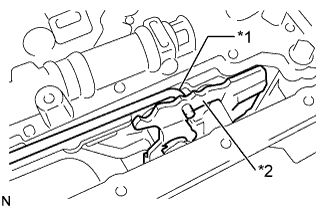
  1. Disconnect the manual valve connecting rod sub-assembly from the manual valve lever sub-assembly.
    Text in Illustration 
    *1
    Manual Valve Connecting Rod Sub-assembly
    *2
    Manual Valve Lever Sub-assembly


    D027914E13
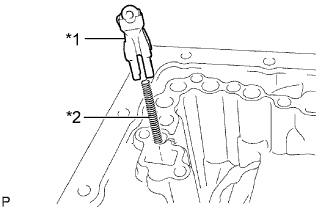
  1. Remove the check ball body and the compression spring.
    Text in Illustration 
    *1
    Check Ball Body
    *2
    Compression Spring

    NOTICE:
    Do not drop the check ball body and compression spring.