FUEL INJECTOR (for Direct Injection) > INSTALLATION |
| 1. INSTALL FUEL INJECTOR SEAL |
![]() |
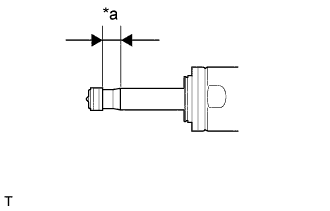
Apply engine conditioner to the injector area shown in the illustration. Using a piece of cloth, remove the carbon deposits from the injector and its grooves.
| *a | Clean Area |
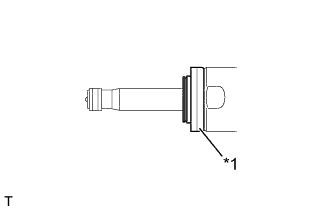
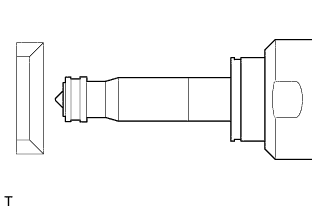
![]() |
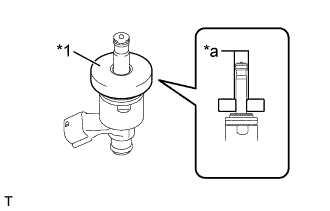
Apply engine oil to the injector contact surface of SST (guide). Then attach SST (guide) to the injector with the tapered inner portion facing the tip of the injector, as shown in the illustration.
| *1 | SST (Guide) |
| *a | Tapered Inner Portion |
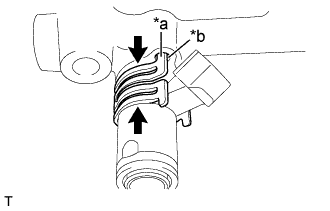
![]() |
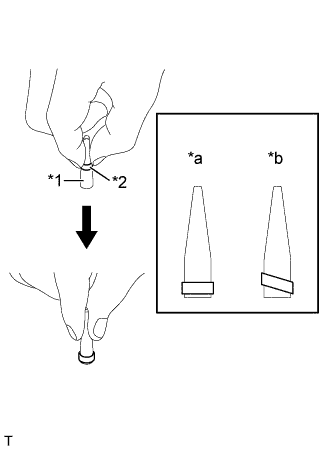
Install a new injector seal to SST (holder).
| *1 | SST (holder) |
| *2 | Injector Seal |
| *a | CORRECT |
| *b | INCORRECT |
![]() |
Install SST (holder with injector seal) to the tip of the injector. Slide the seal downward into the injector groove (injector connector side) with your fingers, as shown in the illustration.
| *1 | SST (Guide) |
| *2 | SST (Holder) |
![]() |
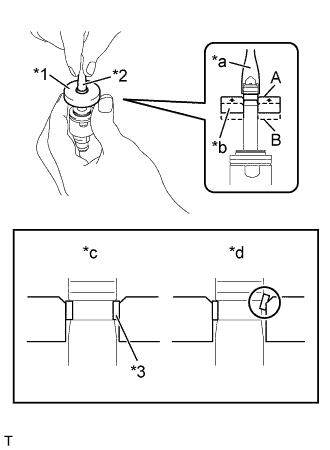
Using SST (holder), gently press downward on the injector seal (injector connector side). Then slowly slide SST (guide) toward the injector tip to settle the seal into the injector groove.
| *1 | SST (Guide) |
| *2 | SST (Holder) |
| *3 | Injector Seal |
| *a | Gently Press |
| *b | Slowly Slide |
| *c | CORRECT |
| *d | INCORRECT |
![]() |
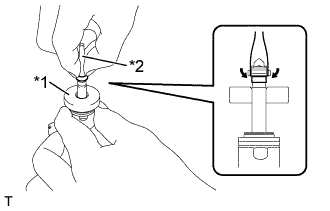
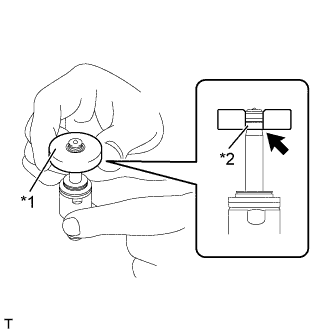
Slowly slide SST (guide) toward the tip of the injector. When the injector contact surface of SST (guide) aligns with the seal (injector connector side) as shown in the illustration, hold the position for 5 seconds or more to fully align the seal into the injector groove.
| *1 | SST (Guide) |
| *2 | Injector Seal |
![]() |
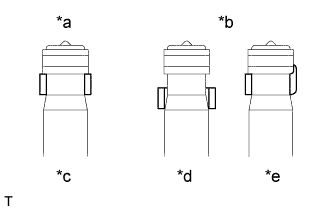
After installing the seals, check that they are not scratched, deformed or protruding from the injector groove.
| *a | CORRECT |
| *b | INCORRECT |
| *c | Normal |
| *d | Protruding |
| *e | Deformed |
| 2. INSTALL FUEL INJECTOR ASSEMBLY |
![]() |
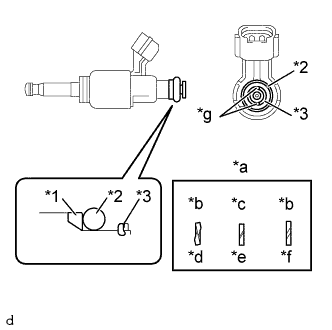
Install new fuel injector backup rings (No. 1 and No. 2) and a new fuel injector seal to the fuel injector assembly as shown in the illustration.
| *1 | No. 1 Fuel Injector Backup Ring |
| *2 | Fuel Injector Seal |
| *3 | No. 2 Fuel Injector Backup Ring |
| *a | Alignment Opening |
| *b | INCORRECT |
| *c | CORRECT |
| *d | Overlapped |
| *e | Normal |
| *f | Stretched |
| *g | Grooved Section |
![]() ![]() |
Install a new fuel injector insulator to the fuel injector.
| *1 | Fuel Injector Insulator |
Install the No. 1 injector holder.
![]() ![]() |
Apply new engine oil to the surface of the injector insertion hole in the fuel delivery pipe.
| *a | Protruding section |
| *b | Baffle hole |
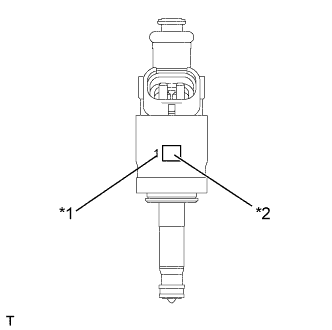
![]() | No gap |
| *1 | Number |
| *2 | Quick Response Code |
Install the No. 1 injector holder while aligning the protrusion on the No. 1 injector holder with the baffle hole on the fuel delivery pipe.
| 3. INSTALL FUEL DELIVERY PIPE LH |
Install the fuel delivery pipe LH with the 2 bolts.
Connect the 2 fuel injector assembly connectors.
| 4. INSTALL FUEL DELIVERY PIPE RH |
Install the fuel delivery pipe RH with the 2 bolts.
Connect the fuel pressure sensor connector and 2 fuel injector assembly connectors.
| 5. INSTALL FUEL DELIVERY PIPE |
Temporarily install the new fuel delivery pipe with the 2 union nuts and 3 bolts.
Tighten the 3 bolts.
Using a union nut wrench, tighten the 2 union nuts.
| 6. INSTALL NO. 2 FUEL DELIVERY PIPE |
Temporarily install the new No. 2 fuel pipe with the 2 union nuts.
Using a union nut wrench, tighten the 2 union nuts.
| 7. INSTALL INTAKE MANIFOLD |