 |
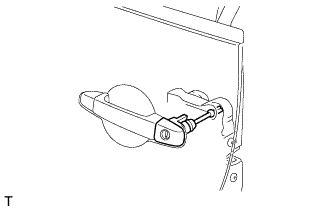
Install the front door outside handle cover with front door lock cylinder assembly.
- HINT:
- Make sure that the front door lock cylinder rod is inserted into the front door lock assembly.
FRONT DOOR LOCK > INSTALLATION |
| 1. INSTALL FRONT DOOR LOCK ASSEMBLY |
Apply MP grease to the sliding parts of the front door lock assembly.
Insert the front door lock open rod into the front door lock assembly.
Check that the front door lock open rod is securely connected to the front door lock assembly.
Install the front door lock assembly with the 3 bolts.
| 2. INSTALL FRONT DOOR LOCK CYLINDER ASSEMBLY (for Driver Side) |
|
Install the front door outside handle cover with front door lock cylinder assembly.
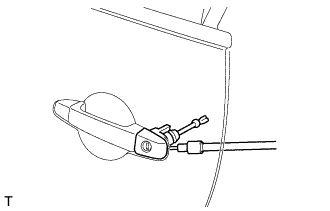 |
Using a T30 "TORX" socket wrench, install the front door lock cylinder assembly with the screw.
| 3. INSTALL FRONT DOOR REAR LOWER FRAME SUB-ASSEMBLY |
Install the front door rear lower frame sub-assembly with the 3 nuts.
| 4. INSTALL FRONT DOOR GLASS SUB-ASSEMBLY |
Check the front door glass sub-assembly .
Adjust the front door glass sub-assembly .
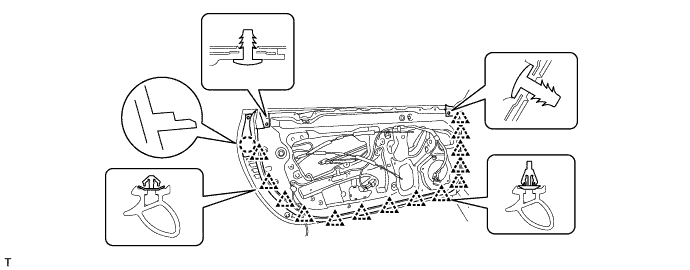
| 5. INSTALL FRONT DOOR WEATHERSTRIP |
Engage the 16 clips.
Engage the claw.
Install the front door weatherstrip with the screw.
| 6. INSTALL FRONT DOOR SERVICE HOLE COVER |
Apply butyl tape to the front door panel.
Pass the front door lock remote control cable assembly and the front door inside locking cable assembly through a new front door service hole cover.
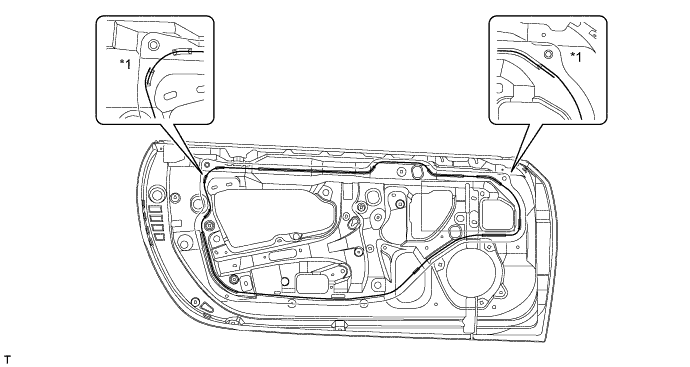
| *1 | Reference Point | - | - |
Attach the front door service hole cover according to the reference points on the front door panel.
Connect each connector.
| 7. INSTALL FRONT DOOR TRIM BOARD SUB-ASSEMBLY |
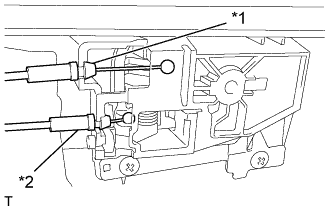 |
Connect the front door lock remote control cable assembly and front door inside locking cable assembly to the front door inside handle.
| *1 | Front Door Inside Locking Cable Assembly |
| *2 | Front Door Lock Remote Control Cable Assembly |
Connect each connector.
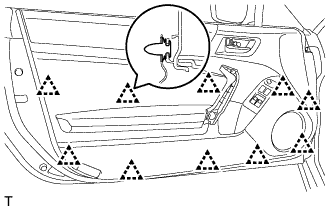 |
Engage the 10 clips and install the front door trim board sub-assembly.
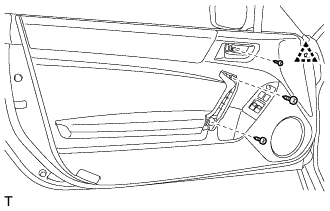 |
Engage the clip and install the 3 screws.
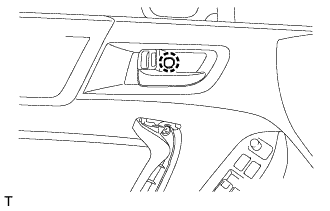 |
Engage the claw and install the cap.
| 8. INSTALL DOOR ARMREST COVER |
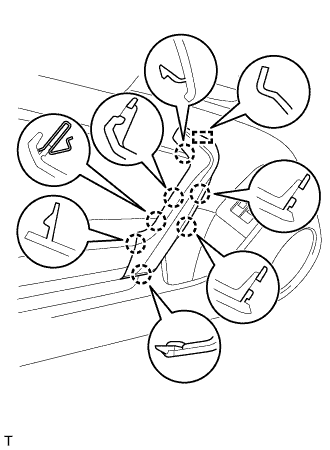 |
Engage the guide and 7 claws, and install the door armrest cover.
| 9. INSTALL INITIALIZE POWER WINDOW CONTROL SYSTEM |
| 10. INSPECT POWER WINDOW OPERATION |