IGNITION COIL AND SPARK PLUG > REMOVAL |
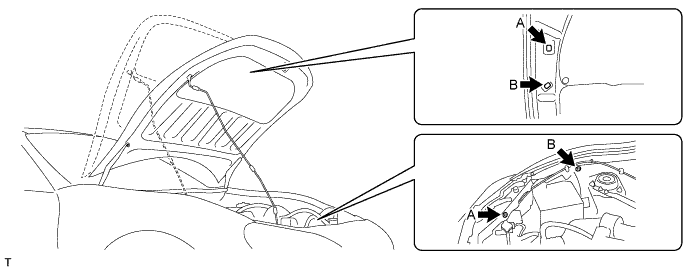
| 1. SET HOOD SUB-ASSEMBLY |
Change the front hood stay position from A to B, and support the hood sub-assembly at position B.
| 2. DISCONNECT CABLE FROM NEGATIVE BATTERY TERMINAL |
| 3. REMOVE FRONT SUSPENSION UPPER TO COWL BRACE SUB-ASSEMBLY LH |
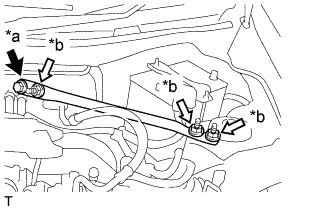 |
Remove the bolt, 3 nuts and the front suspension upper to cowl brace sub-assembly LH
| *a | Bolt |
| *b | Nut |
| 4. REMOVE FRONT SUSPENSION UPPER TO COWL BRACE SUB-ASSEMBLY RH |
| 5. REMOVE AIR CLEANER CAP WITH AIR CLEANER HOSE |
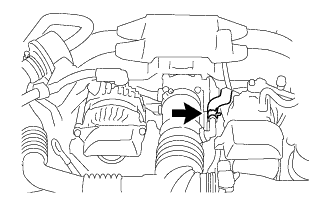 |
Loosen the hose clamp and disconnect the No. 2 ventilation hose.
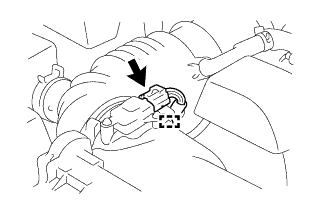 |
Disconnect the mass air flow meter connector.
Disengage the clamp and separate the wire harness from the air cleaner cap.
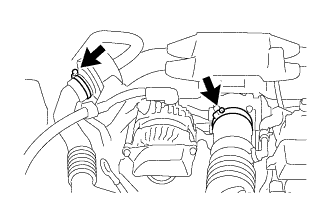 |
Loosen the 2 hose clamps.
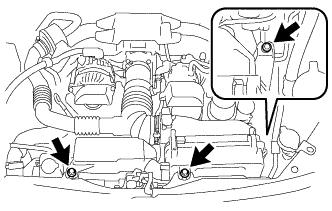 |
Remove the 3 bolts and the air cleaner cap with air cleaner hose.
| 6. DISCONNECT ENGINE WIRE |
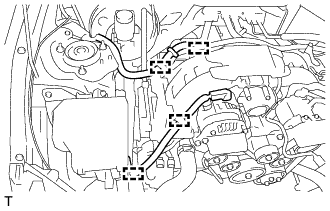 |
Disengage the 4 clamps, and disconnect the engine wire.
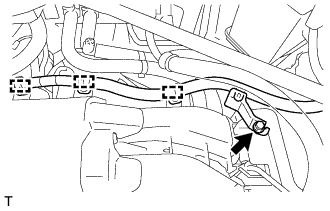 |
Disengage the 3 clamps and bolt, and disconnect the engine wire.
| 7. REMOVE CLUTCH FLEXIBLE HOSE BRACKET (for RHD with Manual Transmission) |
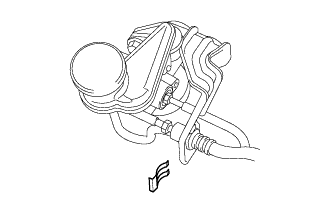 |
Remove the clip, and disconnect the clutch flexible tube.
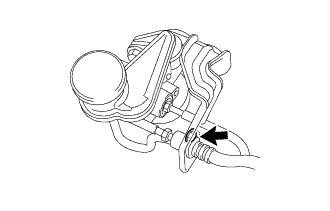 |
remove the bolt, and disconnect the clutch flexible hose bracket.
| 8. REMOVE EXHAUST MANIFOLD |
| 9. INSTALL ENGINE HANGER |
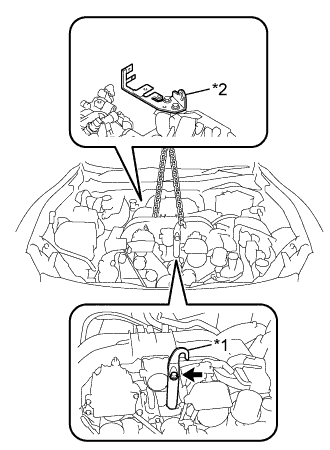 |
Install the engine hanger with the bolt, as shown in the illustration.
| *1 | No. 1 Engine Hanger |
| *2 | No. 2 Engine Hanger |
| No. 1 Engine Hanger | 12281-38030 |
| Bolt | 90119-14120 |
Use an engine sling device and a mini crane to hold the engine.
| 10. SET SST |
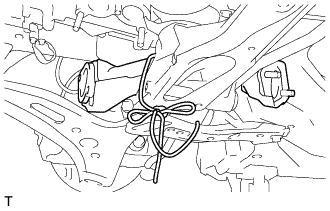 |
Tie the front exhaust pipe sub-assembly onto the front suspension cross member sub-assembly using rope.
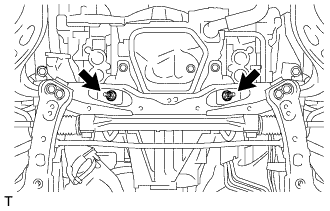 |
Remove the 2 nuts.
Install the engine hanger with the bolt.
Hoist the engine assembly up with an engine sling device and a mini crane.
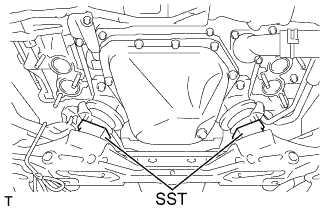 |
Install the SST to between the engine mount and front.
| 11. REMOVE INJECTOR COVER (for LH Side) |
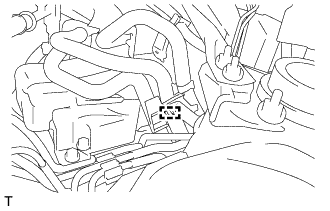 |
Disengage the clamp, and disconnect the fuel hoses.
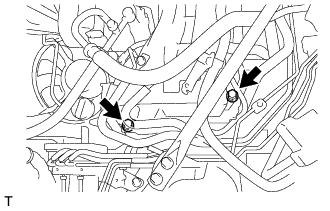 |
Remove the 2 bolts and injector cover.
| 12. REMOVE IGNITION COIL ASSEMBLY (for Bank 2) |
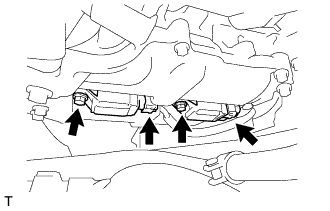 |
Disconnect the 2 ignition coil connectors from the ignition coil assembly.
Remove the 2 bolts and remove the 2 ignition coils.
| 13. REMOVE SPARK PLUG (for Bank 2) |
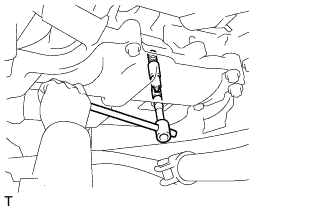 |
Remove the 2 spark plugs.
| 14. REMOVE INJECTOR DRIVER |
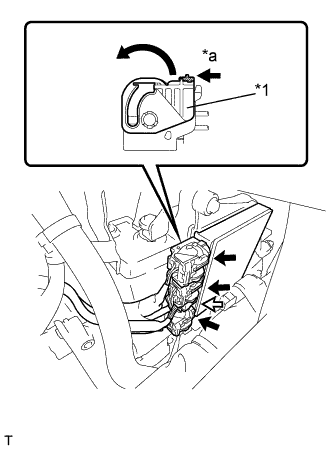 |
Move the lock levers in the direction indicated by the arrow to release the 3 connector locks. Disconnect the 4 connectors from the injector driver.
| *1 | Lock Lever |
| *a | Release |
 | Lock with Connector |
 | Normal Connector |
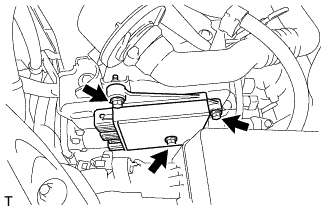 |
Remove the 3 bolts and injector driver.
| 15. REMOVE IGNITION COIL ASSEMBLY (for Bank 1) |
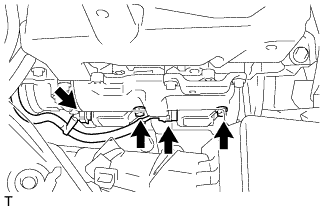 |
Disconnect the 2 ignition coil connectors from the ignition coil assembly.
Remove the 2 bolts and remove the 2 ignition coils.
| 16. REMOVE SPARK PLUG (for Bank 1) |
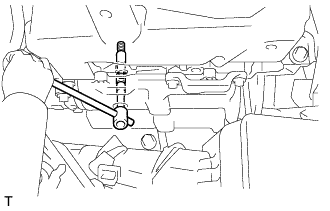 |
Remove the 2 spark plugs.