Install the 4 cowl top ventilator louver clips.
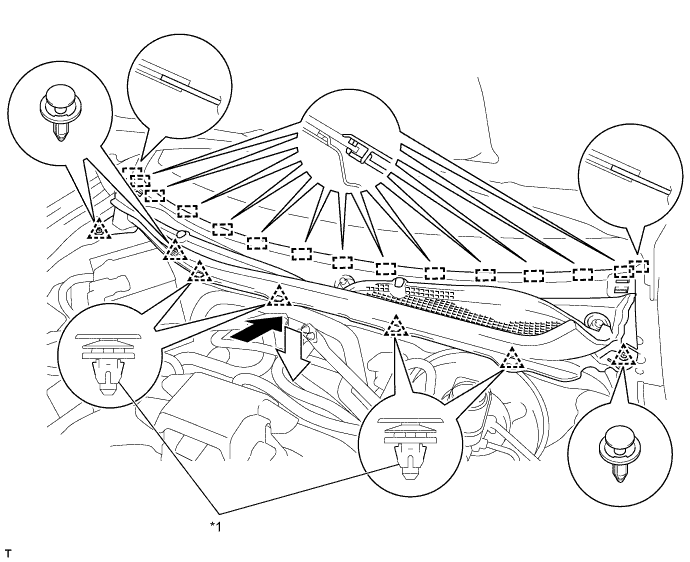
| *1 | Cowl Top Ventilator Louver Clips | - | - |
WASHER NOZZLE > INSTALLATION |
| 1. INSTALL WASHER NOZZLE SUB-ASSEMBLY |
Connect a washer nozzle sub-assembly to the washer hose.
Engage the 2 claws and install the washer nozzle sub-assembly.
| 2. INSTALL COWL VENTILATOR LOUVER |
Engage the 15 guides to install the cowl ventilator louver, as shown in the illustration.
Install the 4 cowl top ventilator louver clips.
| *1 | Cowl Top Ventilator Louver Clips | - | - |
Install the 3 clips.
| 3. INSTALL FRONT FENDER TO COWL SIDE SEAL RH |
Engage the 4claws to install the clip and front fender to cowl side seal RH.
| 4. INSTALL FRONT FENDER TO COWL SIDE SEAL LH |
| 5. INSTALL WINDSHIELD WIPER ARM AND BLADE ASSEMBLY LH |
Operate the wiper and stop the windshield wiper motor at the automatic stop position.
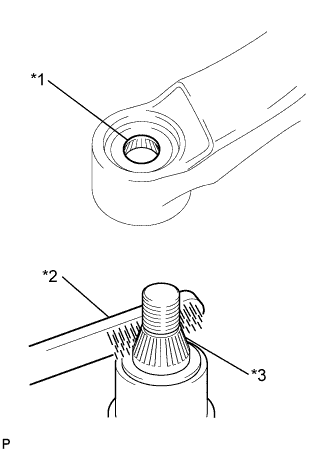 |
When reusing the windshield wiper arm and blade assembly LH:
Clean the wiper arm serrations.
| *1 | Wiper Arm Serration |
| *2 | Wire Brush |
| *3 | Wiper Pivot Serration |
When reusing the windshield wiper link assembly:
Clean the wiper pivot serrations with a wire brush.
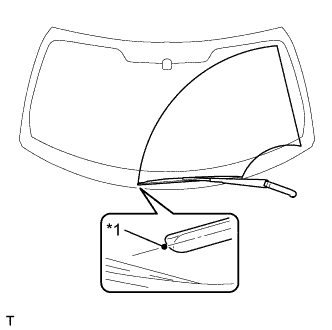 |
Install the windshield wiper arm and blade assembly LH with the nut to the position shown in the illustration.
| *1 | Ceramic Dot |
Operate the front wipers while spraying washer fluid on the windshield glass. Make sure that the front wipers function properly and there is no interference with the vehicle body.
| 6. INSTALL WINDSHIELD WIPER ARM AND BLADE ASSEMBLY RH |
Operate the wiper and stop the windshield wiper motor at the automatic stop position.
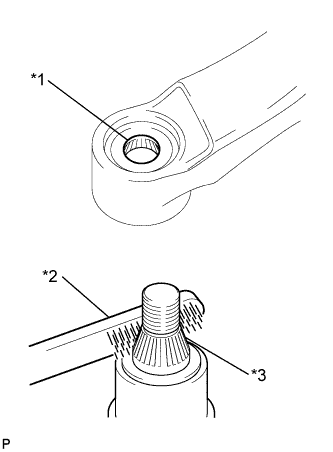 |
When reusing the windshield wiper arm and blade assembly RH:
Clean the wiper arm serrations.
| *1 | Wiper Arm Serration |
| *2 | Wire Brush |
| *3 | Wiper Pivot Serration |
When reusing the windshield wiper link assembly:
Clean the wiper pivot serrations with a wire brush.
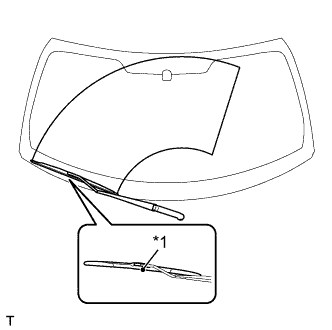 |
Install the windshield wiper arm and blade assembly RH with the nut to the position shown in the illustration.
| *1 | Ceramic Dot |
| 7. INSTALL WINDSHIELD WIPER ARM COVER |
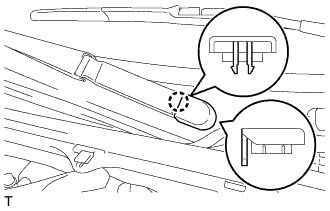 |
Engage the claw to install the windshield wiper arm cover.
| 8. INSPECT WASHER NOZZLE SUB-ASSEMBLY |