FA20 ENGINE MECHANICAL CYLINDER BLOCK DISASSEMBLY
PROCEDURE

 1.REMOVE PISTON SUB-ASSEMBLY WITH CONNECTING ROD
Mark each connecting rod cap and piston with a cylinder number.
Turn the crankshaft so that the connecting rod cap can be removed.
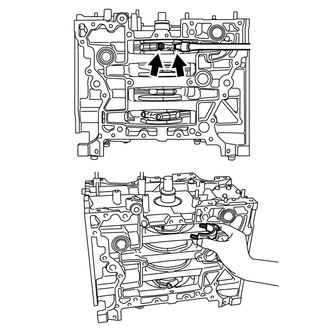
Using a "TORX" socket wrench E14, remove the 2 connecting rod cap bolts and connecting rod cap.
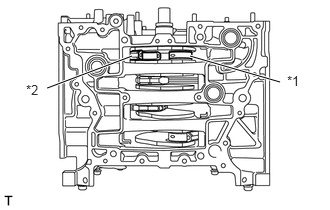
Turn the crankshaft and separate the crank pin from the connecting rod.
| *1 | Crank pin |
| *2 | Connecting rod |
- HINT:
-
Turn the crankshaft clockwise when removing the No. 1 or No. 3 piston with connecting rod, and turn it counterclockwise when removing the No. 2 or No. 4 piston with connecting rod.
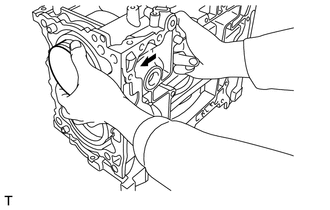
Push the connecting rod in the direction of the arrow, and remove the piston with connecting rod from the cylinder block.
11401
2.REMOVE CYLINDER BLOCK SUB-ASSEMBLY (for Bank 1)
- NOTICE:
-
Place a cloth to avoid scratching the mating surface of the cylinder block during servicing.
Operate the engine stand so that the bank 1 side faces upward.
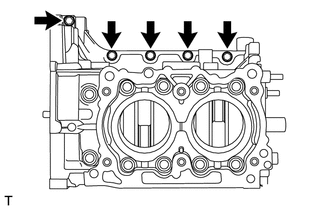
Remove the 5 bolts.
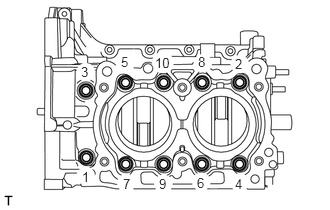
Using a 12 mm socket wrench, loosen the 10 bolts in the order as shown in the illustration.
Remove the 10 bolts and cylinder block (for bank 1).
- NOTICE:
-
Lift the cylinder block (for bank 1) slightly, and confirm that the crankshaft is remaining on the cylinder block (for bank 2). If the cylinder block (for bank 1) is lifted carelessly when separating, the crankshaft possibly having stuck to cylinder block (for bank 1) may fall off.
13411
3.REMOVE CRANKSHAFT
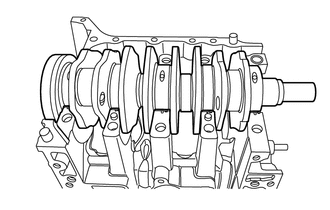
Remove the crankshaft from the cylinder block (for bank 2).
11401L
4.REMOVE REAR ENGINE OIL SEAL
Remove the rear engine oil seal.
5.REMOVE O-RING
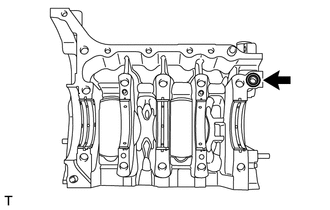
Remove the O-ring from the cylinder block (for bank 2).
11711
6.REMOVE CRANKSHAFT BEARING
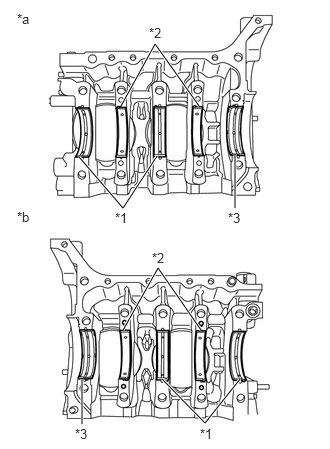
Remove the crankshaft bearings from the cylinder block (for bank 1) and cylinder block (for bank 2).
| *1 | No. 1 and No. 3 Crankshaft Bearing |
| *2 | No. 2 and No. 4 Crankshaft Bearing |
| *3 | No. 5 Crankshaft Bearing |
| *a | for Bank 1 |
| *b | for Bank 2 |
- HINT:
- ·
Arrange the removed parts in the correct order.
·Push the bearing at the opposite end to locking lip to remove the bearing.
12270H
7.REMOVE OIL SEPARATOR COVER
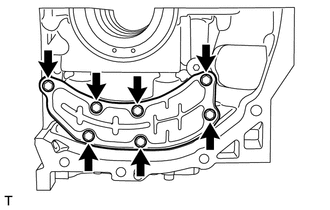
Remove the 7 bolts and oil separator cover from the cylinder block (for bank 1).
11401
8.REMOVE CYLINDER BLOCK SUB-ASSEMBLY (for Bank 2)
Remove the cylinder block sub-assembly (for bank 2) from the engine stand.
11271J
9.REMOVE CYLINDER BLOCK PLATE
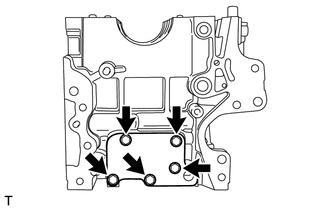
Remove the 5 bolts and cylinder block plate from the cylinder block (for bank 2).
11401R
10.REMOVE CRANKSHAFT SENSOR HOLDER ASSEMBLY
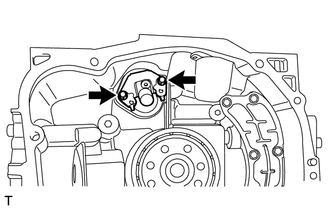
Remove the 2 bolts and crankshaft sensor holder assembly from the cylinder block (for bank 2).
11431A
11.REMOVE NO. 1 CYLINDER BLOCK TIGHT PLUG
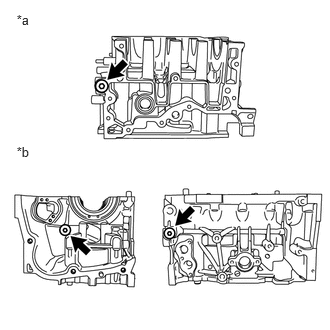
Remove the 3 No. 1 cylinder block tight plugs from the cylinder block (for bank 1) and cylinder block (for bank 2).
| *a | for Bank 1 |
| *b | for Bank 2 |
13041
12.REMOVE CONNECTING ROD BEARING
Remove the connecting rod bearings.
- HINT:
-
Arrange the removed parts in the correct order.
13011
13.REMOVE PISTON RING SET
- HINT:
-
Arrange the removed parts in the correct order.
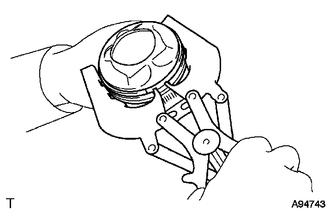
Using a piston ring expander, remove the No. 1 compression ring and No. 2 compression ring in order.
Remove the upper oil ring side rail, lower oil ring side rail and oil ring expander in order by hand.
13101
14.REMOVE PISTON WITH PIN SUB-ASSEMBLY
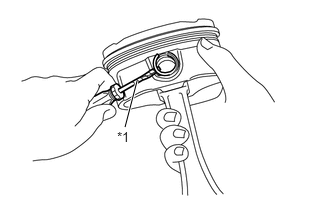
Using a screwdriver with its tip wrapped in protective tape, remove the piston pin hole snap ring on one end from the piston.
| *1 | Protective Tape |
- HINT:
-
Be careful not to damage the piston and piston pin by wrapping the tip of the screwdriver with protective tape.
Remove the piston pin from the piston.
Using a screwdriver with its tip wrapped in protective tape, remove the piston pin hole snap ring on other end from the piston.
- HINT:
-
Be careful not to damage the piston and piston pin by wrapping the tip of the screwdriver with protective tape.