FA20 LUBRICATION OIL PUMP REASSEMBLY
PROCEDURE

 15330
1.INSTALL CAMSHAFT TIMING OIL CONTROL VALVE (for Exhaust Side of Bank 2)
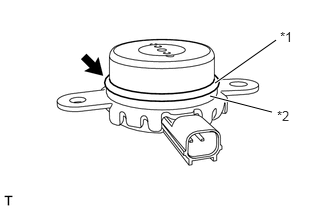
Install the back-up ring to the camshaft timing oil control valve.
| *1 | O-ring |
| *2 | Back-up Ring |
Apply a light coat of engine oil to a new O-ring and install it to the camshaft timing oil control valve.
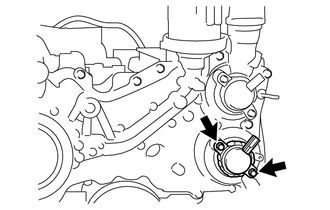
Install the camshaft timing oil control valve with the 2 bolts.
- Torque:
- 6.4 N*m (65 kgf*cm, 57 in.*lbf)
- NOTICE:
- ·
If a component has been dropped or subjected to a strong impact, replace it.
·Make sure that the O-ring is not damaged or does not jump out of position during installation.
15330
2.INSTALL CAMSHAFT TIMING OIL CONTROL VALVE (for Intake Side of Bank 2)
Install the back-up ring to the camshaft timing oil control valve.
| *1 | O-ring |
| *2 | Back-up Ring |
Apply a light coat of engine oil to a new O-ring and install it to the camshaft timing oil control valve.
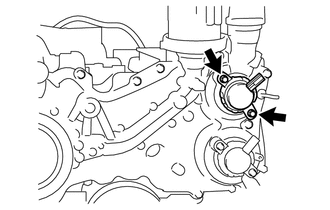
Install the camshaft timing oil control valve with the 2 bolts.
- Torque:
- 6.4 N*m (65 kgf*cm, 57 in.*lbf)
- NOTICE:
- ·
If a component has been dropped or subjected to a strong impact, replace it.
·Make sure that the O-ring is not damaged or does not jump out of position during installation.
15330
3.INSTALL CAMSHAFT TIMING OIL CONTROL VALVE (for Exhaust Side of Bank 1)
Install the back-up ring to the camshaft timing oil control valve.
| *1 | O-ring |
| *2 | Back-up Ring |
Apply a light coat of engine oil to a new O-ring and install it to the camshaft timing oil control valve.
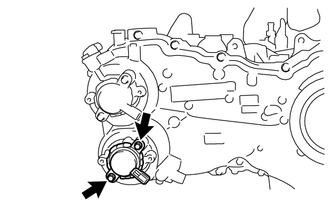
Install the camshaft timing oil control valve with the 2 bolts.
- Torque:
- 6.4 N*m (65 kgf*cm, 57 in.*lbf)
- NOTICE:
- ·
If a component has been dropped or subjected to a strong impact, replace it.
·Make sure that the O-ring is not damaged or does not jump out of position during installation.
15330
4.INSTALL CAMSHAFT TIMING OIL CONTROL VALVE (for Intake Side of Bank 1)
Install the back-up ring to the camshaft timing oil control valve.
| *1 | O-ring |
| *2 | Back-up Ring |
Apply a light coat of engine oil to a new O-ring and install it to the camshaft timing oil control valve.
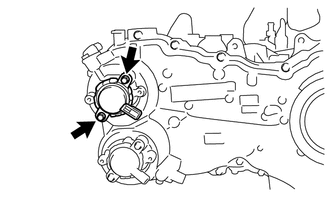
Install the camshaft timing oil control valve with the 2 bolts.
- Torque:
- 6.4 N*m (65 kgf*cm, 57 in.*lbf)
- NOTICE:
- ·
If a component has been dropped or subjected to a strong impact, replace it.
·Make sure that the O-ring is not damaged or does not jump out of position during installation.
11102A
5.INSTALL VVT SENSOR (for Exhaust Side of Bank 2)
Apply a light coat of engine oil to the new O-ring of the VVT sensor.
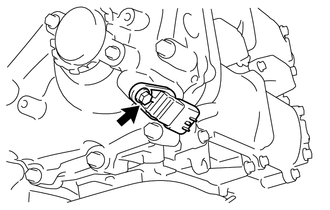
Install the VVT sensor with the bolt.
- Torque:
- 6.4 N*m (65 kgf*cm, 57 in.*lbf)
11102A
6.INSTALL VVT SENSOR (for Intake Side of Bank 2)
Apply a light coat of engine oil to the new O-ring of the VVT sensor.
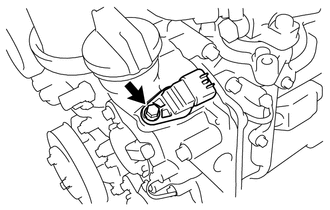
Install the VVT sensor with the bolt.
- Torque:
- 6.4 N*m (65 kgf*cm, 57 in.*lbf)
11102A
7.INSTALL VVT SENSOR (for Exhaust Side of Bank 1)
Apply a light coat of engine oil to the new O-ring of the VVT sensor.
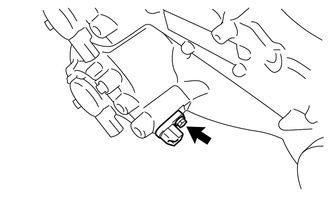
Install the VVT sensor with the bolt.
- Torque:
- 6.4 N*m (65 kgf*cm, 57 in.*lbf)
11102A
8.INSTALL VVT SENSOR (for Intake Side of Bank 1)
Apply a light coat of engine oil to the new O-ring of the VVT sensor.
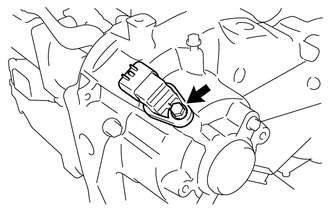
Install the VVT sensor with the bolt.
- Torque:
- 6.4 N*m (65 kgf*cm, 57 in.*lbf)
9.INSTALL ENGINE OIL TEMPERATURE SENSOR
Install a new gasket to the engine oil temperature sensor.
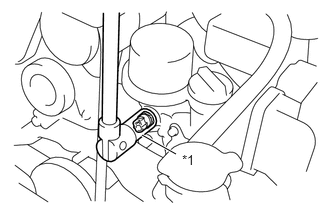
Using a 19 mm deep socket wrench, install the engine oil temperature sensor to the cylinder head sub-assembly.
| *1 | 19 mm Deep Socket Wrench |
- Torque:
- 18 N*m (184 kgf*cm, 13 ft.*lbf)
83530
10.INSTALL ENGINE OIL PRESSURE SWITCH ASSEMBLY
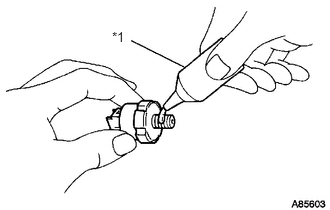
Apply adhesive to 2 or 3 threads of the engine oil pressure switch assembly.
| *1 | Adhesive |
- Adhesive:
Toyota Genuine Adhesive 1324, Three Bond 1324 or equivalent
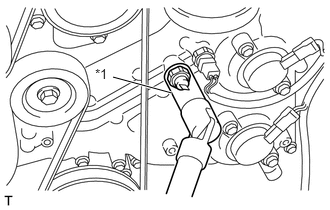
Using a 24 mm deep socket wrench, install the engine oil pressure switch assembly.
| *1 | 24 mm Deep Socket Wrench |
- Torque:
- 18 N*m (184 kgf*cm, 13 ft.*lbf)
- NOTICE:
-
Do not start the engine for at least 1 hour after installation.
15600A
11.INSTALL OIL FILTER UNION
15601
12.INSTALL OIL FILTER SUB-ASSEMBLY