HEATING / AIR CONDITIONING AIR CONDITIONING UNIT DISASSEMBLY
PROCEDURE

 88897P
1.REMOVE ASPIRATOR (for Automatic Air Conditioning System)
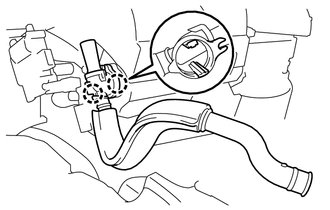
Disengage the 2 claws and remove the aspirator with aspirator pipe as a unit.
88897A
2.REMOVE ASPIRATOR PIPE (for Automatic Air Conditioning System)
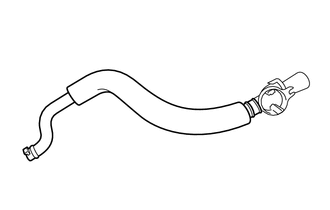
Remove the aspirator pipe.
87050C
3.REMOVE NO. 1 AIR CONDITIONING RADIATOR DAMPER SERVO SUB-ASSEMBLY
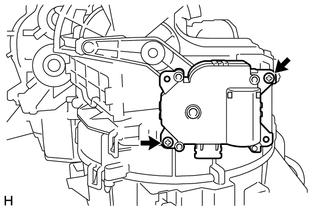
Remove the 2 screws and No. 1 air conditioning radiator damper servo sub-assembly.
87050G
4.REMOVE NO. 5 AIR CONDITIONING RADIATOR DAMPER SERVO SUB-ASSEMBLY (for Automatic Air Conditioning System)
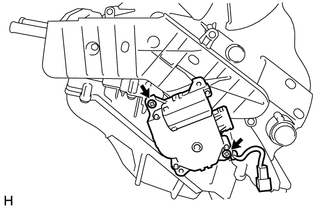
Remove the 2 screws and No. 5 air conditioning radiator damper servo sub-assembly.
- NOTICE:
-
When re-using the No. 5 air conditioner damper servo sub-assembly, set the temperature adjustment dial to MAX COOL before removing the sub-assembly, and then wait for 30 seconds before beginning work.
87114B
5.REMOVE HEATER COVER (for Automatic Air Conditioning System)
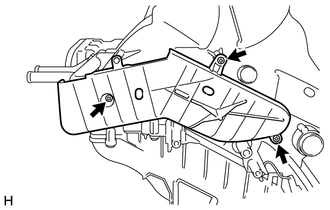
Remove the 3 screws and heater cover.
87114B
6.REMOVE HEATER COVER (for Manual Air Conditioning System)
- HINT:
-
Use the same procedure as for the automatic air conditioning system.
87114B
7.REMOVE HEATER COVER (w/o Airbag System)
- HINT:
-
Use the same procedure as for the automatic air conditioning system.
87107A
8.REMOVE HEATER RADIATOR UNIT SUB-ASSEMBLY (for Automatic Air Conditioning System)
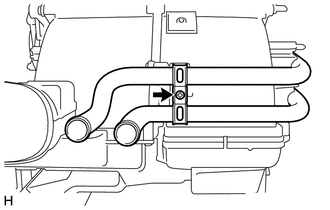
Remove the screw and the clamp.
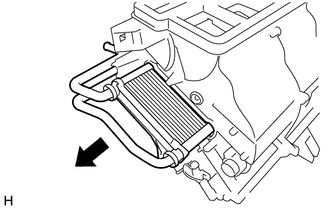
Remove the heater radiator unit sub-assembly as shown in the illustration.
87107A
9.REMOVE HEATER RADIATOR UNIT SUB-ASSEMBLY (for Manual Air Conditioning System)
- HINT:
-
Use the same procedure as for the automatic air conditioning system.
87107A
10.REMOVE HEATER RADIATOR UNIT SUB-ASSEMBLY (w/o Air Conditioning System)
- HINT:
-
Use the same procedure as for the automatic air conditioning system.
88548B
11.REMOVE AIR FILTER CASE
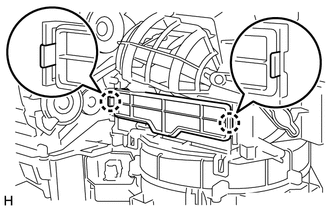
Disengage the 2 claws and remove the air filter case.
87139C
12.REMOVE CLEAN AIR FILTER
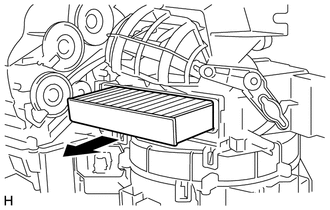
Remove the clean air filter as shown in the illustration.
88521C
13.REMOVE COOLING UNIT CASE
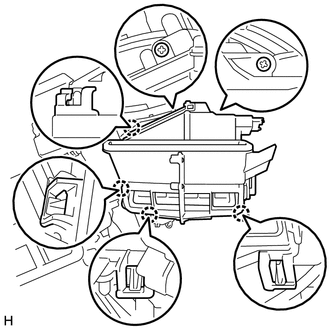
Remove the 2 screws.
Disengage the 4 claws and remove the cooling unit case.
88515
14.REMOVE COOLER EXPANSION VALVE (for Automatic Air Conditioning System)
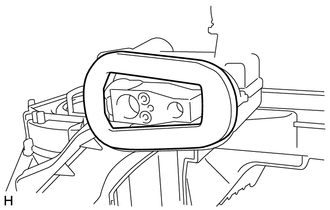
Remove the gasket.
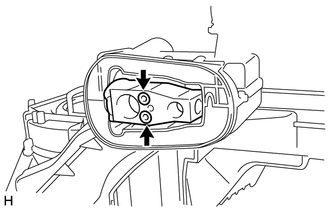
Using a 4 mm hexagon socket wrench, remove the 2 hexagon bolts and cooler expansion valve.
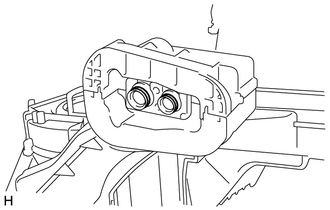
Remove the 2 O-rings from the evaporator pipe.
88515
15.REMOVE COOLER EXPANSION VALVE (for Manual Air Conditioning System)
- HINT:
-
Use the same procedure as for the automatic air conditioning system.
88482A
16.REMOVE COVER
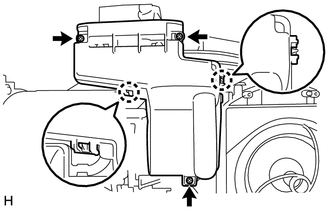
Remove the 3 screws.
Disengage the 2 claws and remove the cover.
88539
17.REMOVE NO. 1 COOLER UNIT DRAIN HOSE
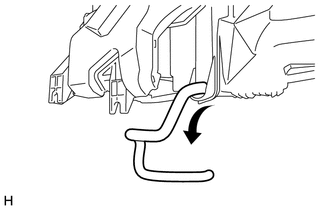
Remove the No. 1 cooler unit drain hose.
87201
18.REMOVE NO. 1 AIR DUCT SUB-ASSEMBLY
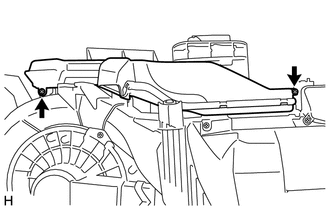
Remove the 2 screws and remove the No. 1 air duct sub-assembly.
87103B
19.REMOVE BLOWER MOTOR WITH FAN SUB-ASSEMBLY
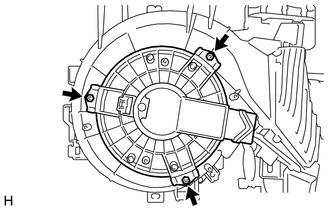
Remove the 3 screws and remove the blower motor with fan sub-assembly.
87201B
20.REMOVE NO. 2 AIR DUCT SUB-ASSEMBLY
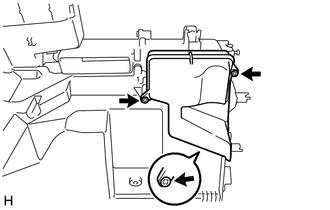
Remove the 3 screws and remove the No. 2 air duct sub-assembly.
87050F
21.REMOVE NO. 4 AIR CONDITIONING RADIATOR DAMPER SERVO SUB-ASSEMBLY (for Automatic Air Conditioning System)
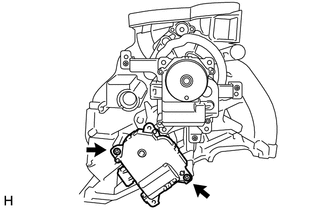
Remove the 2 screws and remove the No. 4 air conditioning radiator damper servo sub-assembly.
- NOTICE:
-
When re-using the No. 4 air conditioner damper servo sub-assembly, set the temperature adjustment dial to MAX COOL before removing the sub-assembly, and then wait for 30 seconds before beginning work.
87050E
22.REMOVE NO. 3 AIR CONDITIONING RADIATOR DAMPER SERVO SUB-ASSEMBLY (for Automatic Air Conditioning System)
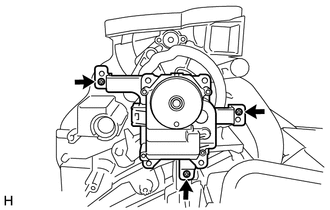
Remove the 3 screws and remove the No. 3 air conditioning radiator damper servo sub-assembly.
55908A
23.REMOVE AIR INLET DAMPER CONTROL CABLE SUB-ASSEMBLY (for Manual Air Conditioning System)
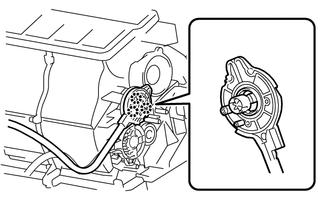
Disengage the 3 claws and remove the air inlet damper control cable sub-assembly.
- NOTICE:
-
Hold the control cable and remove the drive gear on the unit side slowly, without pulling it.
55908A
24.REMOVE AIR INLET DAMPER CONTROL CABLE SUB-ASSEMBLY (w/o Air Conditioning System)
- HINT:
-
Use the same procedure as for the manual air conditioning system.
55906
25.REMOVE HEATER CONTROL CABLE SUB-ASSEMBLY (for Automatic Air Conditioning System)
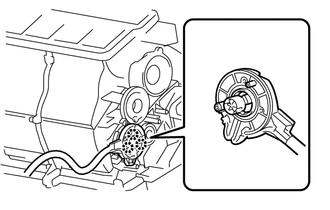
Disengage the 3 claws and remove the heater control cable sub-assembly.
- NOTICE:
-
Hold the control cable and remove the drive gear on the unit side slowly, without pulling it.
55906
26.REMOVE HEATER CONTROL CABLE SUB-ASSEMBLY (w/o Air Conditioning System)
- HINT:
-
Use the same procedure as for the manual air conditioning system.
88502A
27.REMOVE COOLING UNIT CASE SUB-ASSEMBLY (for Automatic Air Conditioning System)
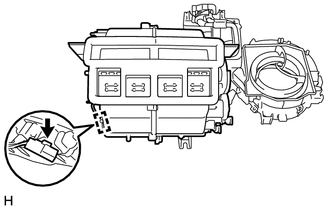
Disengage the clamp.
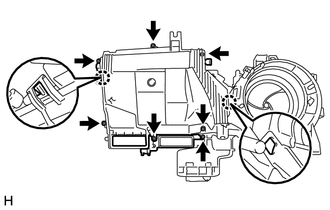
Remove the 7 screws.
Disengage the 2 claws and remove the cooling unit case sub-assembly.
88502A
28.REMOVE COOLING UNIT CASE SUB-ASSEMBLY (for Manual Air Conditioning System)
- HINT:
-
Use the same procedure as for the automatic air conditioning system.
88502A
29.REMOVE COOLING UNIT CASE SUB-ASSEMBLY (w/o Air Conditioning System)
Remove the 7 screws.
Disengage the 2 claws and remove the cooling unit case sub-assembly.
88501
30.REMOVE NO. 1 COOLER EVAPORATOR SUB-ASSEMBLY (for Automatic Air Conditioning System)
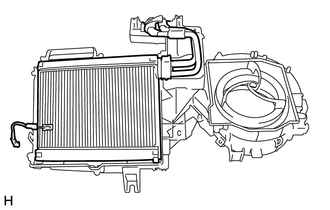
Remove the No. 1 cooler evaporator sub-assembly with evaporator pipe as a unit.
88501
31.REMOVE NO. 1 COOLER EVAPORATOR SUB-ASSEMBLY (for Manual Air Conditioning System)
- HINT:
-
Use the same procedure as for the automatic air conditioning system.
88899P
32.REMOVE COVER PLATE (w/o Air Conditioning System)
Remove the cover plate.
88625
33.REMOVE NO. 1 COOLER THERMISTOR (for Automatic Air Conditioning System)
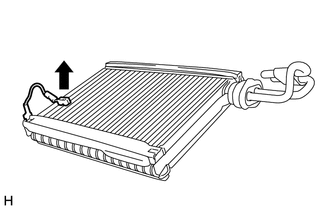
Remove the No. 1 cooler thermistor.
88625
34.REMOVE NO. 1 COOLER THERMISTOR (for Manual Air Conditioning System)
- HINT:
-
Use the same procedure as for the automatic air conditioning system.
88710
35.REMOVE AIR CONDITIONER TUBE ASSEMBLY (for Automatic Air Conditioning System)
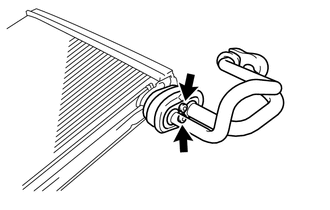
Using a 4 mm hexagon socket wrench, remove the 2 hexagon bolts and air conditioner tube assembly.
88710
36.REMOVE AIR CONDITIONER TUBE ASSEMBLY (for Manual Air Conditioning System)
- HINT:
-
Use the same procedure as for the automatic air conditioning system.
87165C
37.REMOVE BLOWER MOTOR CONTROL (for Automatic Air Conditioning System)
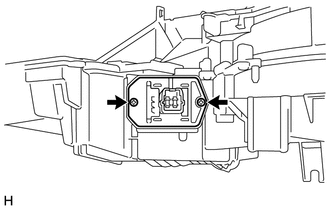
Remove the 2 screws and remove the blower motor control.
87138C
38.REMOVE BLOWER RESISTOR (for Manual Air Conditioning System)
- HINT:
-
Use the same procedure as for the automatic air conditioning system.
87138C
39.REMOVE BLOWER RESISTOR (w/o Air Conditioning System)
- HINT:
-
Use the same procedure as for the automatic air conditioning system.
88544
40.REMOVE COOLER BLOWER CASE
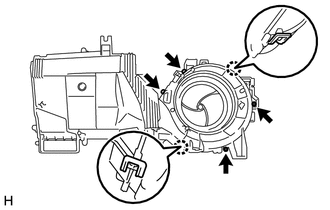
Remove the 4 screws and disengage the 2 claws.
Remove the cooler blower case from the lower heater case.
88521B
41.REMOVE COOLER UNIT CASE PACKING (for Automatic Air Conditioning System)
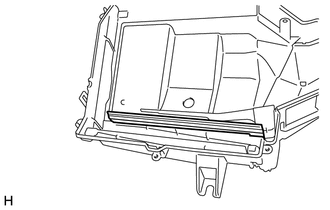
Remove the cooler unit case packing.
88521B
42.REMOVE COOLER UNIT CASE PACKING (for Manual Air Conditioning System)
- HINT:
-
Use the same procedure as for the automatic air conditioning system.
88326A
43.REMOVE COVER PLATE
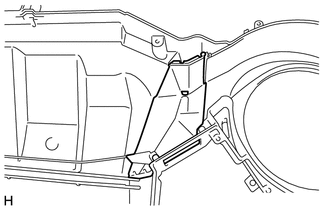
Remove the cover plate.