INTERIOR PANELS / TRIM UPPER INSTRUMENT PANEL REASSEMBLY
PROCEDURE

 55349A
1.INSTALL INSTRUMENT PANEL CUSHION
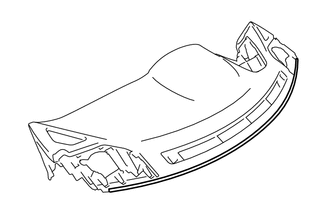
Install a new instrument panel cushion.
55981
2.INSTALL NO. 1 DEFROSTER NOZZLE GARNISH
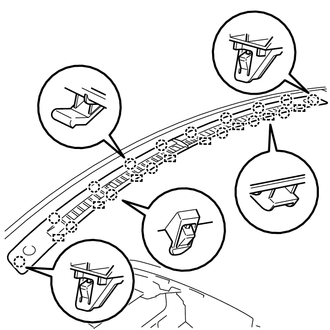
Engage the 16 claws and 8 guides to install the No. 1 defroster nozzle garnish .
55650B
3.INSTALL INSTRUMENT PANEL REGISTER BEZEL (for LH Side)
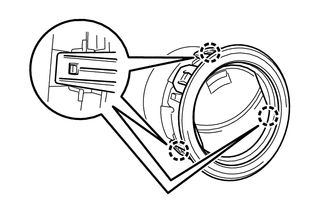
Engage the 3 claws to install the instrument panel register bezel.
55650B
4.INSTALL INSTRUMENT PANEL REGISTER BEZEL (for RH Side)
- HINT:
-
Use the same procedure as for the LH side
55062
5.INSTALL NO. 2 INSTRUMENT PANEL REGISTER SUB-ASSEMBLY
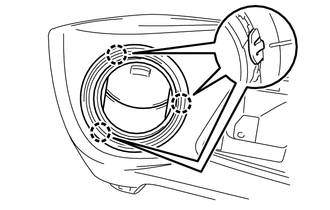
Engage the 3 claws to install the No. 2 instrument panel register sub-assembly.
55061
6.INSTALL NO. 1 INSTRUMENT PANEL REGISTER SUB-ASSEMBLY
- HINT:
-
Use the same procedure as for the No. 2 instrument panel register sub-assembly.
55670A
7.INSTALL CENTER INSTRUMENT PANEL REGISTER ASSEMBLY
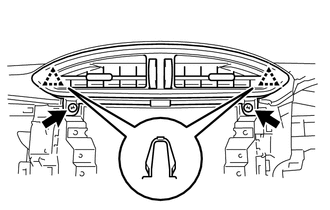
Engage the 2 clips.
Install the center instrument panel register assembly with the 2 screws.
55983
8.INSTALL NO. 3 DEFROSTER NOZZLE GARNISH
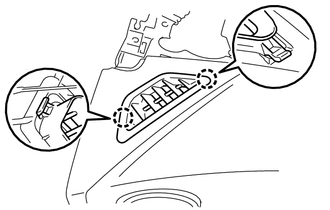
Engage the 2 claws to install the No. 3 defroster nozzle garnish.
55982
9.INSTALL NO. 2 DEFROSTER NOZZLE GARNISH
- HINT:
-
Use the same procedure as for the No. 2 defroster nozzle garnish.
55972C
10.INSTALL NO. 2 SIDE DEFROSTER NOZZLE DUCT
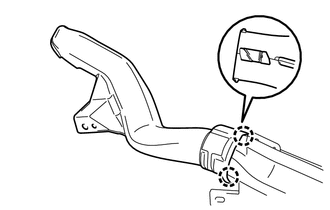
Engage the 2 claws to install the No. 2 side defroster nozzle duct.
55971C
11.INSTALL NO. 1 SIDE DEFROSTER NOZZLE DUCT
- HINT:
-
Use the same procedure as for the No. 2 side defroster nozzle duct.
55950G
12.INSTALL DEFROSTER NOZZLE ASSEMBLY
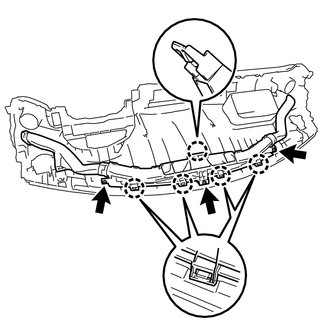
Engage the 5 claws.
Install the defroster nozzle assembly, No. 2 side defroster nozzle duct, and No. 1 side defroster nozzle duct as a single unit with the 3 screws.
55844
13.INSTALL NO. 2 HEATER TO REGISTER DUCT
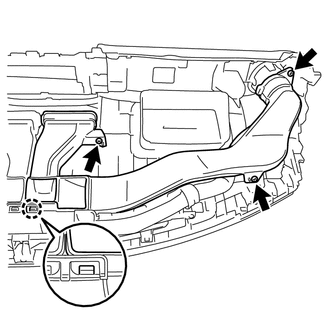
Engage the claw.
Install the No. 2 heater to register duct with the 3 screws.
55843A
14.INSTALL NO. 1 HEATER TO REGISTER DUCT
- HINT:
-
Use the same procedure as for the No. 2 heater to register duct.