WIPER / WASHER FRONT WIPER MOTOR REMOVAL
CAUTION / NOTICE / HINT
- HINT:
- ·
Use the same procedure for the LHD and RHD vehicles.
·The procedure listed below is for the LHD vehicles.
PROCEDURE

 85192
1.REMOVE WINDSHIELD WIPER ARM COVER
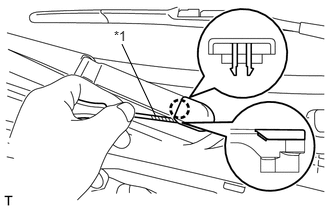
Using a screwdriver, disengage the claw and remove the windshield wiper arm cover, as shown in the illustration.
| *1 | Protective Tape |
- HINT:
- ·
Tape the screwdriver tip before use.
·Use the same procedure for both the RH and LH sides.
2.REMOVE WINDSHIELD WIPER ARM AND BLADE ASSEMBLY LH
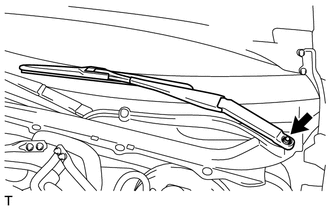
Remove the nut and the windshield wiper arm and blade assembly LH.
3.REMOVE WINDSHIELD WIPER ARM AND BLADE ASSEMBLY RH
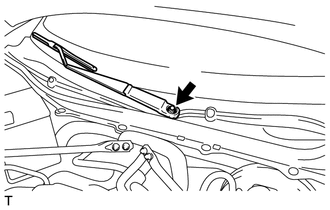
Remove the nut and the windshield wiper arm and blade assembly RH.
53866J
4.REMOVE FRONT FENDER TO COWL SIDE SEAL RH
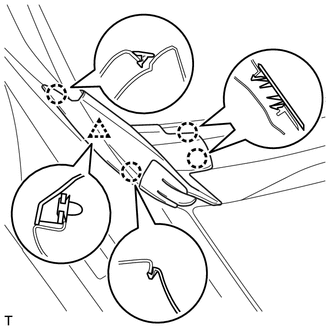
Disengage the 4 claws.
Remove the clip and the front fender to cowl side seal RH.
53867H
5.REMOVE FRONT FENDER TO COWL SIDE SEAL LH
- HINT:
-
Use the same procedure as for the RH side.
55781
6.REMOVE COWL VENTILATOR LOUVER
Using a clip remover, remove the 3 clips.
While pressing the claws, as shown in the illustration, remove the 4 cowl top ventilator louver clips.
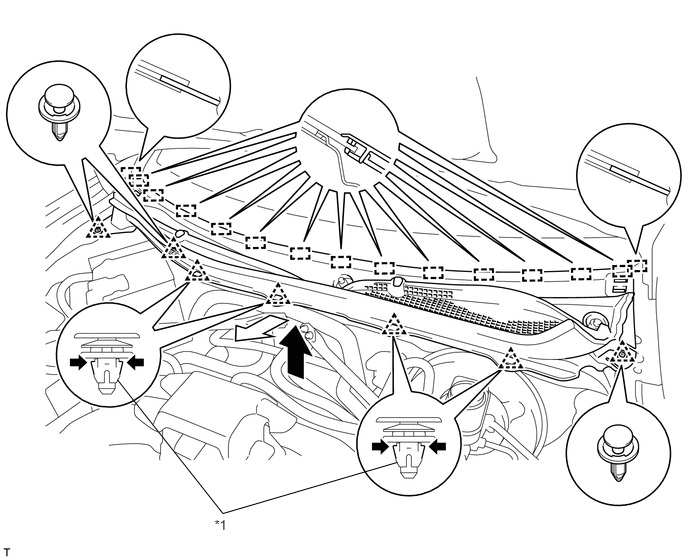
| *1 | Cowl Top Ventilator Louver Clip | - | - |
- NOTICE:
-
Do not pull forcibly the cowl top ventilator louver clips because they may get damaged.
Disengage the 15 guides and pull out the cowl ventilator louver, as shown in the illustration.
85010
7.REMOVE FRONT WIPER MOTOR AND LINK ASSEMBLY
Operate the wiper and stop the windshield wiper motor at the automatic stop position.
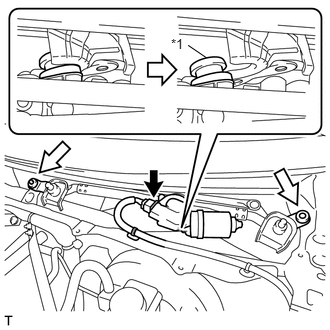
Disconnect the connector.
Remove the 2 bolts.
Disengage the grommet and remove the front wiper motor and link assembly, as shown in the illustration.
| *1 | Grommet |
- NOTICE:
-
Be careful not to damage the windshield when removing the front wiper motor and link assembly.
55434E
8.REMOVE CAP
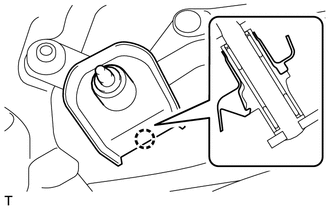
Disengage the claw and remove the cap.
- HINT:
-
Use the same procedure for both the RH and LH sides.
85012A
9.REMOVE FRONT WIPER CRANK SUB-ASSEMBLY
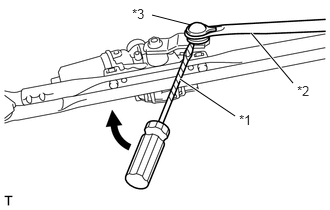
Using a screwdriver, separate the No. 1 rod from the crank arm pivot of the front wiper crank sub-assembly, as shown in the illustration.
| *1 | Protective Tape |
- HINT:
-
Tape the screwdriver tip before use.
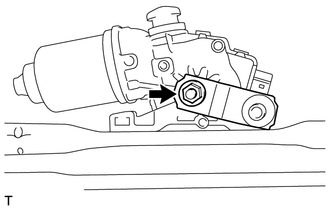
Remove the nut and the front wiper crank sub-assembly.
85110
10.REMOVE WINDSHIELD WIPER MOTOR ASSEMBLY
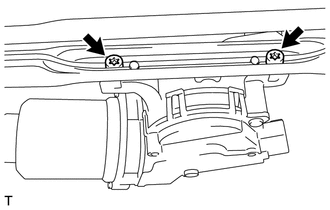
Using a T30 "TORX" socket wrench, remove the 2 bolts and the windshield wiper motor assembly from the windshield wiper link assembly.