2NR-VE ENGINE MECHANICAL REAR CRANKSHAFT OIL SEAL REMOVAL
PROCEDURE

 31250
1.REMOVE CLUTCH DISC ASSEMBLY (for Manual Transmission)
13405
2.REMOVE FLYWHEEL SUB-ASSEMBLY (for Manual Transmission)
Using height adjustable attachments and plate lift attachments, place the engine assembly on a flat, level surface.
- NOTICE:
- ·
Using height adjustable attachments and plate lift attachments, place the engine assembly horizontally.
·To prevent the oil pan sub-assembly from deforming, do not place any attachments under the oil pan sub-assembly of the engine assembly.
·Using an engine sling device and engine lift, secure the engine assembly before servicing.
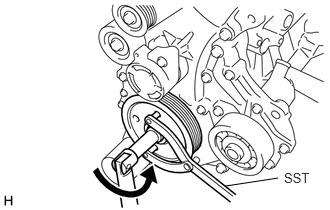
Using SST, hold the crankshaft.
- SST
- 09960-10010 (09962-01000, 09963-01000)
- NOTICE:
-
Never turn the crankshaft pulley counterclockwise (when viewed from the front of the engine).
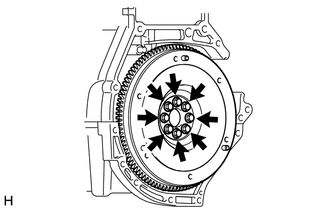
Remove the 8 bolts and flywheel sub-assembly.
3.REMOVE AUTOMATIC TRANSMISSION ASSEMBLY (for Automatic Transmission)
32101
4.REMOVE DRIVE PLATE AND RING GEAR SUB-ASSEMBLY (for Automatic Transmission)
Using height adjustable attachments and plate lift attachments, place the engine assembly on a flat,level surface.
- NOTICE:
- ·
Using height adjustable attachments and plate lift attachments, place the engine assembly horizontally.
·To prevent the oil pan sub-assembly from deforming, do not place any attachments under the oil pan sub-assembly of the engine assembly.
·Using an engine sling device and engine lift, secure the engine assembly before servicing.
Using SST, hold the crankshaft.
- SST
- 09960-10010 (09962-01000, 09963-01000)
- NOTICE:
-
Never turn the crankshaft pulley counterclockwise (when viewed from the front of the engine).
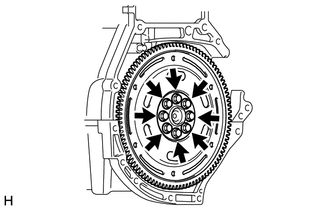
Remove the 8 bolts, drive plate and ring gear sub-assembly and centering plate.
11381A
5.REMOVE REAR ENGINE OIL SEAL
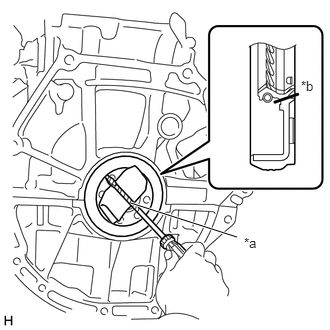
| *a | Protective Tape |
| *b | Cut Position |
Using a screwdriver with its tip wrapped with protective tape, pry out the rear engine oil seal.
- NOTICE:
-
Be careful not to damage the crankshaft bearing.