A4R AUTOMATIC TRANSMISSION / TRANSAXLE AUTOMATIC TRANSMISSION ASSEMBLY REMOVAL
PROCEDURE

 1.REMOVE ENGINE AND TRANSMISSION ASSEMBLY (for 1NR-VE)
2.REMOVE ENGINE AND TRANSMISSION ASSEMBLY (for 2NR-VE)
3.INSTALL ENGINE HANGER
4.DISCONNECT ENGINE WIRE
Disconnect the clamps and connectors from the automatic transmission assembly.
35103
5.REMOVE TRANSMISSION OIL LEVEL DIPSTICK SUB-ASSEMBLY
Remove the transmission oil level dipstick sub-assembly.
35013
6.REMOVE TRANSMISSION OIL FILLER TUBE SUB-ASSEMBLY
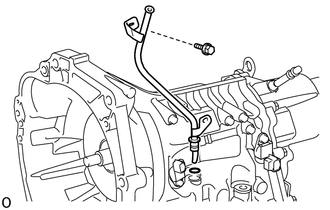
Remove the bolt and the transmission oil filler tube sub-assembly.
Remove the O-ring from the transmission oil filler tube sub-assembly.
32906
7.REMOVE OIL COOLER TUBE SUB-ASSEMBLY
Remove the 2 union bolts and 2 gaskets.
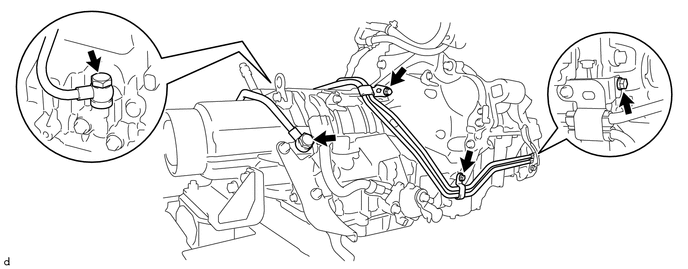
Remove the 3 bolts and oil cooler tube sub-assembly.
28100
8.REMOVE STARTER ASSEMBLY (for 1NR-VE)
28100
9.REMOVE STARTER ASSEMBLY (for 2NR-VE)
35000
10.REMOVE AUTOMATIC TRANSMISSION ASSEMBLY
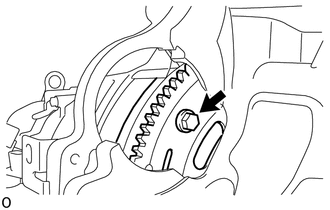
Turn the crankshaft to gain access and remove the 6 bolts while holding the crankshaft pulley bolt with a wrench.
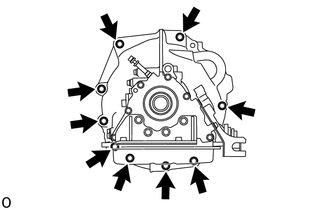
Remove the 9 bolts and automatic transmission assembly.
12321E
11.SEPARATE REAR ENGINE MOUNTING BRACKET
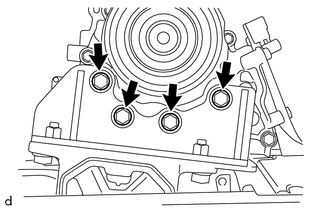
Remove the 4 bolts and separate the from the automatic transmission assembly.
32000
12.REMOVE TORQUE CONVERTER ASSEMBLY
Remove the torque converter assembly from the automatic transmission assembly.
12371
13.REMOVE REAR NO. 1 ENGINE MOUNTING INSULATOR
- HINT:
-
Perform this procedure only when replacement of the rear No. 1 engine mounting insulator is necessary.
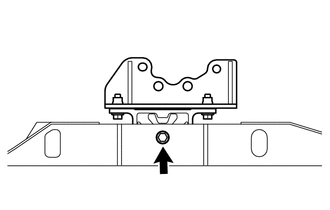
Remove the bolt.
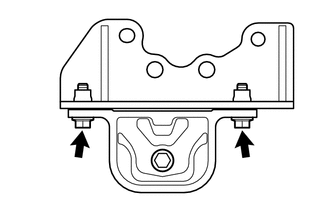
Remove the 2 bolts and rear No. 1 engine mounting insulator.