EXTERIOR PANELS / TRIM FRONT BUMPER INSTALLATION
PROCEDURE

 1.INSTALL FRONT BUMPER ASSEMBLY
Move the front bumper assembly into position.
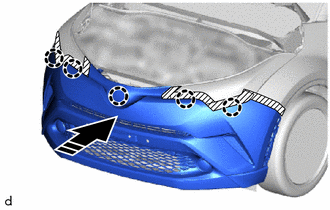

|
Install in this Direction |
Temporarily install the front bumper assembly with the engage claw as shown in the illustration.
Install the 3 bolts.
w/ TOYOTA Parking Assist-sensor System:
Connect the connector.
w/ Toyota Safety Sense:
Connect the connector.
w/ Fog Light:
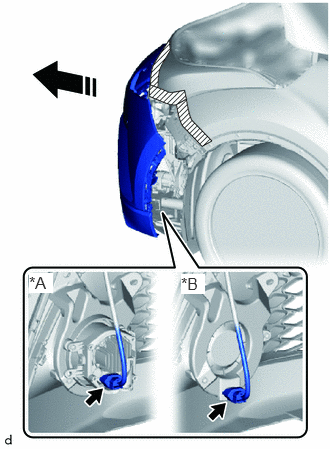
| *A | w/ Fog Light |
| *B | w/o Fog Light |
|
|
Remove in this Direction |
Pull back the side of the front bumper assembly and connect the connector.
- NOTICE:
-
Do not apply excessive force when pulling back the front bumper assembly.
- HINT:
-
Use the same procedure for the RH side and LH side.
w/o Fog Light:
Pull back the side of the front bumper assembly and connect the connector to the fog light cover.
- NOTICE:
-
Do not apply excessive force when pulling back the front bumper assembly.
- HINT:
-
Use the same procedure for the RH side and LH side.
w/ Headlight Cleaner System:
Connect the washer hose.
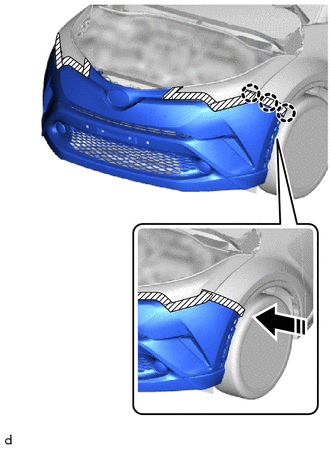
|
|
Install in this Direction |
Engage the claws as shown in the illustration.
- HINT:
-
Use the same procedure for the RH side and LH side.
Remove the protective tape.
Install the 6 screws.
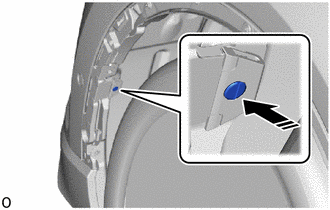
|
|
Install in this Direction |
Install the pin hold clip as shown in the illustration.
- NOTICE:
-
Insert the pin hold clip with the slot aligned vertically.
-
Do not rotate the clip after inserting it.
-
After installation, confirm that the slot is aligned vertically.
- HINT:
-
Use the same procedure for the RH side and LH side.
75602A
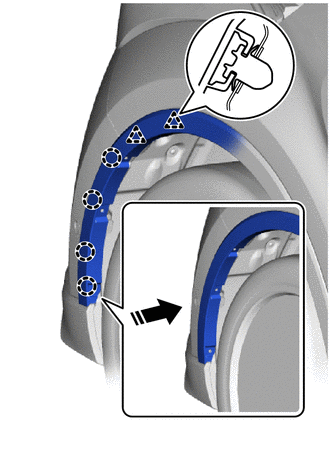
2.INSTALL FRONT FENDER MOULDING SUB-ASSEMBLY LH
|
|
Install in this Direction |
Engage the clip and claws to install the front fender moulding sub-assembly LH as shown in the illustration.
Install the 2 clips and 3 screws.
75601A
3.INSTALL FRONT FENDER MOULDING SUB-ASSEMBLY RH
- HINT:
-
Use the same procedure as for the LH side.
53141F
4.INSTALL RADIATOR COVER
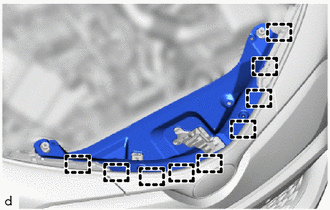
Engage the guides to install the radiator cover.
Install the 5 clips and 2 hood bumper cushions.
5.ADJUST FOG LIGHT ASSEMBLY (w/ Fog Light)
6.ADD WINDSHIELD WASHER FLUID
7. INITIALIZATION GRILLE SHUTTER SYSTEM (w/ Grille Shutter)
Change the grille shutter control mode to normal mode and initialize the grille shutter system.
Click hereVehicle Exterior>EXTERIOR PANELS / TRIM>GRILLE SHUTTER SYSTEM>INITIALIZATION