2ZR-FXE HYBRID / BATTERY CONTROL HV BATTERY STACK(for LITHIUM-ION BATTERY) REMOVAL
CAUTION / NOTICE / HINT
The necessary procedures (adjustment, calibration, initialization, or registration) that must be performed after parts are removed and installed, or replaced during HV supply stack sub-assembly removal/installation are shown below.
| Replaced Part or Performed Procedure | Necessary Procedures | Effect/Inoperative Function when Necessary Procedures not Performed | Link |
|---|---|---|---|
|
*1: When performing learning using the GTS. Click here( |
|||
| Disconnect cable from negative auxiliary battery terminal | Perform steering sensor zero point calibration | Lane departure alert system (w/ Steering Control) | ( ) |
| Toyota parking assist-sensor system*1 | |||
| Parking support brake system*1 | |||
| Simple intelligent parking assist system*1 | |||
| Pre-collision system | |||
| Memorize steering angle neutral point | Panoramic view monitor system | ()
|
|
| Initialize back door lock | Power door lock control system | ()
|
|
·
Replacement of No. 1 HV supply stack sub-assembly ·
Replacement of No. 2 HV supply stack sub-assembly |
1.
Prediagnostic battery charge 2.
Battery diagnosis 3.
Battery status info update |
HV battery status information cannot be updated | ()
|
- CAUTION:
- ·
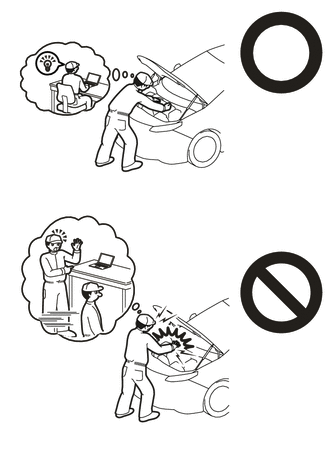
Orange wire harnesses and connectors indicate high-voltage circuits. To prevent electric shock, always follow the procedure described in the repair manual.
·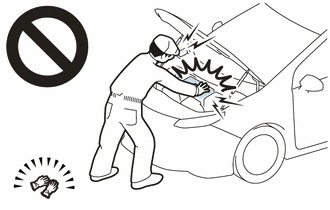
To prevent electric shock, wear insulated gloves when working on wire harnesses and components of the high voltage system.
·The hybrid system has high-voltage circuits. Accidents, such as electric shock, or electric leaks may result if the hybrid system is not operated in a correct manner. Make sure to follow the correct procedure.
·When disposing of an HV battery assembly or hybrid vehicle supply stack sub-assembly, make sure to return them through an authorized collection agent who is capable of handling them safely.
·Before returning an HV battery assembly, make sure to perform a recovery inspection.
·Before returning an HV supply stack sub-assembly, make sure to perform a recovery inspection.
·Make a note of the output DTCs as some of them may be necessary for "Recovery Inspection" of the HV battery assembly and HV supply stack sub-assemblies.
- NOTICE:
-
When replacing the No. 1 hybrid vehicle supply stack sub-assembly or No. 2 hybrid vehicle supply stack sub-assembly, it is necessary to check, adjust and equalize the SOC of the HV battery. Otherwise, the engine may run longer than normal, resulting in a decrease in fuel efficiency.
PROCEDURE

 1. PRECAUTION
- NOTICE:
- ·
After turning the power switch off, waiting time may be required before disconnecting the cable from the negative (-) auxiliary battery terminal. Therefore, make sure to read the disconnecting the cable from the negative (-) auxiliary battery terminal notices before proceeding with work.
Click hereGeneral>INTRODUCTION>REPAIR INSTRUCTION>PRECAUTION
2. READ VALUE USING GTS
Connect the GTS to the DLC3.
Turn the power switch on (IG).
Enter the following menus: Powertrain / HV Battery / Data List / Hybrid Battery Temperature 1 to 6.
- Powertrain > HV Battery > Data List
-
Tester Display Hybrid Battery Temperature 1 Hybrid Battery Temperature 2 Hybrid Battery Temperature 3 Hybrid Battery Temperature 4 Hybrid Battery Temperature 5 Hybrid Battery Temperature 6 - 50003 398 62,63,64,65,66,67
Read the Data List.
- NOTICE:
-
If any of the temperatures listed in "Hybrid Battery Temperature 1 to 6" are 50°C or more, leave the vehicle until the temperature drops to less than 50°C.
G9510
3.REMOVE HV BATTERY
G920L
4.REMOVE UPPER NO.1 HYBRID BATTERY COVER SUB-ASSEMBLY
G92Z0
5.REMOVE HV BATTERY JUNCTION BLOCK ASSEMBLY WITH NO. 2 HYBRID BATTERY SHIELD SUB-ASSEMBLY
G92Z2
6.REMOVE HYBRID BATTERY TERMINAL BLOCK
G92D1
7.REMOVE NO. 1 HYBRID BATTERY INTAKE DUCT
- CAUTION:
-
Be sure to wear insulated gloves and protective goggles.
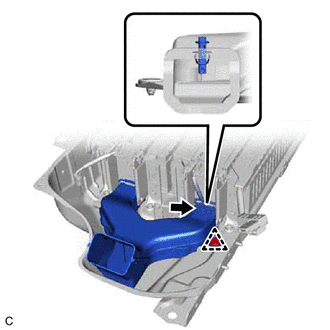
Disengage the claw of hybrid battery thermistor (sensor portion) and disconnect the hybrid battery thermistor from the No. 1 hybrid battery intake duct.
Remove the clip and No. 1 hybrid battery intake duct from the HV battery.
G929A
8.REMOVE NO. 1 HV BATTERY HOSE
G920Q
9.REMOVE NO. 1 HYBRID BATTERY SHIELD SUB-ASSEMBLY
- CAUTION:
-
Be sure to wear insulated gloves and protective goggles.
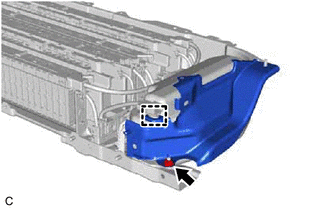
Disengage the clamp.
Remove the nut and No. 1 hybrid battery shield sub-assembly from the HV battery.
G92PC
10.REMOVE NO. 1 HV BATTERY PROTECTOR
- CAUTION:
-
Be sure to wear insulated gloves and protective goggles.
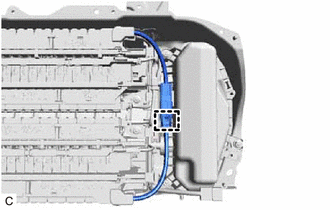
Disengage the clamp to disconnect the wire harness.
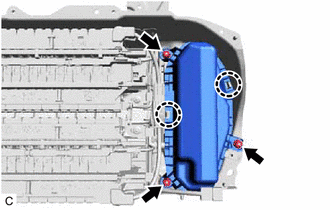
Remove the 3 nuts.
Disengage the 2 claws and remove the No. 1 HV battery protector from the No. 2 HV battery protector.
89890A
11.REMOVE BATTERY ECU ASSEMBLY
G92PD
12.REMOVE NO. 2 HV BATTERY PROTECTOR
G9508
13.REMOVE NO. 1 HV SUPPLY STACK SUB-ASSEMBLY
- CAUTION:
-
Be sure to wear insulated gloves and protective goggles.
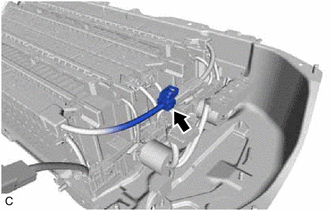
Disconnect the connector.
- NOTICE:
-
Insulate each disconnected high-voltage connector with insulating tape. Wrap the connector from the wire harness side to the end of the connector.
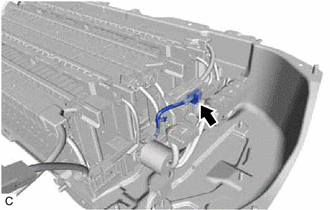
Disconnect the connector.
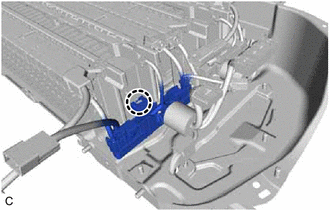
Disengage the claw.
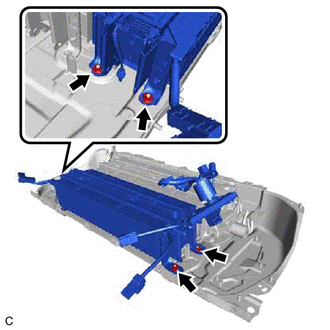
Remove the 4 nuts and No. 1 HV supply stack sub-assembly.
G9509
14.REMOVE NO. 2 HV SUPPLY STACK SUB-ASSEMBLY
- CAUTION:
-
Be sure to wear insulated gloves and protective goggles.
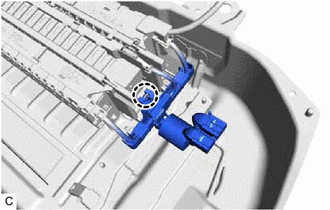
Disengage the claw.
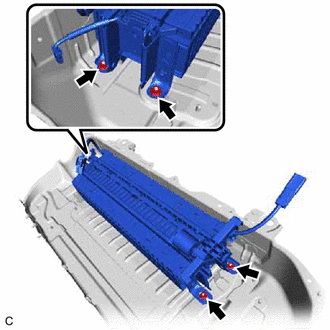
Remove the 4 nuts and No. 2 HV supply stack sub-assembly.
15.PERFORM RECOVERY INSPECTION
Before returning the HV supply stack sub-assembly, make sure to perform a recovery inspection.