M20A-FXS BATTERY / CHARGING CHARGING SYSTEM ON-VEHICLE INSPECTION
CAUTION / NOTICE / HINT
The necessary procedures (adjustment, calibration, initialization, or registration) that must be performed after parts are removed and installed, or replaced when inspecting auxiliary battery are shown below.
| Replacement Part or Procedure | Necessary Procedure | Effect/Inoperative Function when Necessary Procedure not Performed | Link |
|---|---|---|---|
|
*1: When performing learning using the GTS. Click here( |
|||
| Disconnect cable from negative auxiliary battery terminal | Memorize steering angle neutral point | Lane departure alert system (w/ Steering Control) | ( ) |
| Simple intelligent parking assist system*1 | |||
| Toyota parking assist-sensor system*1 | |||
| Pre-collision system | |||
| Initialize back door lock | Power door lock control system | ()
|
|
PROCEDURE

 1.CHECK AUXILIARY BATTERY
Check that the auxiliary battery cables are connected to the correct terminals.
If they are not, connect them properly.
Check the auxiliary battery for damage and deformation. If severe damage, deformation or leakage is found, replace the auxiliary battery.
Check the electrolyte level in each cell.
If the electrolyte level is below the lower line, replace the auxiliary battery.
If the electrolyte level is above the lower line, check the auxiliary battery voltage when cranking the engine. If the voltage is less than 11 V, recharge or replace the auxiliary battery.
- HINT:
-
Before checking the auxiliary battery voltage, turn off all the electrical systems (headlights, blower motor, rear window defogger, etc.).
2.CHECK AUXILIARY BATTERY VOLTAGE
Turn the power switch off and turn on the high beam headlights for 30 seconds. This will remove the surface charge from the auxiliary battery.
Measure the auxiliary battery voltage according to the value(s) in the table below.
- Result:
Tester Connection Condition Specified Condition Result Positive (+) auxiliary battery terminal - Negative (-) auxiliary battery terminal 20°C (68°F), Power switch off 12.0 V or higher Auxiliary battery is OK 12.0 V or less Recharge auxiliary battery
3.RECHARGE AUXILIARY BATTERY
Recharge the auxiliary battery.
- HINT:
- ·
Recharge the auxiliary battery according to the charger's instructions.
·Apply the appropriate charging current according to the type of auxiliary battery shown in the table below.
Charge Method Charging Current Normal Below 5 A
Turn the power switch off and turn on the high beam headlights for 30 seconds. This will remove the surface charge from the auxiliary battery.
Measure the auxiliary battery voltage according to the value(s) in the table below.
- Result:
Tester Connection Condition Specified Condition Result Positive (+) auxiliary battery terminal - Negative (-) auxiliary battery terminal 20°C (68°F), Power switch off 12.0 V or higher Auxiliary battery is OK 12.0 V or less Recharge auxiliary battery
4.CHECK AUXILIARY BATTERY TERMINAL, FUSIBLE LINK AND FUSE
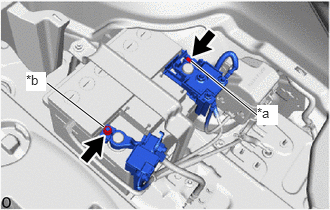
| *a | Positive (+) Auxiliary Battery Terminal |
| *b | Negative (-) Auxiliary Battery Terminal |
Check that the auxiliary battery terminals are not loose or corroded.
- Torque:
- Positive (+) Auxiliary Battery Terminal : 5.4 N*m (55 kgf*cm, 48 in.*lbf)
- Negative (-) Auxiliary Battery Terminal : 5.4 N*m (55 kgf*cm, 48 in.*lbf)
If a terminal is loose or corroded, tighten or clean the terminal.
Measure the resistance of each fusible link and fuse for the auxiliary battery charging system.
- Standard Resistance:
Below 1 Ω
If the result is not as specified, replace the fusible link or fuse as necessary.
5.CHECK AMD TERMINAL
- CAUTION:
- ·
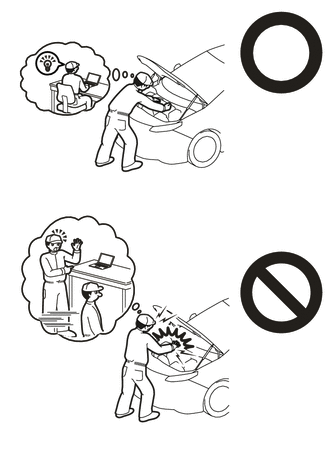
This vehicle has contains high voltage circuits standardized with orange colored wiring and connectors, so follow the instructions in this manual to perform the procedures correctly.
Click hereGeneral>INTRODUCTION>REPAIR INSTRUCTION>PRECAUTION
·If the correct procedures are not followed according to the instructions in this manual, there is a danger of electric shock from the high voltage circuits.
- ·
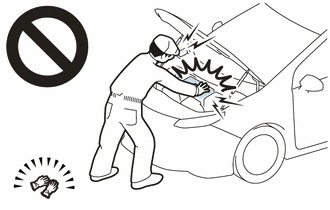
Be sure to wear insulating gloves when working on high voltage wiring or components.
·If work is performed without wearing insulating gloves, there is a danger of electric shock.
Remove the service plug grip.
Click hereEngine / Hybrid System>M20A-FXS (HYBRID / BATTERY CONTROL)>SERVICE PLUG GRIP>REMOVAL
Check that the AMD terminal is connected securely, and there is no contact problem.
If there are any arc marks, replace the affected parts.
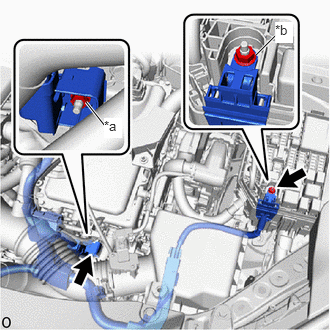
| *a | Inverter with Converter Assembly Side |
| *b | No. 1 Engine Room Relay Block Side |
Check that the nut for the AMD terminal is tightened to the specified torque.
- Torque:
- Inverter with Converter Assembly Side : 10 N*m (102 kgf*cm, 89 in.*lbf)
- No. 1 Engine Room Relay Block Side : 8.4 N*m (86 kgf*cm, 74 in.*lbf)
If there are no arc marks and the AMD terminal connection is faulty, connect the AMD terminal securely.
Install the service plug grip.
Click hereEngine / Hybrid System>M20A-FXS (HYBRID / BATTERY CONTROL)>SERVICE PLUG GRIP>INSTALLATION
6.CHECK DC/DC CONVERTER FUNCTION
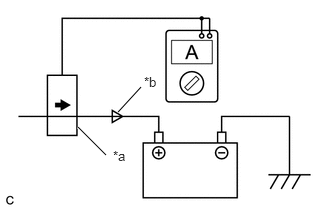
| *a | Probe Direction |
| *b | Current Flowing into Auxiliary Battery |
Connect the AC/DC 400 A probe to the positive (+) auxiliary battery cable.
Turn the power switch on (READY) and leave the vehicle as is until the electric current flowing to the auxiliary battery becomes 10 A or less.
Turn on the high beam headlights, and turn the blower motor switch to the HI position and the rear window defogger on.
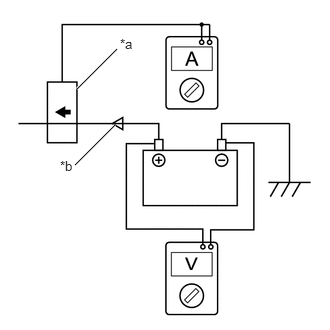
| *a | Probe Direction |
| *b | Current Flowing from Auxiliary Battery |
Measure the current and voltage according to the value(s) in the table below.
- Result:
Item Tester Connection Condition Specified Condition Current flowing from auxiliary battery Positive (+) auxiliary battery cable Power switch on (READY)
(The high beam headlights are on, the blower motor switch is in the HI position, and the rear window defogger is turned on.)0 A or less
(No current from auxiliary battery)Auxiliary battery voltage Positive (+) auxiliary battery terminal - Negative (-) auxiliary battery terminal 12.5 to 15 V
If the result is not as specified, replace the inverter with converter assembly.