3ZR-FAE INTAKE / EXHAUST INTAKE MANIFOLD REMOVAL
CAUTION / NOTICE / HINT
The necessary procedures (adjustment, calibration, initialization or registration) that must be performed after parts are removed and installed, or replaced during intake manifold removal/installation are shown below.
| Replaced Part or Performed Procedure | Necessary Procedure | Effect/Inoperative Function when Necessary Procedure not Performed | Link |
|---|---|---|---|
·
Replacement of throttle body assembly ·
Cleaning the deposits from the throttle body assembly ·
Air leak from intake system is repaired |
Inspection After Repair | ·
Poor idle, etc. ·
Engine start function, etc. |
( ) |
PROCEDURE

 22210
1.REMOVE THROTTLE BODY ASSEMBLY
89421
2.REMOVE VACUUM SENSOR ASSEMBLY (MANIFOLD ABSOLUTE PRESSURE SENSOR)
89426
3.REMOVE VACUUM SENSOR BRACKET
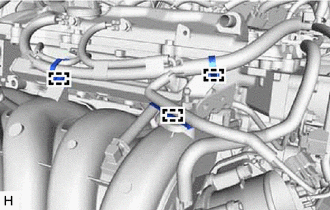
Disengage the wire harness clamp from the intake manifold.
Disengage the 2 wire harness clamps from the vacuum sensor bracket.
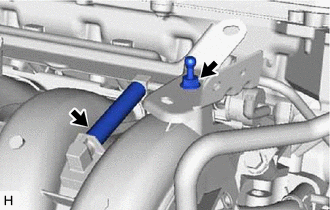
Disconnect the No. 1 air hose assembly from the intake manifold.
Remove the bolt and vacuum sensor bracket from the intake manifold.
23826
4.DISCONNECT NO. 1 FUEL VAPOR FEED HOSE
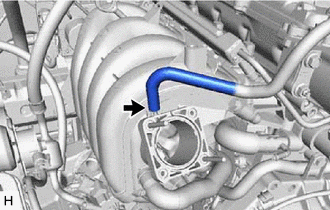
Disconnect the No. 1 fuel vapor feed hose from the intake manifold.
12261
5.DISCONNECT VENTILATION HOSE
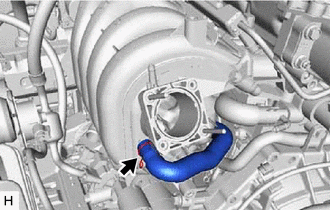
Slide the clip and disconnect the ventilation hose from the intake manifold.
17111
6.REMOVE INTAKE MANIFOLD
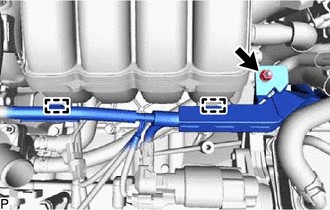
Disengage the 2 wire harness clamps from the intake manifold.
Remove the nut to separate the engine wire from the wire harness clamp bracket.
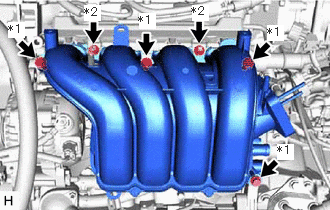
| *1 | Bolt |
| *2 | Nut |
Remove the 4 bolts, 2 nuts, intake manifold and intake manifold stay.
- HINT:
-
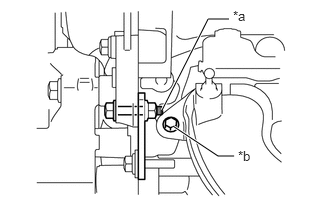 1.802,1.313 2.271,1.625 2.271,1.625 2.438,1.625 true 1.688,1.146 2.167,0.198 2.167,0.198 2.385,0.198 true 2.427,0.083 2.74,0.281 0.313,0.198 10 false *a 2.479,1.542 2.792,1.74 0.313,0.198 10 false *b
*a Tip of No. 2 Generator Bracket Set Bolt *b Intake Manifold Set Bolt
-
If the intake manifold set bolt cannot be removed because the tip of the No. 2 generator bracket set bolt is in the way, remove the V-ribbed belt first.
-
Click herePower Source / Network>3ZR-FAE (BATTERY / CHARGING)>GENERATOR>REMOVAL
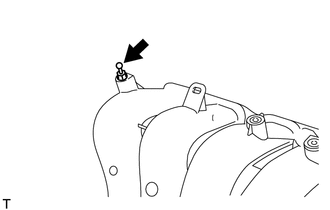
Remove the bolt from the intake manifold.
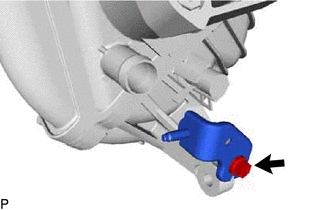
Remove the bolt and wire harness clamp bracket from the intake manifold.
17177
7.REMOVE NO. 1 INTAKE MANIFOLD TO HEAD GASKET
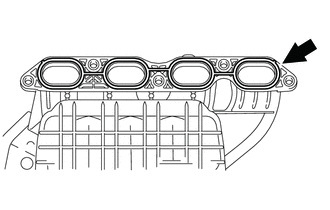
Remove the No. 1 intake manifold to head gasket from the intake manifold.
8.REMOVE STUD BOLT (w/ Stud Bolt)
- HINT:
-
If a stud bolt is deformed or the threads are damaged, replace it.
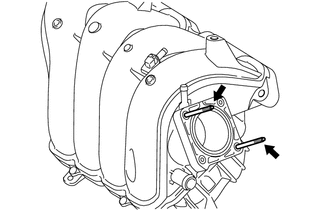
Using an E6 "TORX" socket wrench, remove the 2 stud bolts from the intake manifold.