HEATING / AIR CONDITIONING AIR CONDITIONING UNIT(for DENSO Made) DISASSEMBLY
PROCEDURE

 1. PRECAUTION
- NOTICE:
-
Make sure to perform initialization after replacing the air conditioning radiator damper servo sub-assembly. If initialization is not performed, the air conditioner unit assembly will not perform properly as the air conditioning amplifier assembly will not be able to recognize the position of the air conditioning radiator damper sub-assembly.
87211
2.REMOVE NO. 1 AIR DUCT
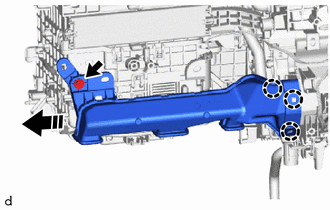

|
Remove in this Direction |
Remove the screw.
Disengage the claws to remove the No. 1 air duct as shown in the illustration.
88505
3.REMOVE AIR CONDITIONING DUCT SUB-ASSEMBLY
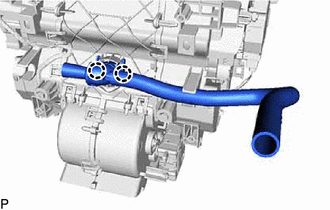
Disengage the claws to remove the air conditioning duct sub-assembly.
87130D
4.REMOVE BLOWER ASSEMBLY
87114B
5.REMOVE HEATER COVER
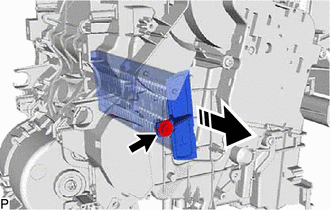
|
|
Remove in this Direction |
Remove the screw and heater cover as shown in the illustration.
88650N
6.REMOVE AIR CONDITIONING AMPLIFIER ASSEMBLY
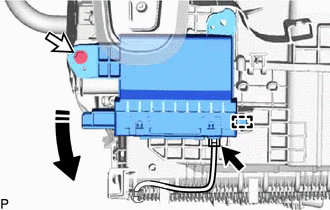
|
|
Remove in this Direction |
Disconnect the connector.
Remove the screw.
Disengage the guide to remove the air conditioning amplifier assembly as shown in the illustration.
82210K
7.REMOVE AIR CONDITIONING HARNESS ASSEMBLY
Disconnect the 4 connectors.
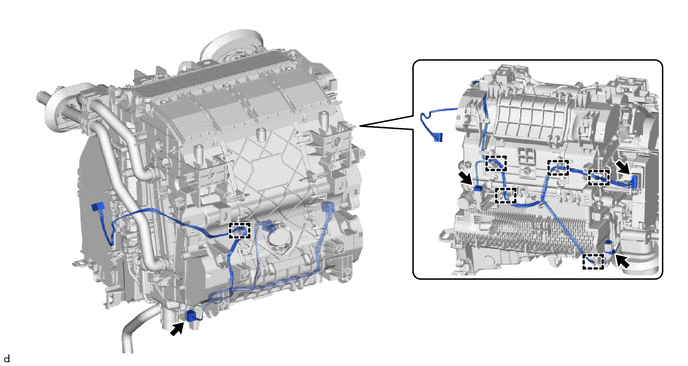
Disengage clamps to remove the air conditioning harness assembly.
88482A
8.REMOVE COVER
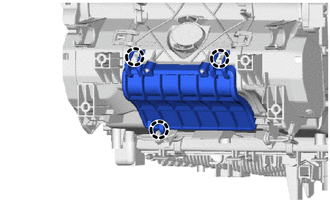
Disengage the claws to remove the cover.
88539J
9.REMOVE DRAIN COOLER HOSE
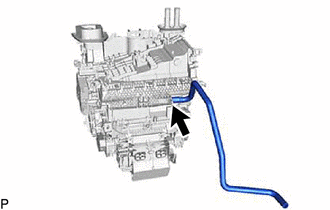
Remove the drain cooler hose.
87050C
10.REMOVE NO. 1 AIR CONDITIONING RADIATOR DAMPER SERVO SUB-ASSEMBLY
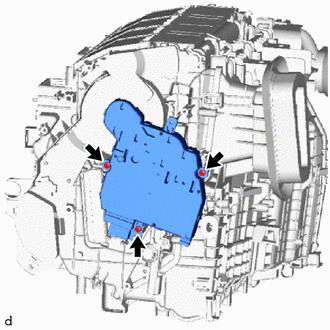
Remove the 3 screws and No. 1 air conditioning radiator damper servo sub-assembly.
88897M
11.REMOVE HEATER PIPE GROMMET
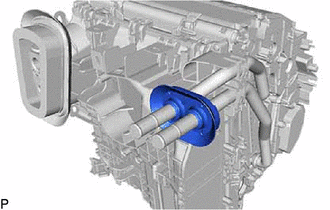
Remove the heater pipe grommet.
87124B
12.REMOVE HEATER CLAMP
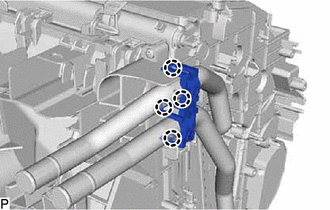
Disengage the claws to remove the heater clamp.
87107A
13.REMOVE HEATER RADIATOR UNIT SUB-ASSEMBLY
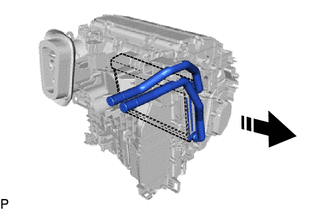
|
|
Remove in this Direction |
Remove the heater radiator unit sub-assembly as shown in the illustration.
- NOTICE:
-
Prepare a drain pan or cloth in case the coolant leaks.
88515
14.REMOVE COOLER EXPANSION VALVE
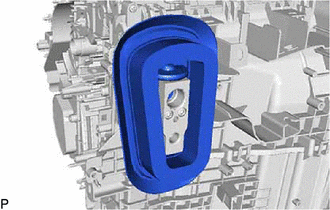
Remove the grommet.
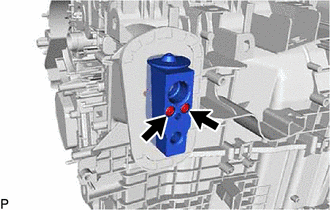
Using a 4 mm hexagon socket wrench, remove the 2 hexagon bolts and cooler expansion valve.
Remove the 2 O-rings from the No. 1 cooler evaporator sub-assembly.
88501
15.REMOVE NO. 1 COOLER EVAPORATOR SUB-ASSEMBLY
Remove the 2 screws.
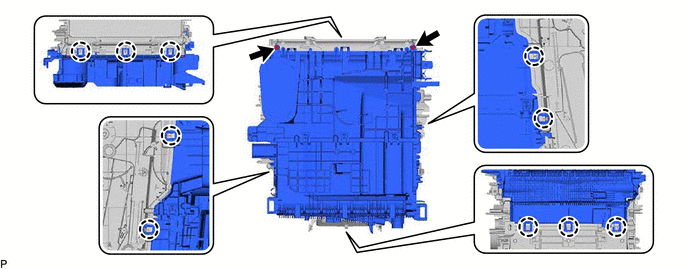
Disengage the claws to remove the upper heater case with No. 1 cooler evaporator sub-assembly from the lower heater case.
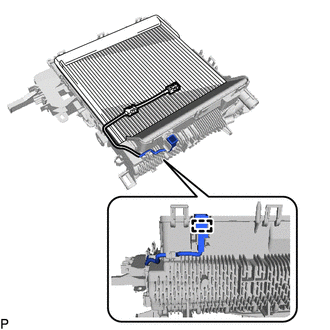
Disengage the clamp.
Remove the No. 1 cooler evaporator sub-assembly with No. 1 cooler thermistor from the upper heater case.
88625
16.REMOVE NO. 1 COOLER THERMISTOR