Removal / installation · Vehicles built from Jun 2009
1.
INSTALL REAR DISC BRAKE CYLINDER ASSEMBLY
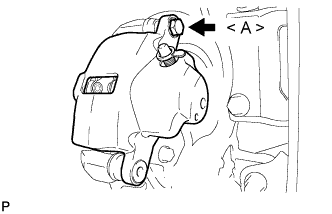
Temporarily tighten bolt <A> to install the upper part of the rear disc brake cylinder assembly.
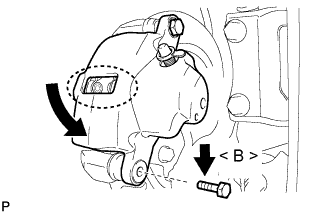
Temporarily tighten bolt <B> to install the lower part of the rear disc brake cylinder assembly while holding the lower part of the rear disc brake cylinder assembly.
NOTICE:
Make sure that the rear brake pad springs do not get caught at the point on the rear disc brake cylinder assembly shown in the illustration.
Fully tighten the rear disc brake cylinder assembly with the 2 bolts.
Torque:
31 N*m{
316 kgf*cm
, 23 ft.*lbf
}
2.
CONNECT REAR BRAKE FLEXIBLE HOSE
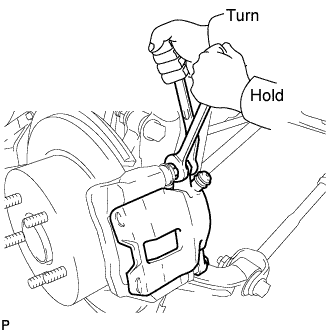
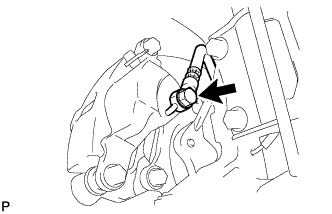
Connect the rear brake flexible hose with the union bolt and 2 new gaskets.
Torque:
29 N*m{
300 kgf*cm
, 21 ft.*lbf
}
NOTICE:
Install the flexible hose lock securely in the lock hole in the disc brake cylinder assembly.
3.
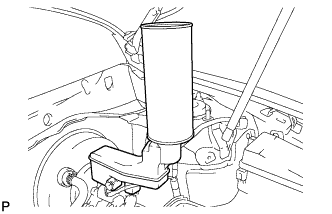
FILL RESERVOIR WITH BRAKE FLUID
Fill the reservoir with brake fluid.
Fluid:
SAE J1703 or FMVSS No. 116 DOT3
4.
BLEED BRAKE LINE
NOTICE:
Bleed the air from the brake line of the wheel farthest from the master cylinder.
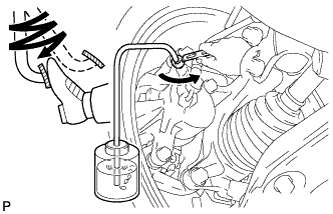
Connect a vinyl tube to the bleeder plug.
Depress the brake pedal several times, then loosen the bleeder plug with the pedal depressed (*3).
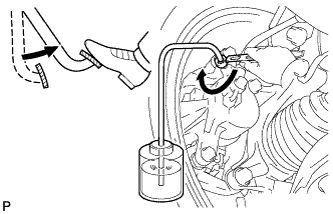
When fluid stops coming out, tighten the bleeder plug, then release the brake pedal (*4).
Repeat (*3) and (*4) until all the air in the fluid is completely bled out.
Tighten the bleeder plug completely.
Torque:
12 N*m{
122 kgf*cm
, 9 ft.*lbf
}
Repeat the above procedures for each wheel to bleed the air from the brake line.
5.
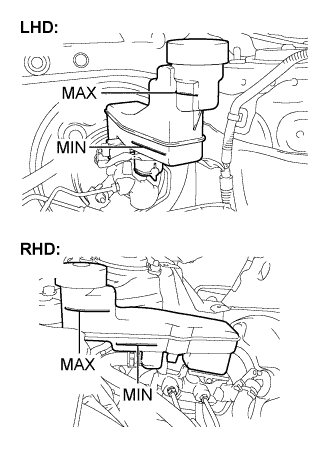
INSPECT FLUID LEVEL IN RESERVOIR
Check the fluid level. If brake fluid level is low, check for leakage and inspect the disc brake pad. If necessary, refill the reservoir with brake fluid after repair and replacement.