INSTALLATION
Removal / installation · Vehicles built from Jun 2006
| 1. INSTALL ROOF DRIP SIDE FINISH MOULDING CLIP |

- NOTICE:
- If installing new clips, remove the double-sided tape remaining where the clips will be installed on the body and clean the body with a non-residue type solvent.
Apply a 2 to 3 mm (0.08 to 0.12 in.) bead of adhesive (3M DP-105 or equivalent) to new roof drip side finish moulding clips.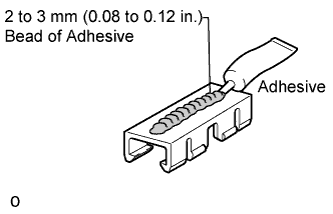

- HINT:
- Adhesive strength (tensile strength): 13.7 MPa (140 kgf/cm2) or more (when the temperature is 23°C (73°F))
Install the roof drip side finish moulding clips to the positions on the roof panel shown in the illustration. Determine the locations and firmly press and install the roof drip side finish moulding clips after lightly rubbing up the adhesive (3M DP-105 or equivalent).
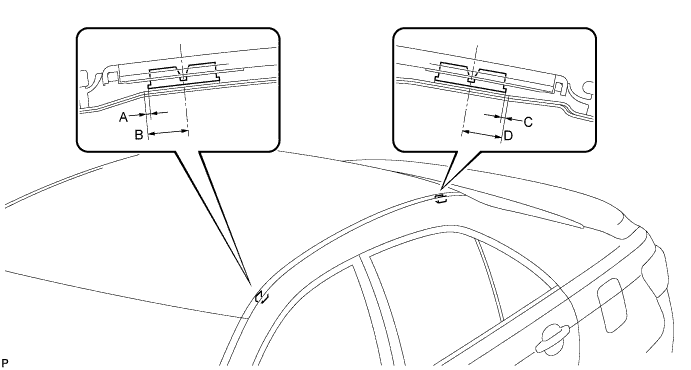
- Standard dimension:
Area
Dimension
A
1.4 mm (0.055 in.)
B
12.4 mm (0.488 in.)
C
1.1 mm (0.043 in.)
D
12.1 mm (0.476 in.)
- HINT:
- Initial hardening time: 20 minutes
- Complete hardening time: 48 hours
- Initial hardening time: 20 minutes
| 2. INSTALL ROOF DRIP SIDE FINISH MOULDING CENTER |
Install the roof drip side finish moulding center when 20 minutes or more have elapsed after pressing and installing the roof drip side finish moulding clips.
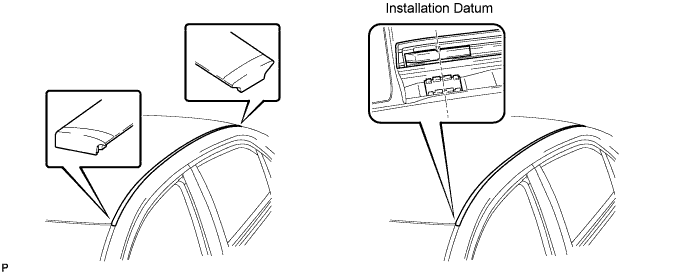
- NOTICE:
- Install the roof drip side finish moulding center in the proper direction.
- Set the front clip to the installation datum.
- Make sure that the front clip and roof drip side finish moulding center fit each other.
- Install the roof drip side finish moulding center in the proper direction.