2006-2011 Camry Aurion · Service Manual RESTRAINTS

INSTALLATION

Removal / installation · Vehicles built Oct 2006 – May 2009

Versions by build date: Oct 2006 – May 2009 from Jun 2009


1. INSTALL CENTER AIRBAG SENSOR ASSEMBLY
  1. Check that the ignition switch is off.

  1. Check that the battery negative (-) cable is disconnected.

    CAUTION:
    Wait for 90 seconds after disconnecting the cable to prevent airbag deployment.

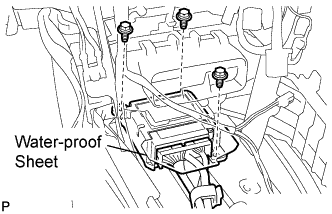
  1. C133884E01
    Install the center airbag sensor assembly with the 3 bolts.

    Torque:
    17.5 N*m{ 179 kgf*cm , 13 ft.*lbf }

    NOTICE:
    1. If the center airbag sensor assembly has been dropped, or there are any cracks, dents or other defects in the case, bracket or connector, replace it with a new one.
    2. When installing the center airbag sensor assembly, be careful that the SRS wiring does not interfere with other parts and that it is not pinched between other parts.

  1. Check that there is no looseness in the installation parts of the center airbag sensor assembly.

  1. Connect the holder (with connectors).

  1. Check that the water-proof sheet is properly set.


2. INSTALL NO. 1 CONSOLE BOX DUCT

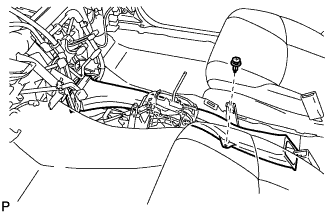
  1. C129716
    Install the No. 1 console box duct with the clip.


3. INSTALL NO. 1 CONSOLE BOX INSERT FRONT

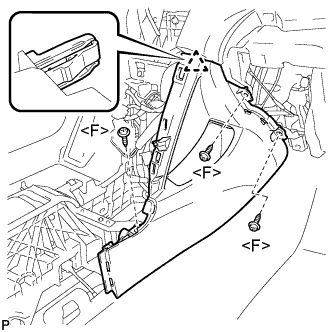
  1. B134006E01
    Engage the clip.

  1. Install the No. 1 console box insert front with the 3 screws <F>.


4. INSTALL NO. 2 CONSOLE BOX INSERT FRONT

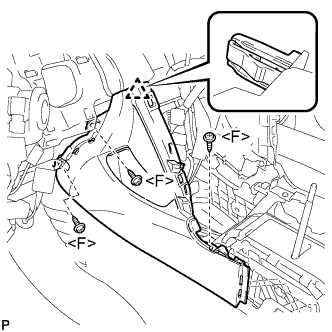
  1. B134005E01
    Engage the clip.

  1. Install the No. 2 console box insert front with the 3 screws <F>.


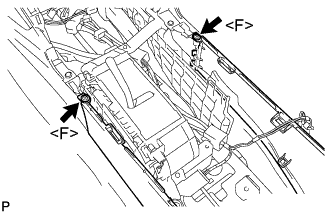
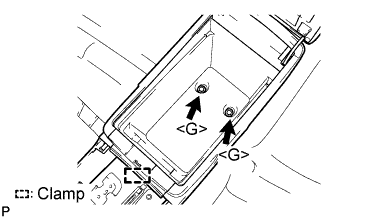
5. INSTALL CONSOLE BOX ASSEMBLY

  1. B134002E01
    Install the 2 screws <F>.

  1. B149935E03
    Install the console box assembly with the 2 bolts <G>.

  1. Engage the clamp.


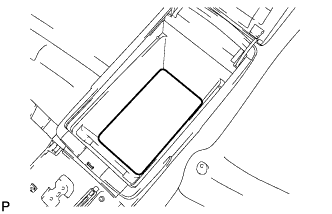
6. INSTALL CONSOLE BOX CARPET

  1. B134004
    Install the console box carpet.


7. INSTALL CONSOLE BOX POCKET
  1. Install the console box pocket.


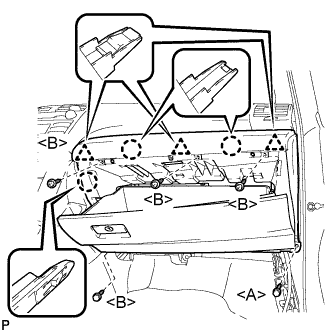
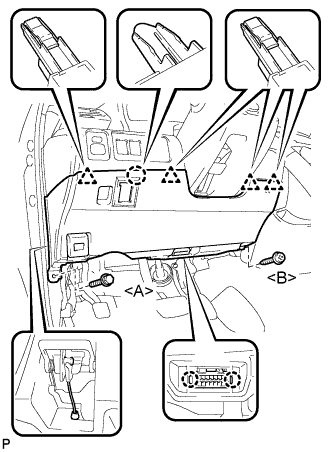
8. INSTALL LOWER INSTRUMENT PANEL SUB-ASSEMBLY

  1. B133992E01
    Engage the 3 claws and 3 clips.

  1. Install the 4 screws <B>.

  1. Install the lower instrument panel sub-assembly with the bolt <A>.


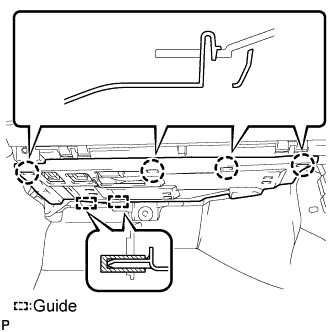
9. INSTALL INSTRUMENT PANEL NO. 2 UNDER COVER SUB-ASSEMBLY

  1. B133989E01
    Engage the 4 claws and 2 guides, and install the instrument panel No. 2 under cover sub-assembly.


10. INSTALL COWL SIDE TRIM SUB-ASSEMBLY RH

HINT:
Use the same procedure for the RH and LH side (Click here).


11. INSTALL FRONT DOOR SCUFF PLATE RH

HINT:
Use the same procedure for the RH and LH side (Click here).


12. INSTALL LOWER NO. 1 INSTRUMENT PANEL FINISH PANEL

  1. B147264E01
    Install the air hose and connect the connector.

  1. Engage the 2 claws and the DLC3.

  1. Engage the claw and the 4 clips.

  1. Install the lower No. 1 instrument panel finish panel with the screw <B> and bolt <A>.


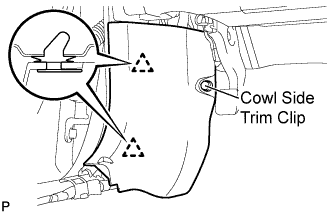
13. INSTALL COWL SIDE TRIM SUB-ASSEMBLY LH

  1. B132116E01
    Engage the 2 clips.

  1. Install the cowl side trim sub-assembly LH with the cowl side trim clip.


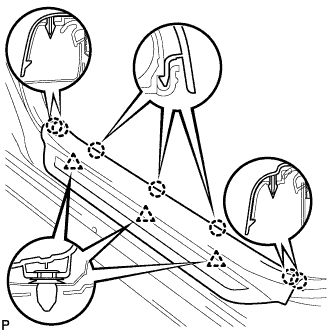
14. INSTALL FRONT DOOR SCUFF PLATE LH

  1. B132067
    Engage the 7 claws and 3 clips, then install the front door scuff plate LH.


15. INSTALL LOWER INSTRUMENT CLUSTER FINISH PANEL CENTER SUB-ASSEMBLY
  1. Connect each connector.

  1. B141243E01
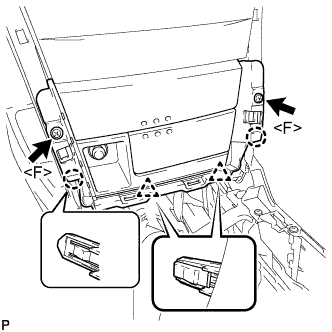
    Engage the 2 claws and 2 clips.

  1. Install the lower instrument cluster finish panel center sub-assembly with the 2 screws <F>.


16. INSTALL UPPER CONSOLE REAR PANEL SUB-ASSEMBLY (for Automatic Transaxle LHD)

  1. B149934
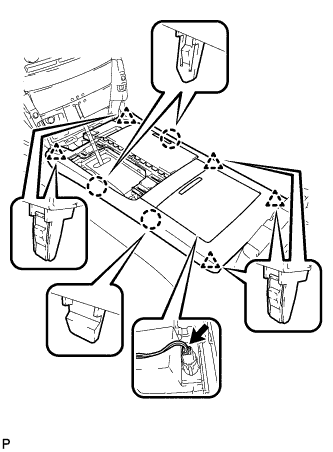
    Connect the connector.

  1. Engage the 3 claws and 5 clips to install the upper console rear panel sub-assembly.


17. INSTALL UPPER CONSOLE REAR PANEL SUB-ASSEMBLY (for Automatic Transaxle RHD)

  1. B144604
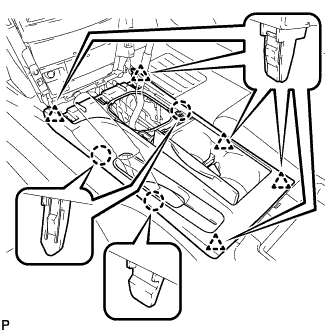
    Engage the 3 claws and 5 clips to install the upper console rear panel sub-assembly.


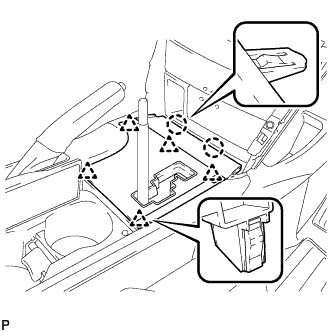
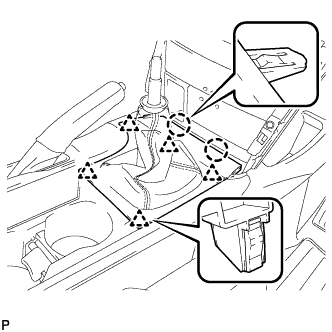
18. INSTALL UPPER CONSOLE REAR PANEL SUB-ASSEMBLY (for Manual Transaxle)

  1. B144604
    Engage the 3 claws and 5 clips to install the upper console rear panel sub-assembly.


19. INSTALL POSITION INDICATOR HOUSING ASSEMBLY (for Automatic Transaxle LHD)

  1. B148447
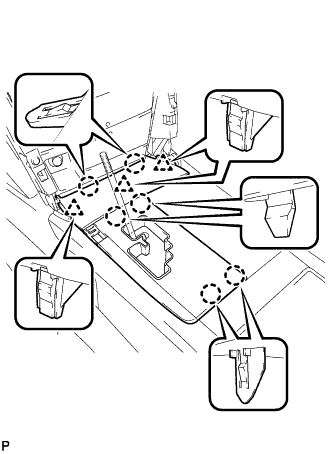
    Engage the 6 claws and the 3 clips to install the position indicator housing assembly.


20. INSTALL POSITION INDICATOR HOUSING ASSEMBLY (for Automatic Transaxle RHD)

  1. B152778
    Engage the 2 claws and the 5 clips to install the position indicator housing assembly as shown in the illustration.


21. INSTALL UPPER CONSOLE PANEL (for Manual Transaxle)

  1. B145877
    Engage the 2 claws and the 5 clips to install the upper console panel as shown in the illustration.


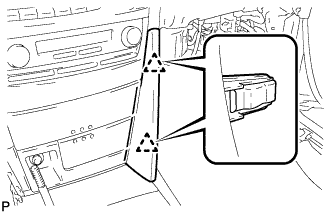
22. INSTALL NO. 1 INSTRUMENT CLUSTER FINISH PANEL GARNISH

  1. B144605
    Engage the 2 clips and install the No. 1 instrument cluster finish panel garnish.


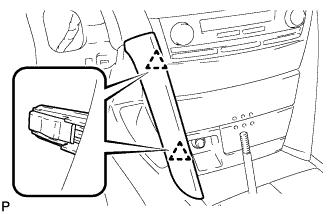
23. INSTALL NO. 2 INSTRUMENT CLUSTER FINISH PANEL GARNISH

  1. B144599
    Engage the 2 clips and install the No. 2 instrument cluster finish panel garnish.


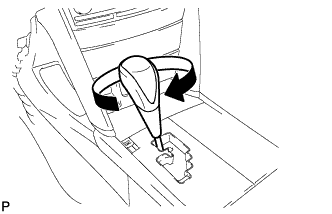
24. INSTALL SHIFT LEVER KNOB SUB-ASSEMBLY (for Automatic Transaxle LHD)

  1. B148448
    Install the shift lever knob sub-assembly.


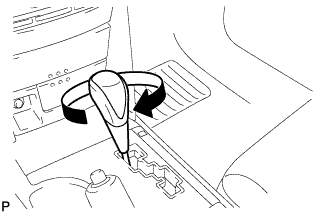
25. INSTALL SHIFT LEVER KNOB SUB-ASSEMBLY (for Automatic Transaxle RHD)

  1. B152780
    Install the shift lever knob sub-assembly.


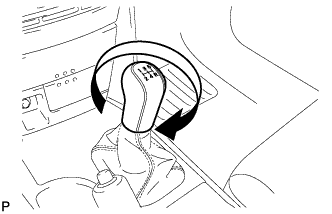
26. INSTALL SHIFT LEVER KNOB SUB-ASSEMBLY (for Manual Transaxle)

  1. B152775
    Install the shift lever knob sub-assembly.


27. CONNECT CABLE TO NEGATIVE BATTERY TERMINAL

28. INSPECT SRS WARNING LIGHT
  1. Inspect the SRS warning light (Click here).

← REMOVAL (from Jun 2009)INSTALLATION (from Jun 2009) →