Headlight Relay Circuit
Circuit diagnosis · Vehicles built from Oct 2006
DESCRIPTION
The main body ECU receives a signal from the headlight dimmer switch assembly, and turns the low beam headlights on.- HINT:
- The headlight relays are built into the power distributor, so unlike conventional relays, they cannot be removed for inspection.
WIRING DIAGRAM
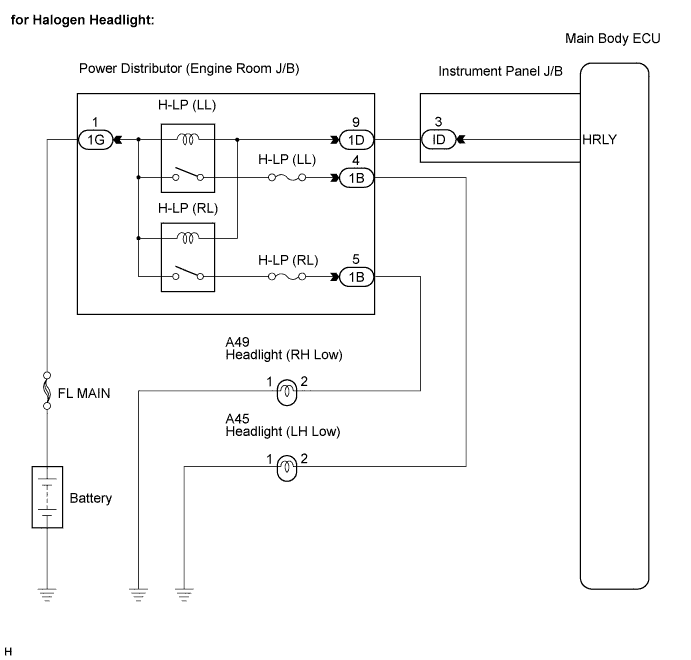

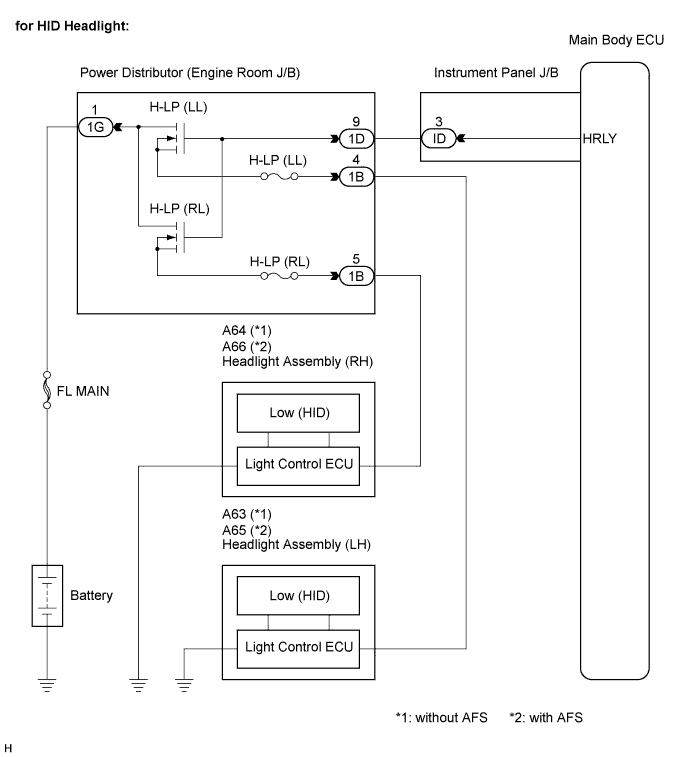
INSPECTION PROCEDURE
| 1. PERFORM ACTIVE TEST USING INTELLIGENT TESTER |

Connect the intelligent tester to the DLC3.
Turn the ignition switch on (IG) and turn the intelligent tester main switch on.
Select the item below in the ACTIVE TEST and then check that the relays operate.
Main Body (Main Body ECU): Tester Display
Test Part
Control Range
Diagnostic Note
Head Relay
Headlight Relays
ON / OFF
-
- OK:
- Headlight relays operate. (Low beam headlights illuminate.)
|
|
||||

| NG | |
 |
| 2. INSPECT INSTRUMENT PANEL JUNCTION BLOCK ASSEMBLY |
Measure the voltage according to the value(s) in the table below.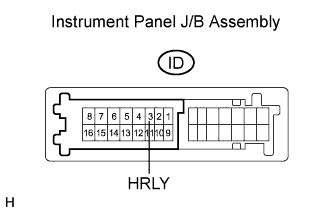
- Standard voltage:
Tester Connection
Condition
Specified Condition
ID-3 (HRLY) - Body ground
Light control switch OFF → HEAD
10 to 14 V → Below 1 V
|
|
||||

| NG | |
|
| 3. CHECK HARNESS AND CONNECTOR (BATTERY - ENGINE ROOM J/B ASSEMBLY) |
Disconnect the 1G engine room J/B assembly connector.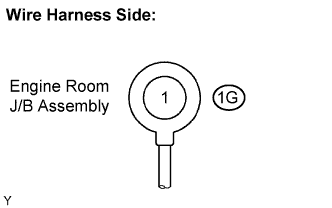
Measure the voltage according to the value(s) in the table below.
- Standard voltage:
Tester Connector
Condition
Specified Condition
1G - Body ground
Always
10 to 14 V
|
|
||||
| OK | |
|
| 4. INSPECT ENGINE ROOM J/B BLOCK ASSEMBLY |
Reconnect the 1G engine room J/B assembly connector.
Disconnect the 1D engine room J/B assembly connector.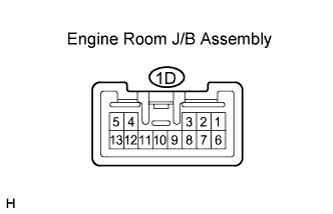
Measure the voltage according to the value(s) in the table below.
- Standard voltage:
Tester Connection
Condition
Specified Condition
1D-9 - Body ground
Always
10 to 14 V
|
|
||||
| OK | |
|
| 5. CHECK HARNESS AND CONNECTOR (ENGINE ROOM J/B ASSEMBLY - INSTRUMENT PANEL J/B ASSEMBLY) |
Reconnect the 1D engine room J/B assembly connectors.
Disconnect the ID instrument panel J/B assembly connector.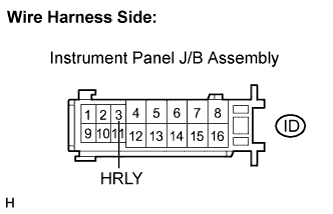
Measure the voltage according to the value(s) in the table below.
- Standard voltage:
Tester Connection
Condition
Specified Condition
ID-3 (HRLY) - Body ground
Always
10 to 14 V
|
|
||||
| OK | ||
 |
||
| ||
| 6. INSPECT ENGINE ROOM JUNCTION BLOCK ASSEMBLY |
Remove the H-LP (RL) fuse and H-LP (LL) fuse from the engine room J/B assembly.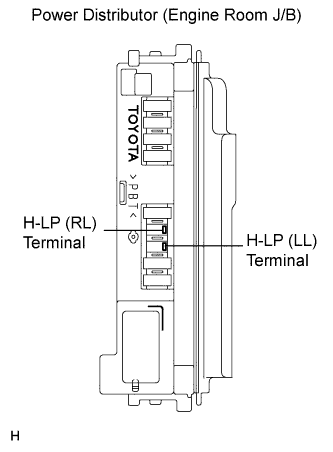
Measure the voltage between the loading slot of each fuse and body ground.
- Standard voltage:
Tester Connection
Condition
Specified Condition
H-LP (RL) Terminal - Body ground
Light control switch in HEAD
10 to 14 V
H-LP (LL) Terminal - Body ground
Light control switch in HEAD
10 to 14 V
|
|
||||
| OK | ||
|
||
| ||