REMOVAL
Removal / installation · Vehicles built Oct 2006 – May 2009
Versions by build date: Jun 2006 – Sep 2006 Oct 2006 – May 2009 from Jun 2009
| 1.
PRECAUTION |
 |
- HINT:
-
Click here.
| 2.
DISCONNECT CABLE FROM NEGATIVE BATTERY TERMINAL |
|
| 3.
REMOVE AIR CONDITIONER UNIT ASSEMBLY |
|
Click here.
| 4.
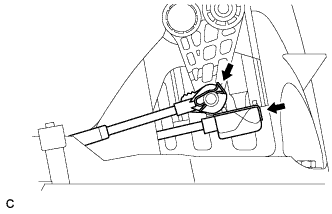
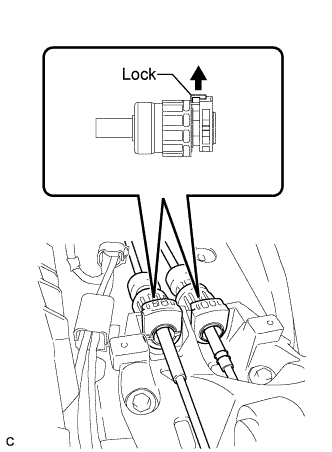
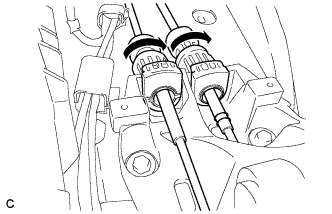
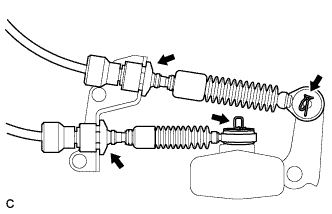
SEPARATE TRANSMISSION CONTROL CABLE ASSEMBLY |
|
- Remove the 2 clips and disconnect the end of the transmission control cable.
- Pull out the control cable assembly locks.
- Turn the adjust nut 180° clockwise. While holding the adjust nut, separate the control cable assembly.
| 5.
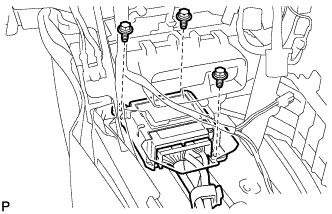
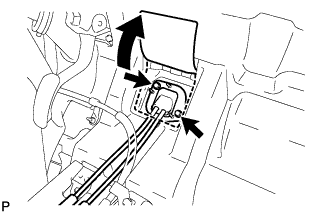
REMOVE CENTER AIRBAG SENSOR ASSEMBLY
|
|
Turn back the carpet.
- Disconnect the holder (with connectors).
Remove the 3 bolts and center airbag sensor assembly.
| 6.
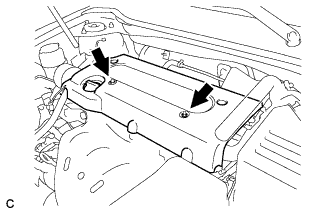
REMOVE NO. 1 ENGINE COVER SUB-ASSEMBLY
|
|
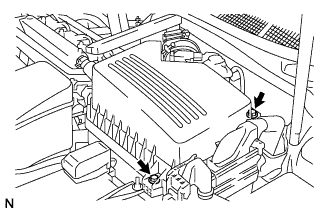
- Remove the 2 nuts and cover.
| 7.
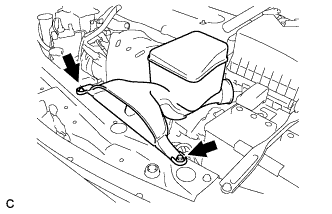
REMOVE AIR CLEANER INLET ASSEMBLY
|
|
- Remove the 2 bolts, clamp and air cleaner inlet.
| 8.
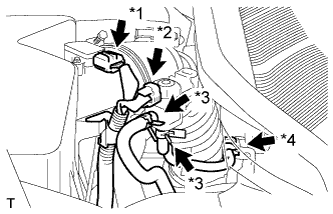
REMOVE AIR CLEANER CAP SUB-ASSEMBLY
|
|
- Disconnect the mass air flow meter connector (*1).
Disconnect the purge VSV connector (*2).
Disconnect the 2 purge VSV vacuum hoses (*3).
Disconnect the purge line hose from the clamp (*4).
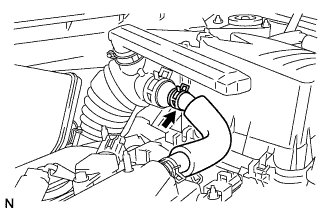
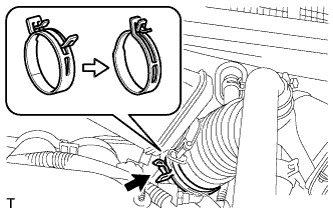
- Disconnect the No. 2 ventilation hose from the air cleaner hose.
- Lock the No. 1 air cleaner hose clamp, and then disconnect the No. 1 air cleaner hose from the throttle body.
- Remove the 2 bolts and air cleaner cap.
Remove the air cleaner filter element from the air cleaner case.
| 9.
REMOVE AIR CLEANER CASE SUB-ASSEMBLY
|
|
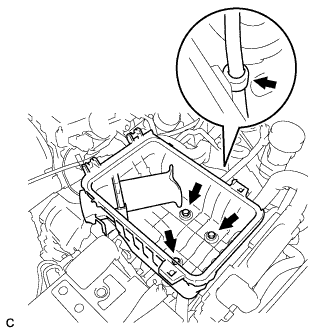
- Disconnect the hose clamp.
Remove the 3 bolts and air cleaner case.
| 10.
REMOVE BATTERY
|
|
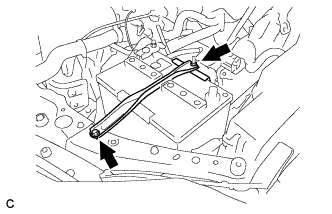
- Loosen the bolt and nut, and remove the battery clamp.
Remove the battery and battery tray.
| 11.
REMOVE TRANSMISSION CONTROL CABLE ASSEMBLY |
|
- Remove the 2 clips and 2 washers and disconnect the 2 cables from the transaxle.
Remove the 2 clips and disconnect the 2 cables from the control cable bracket.
- Remove the 2 bolts and control cable assembly.
Remove the No. 2 shift cable grommet retainer from the control cable assembly.