DISASSEMBLY
Removal / installation · Vehicles built from Jun 2009
Versions by build date: Jun 2006 – May 2009 from Jun 2009
| 1.
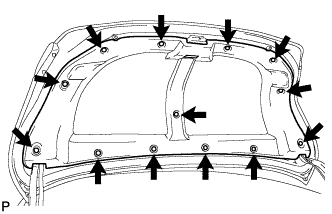
REMOVE LUGGAGE COMPARTMENT DOOR COVER
|
 |
- Using a clip remover, remove the 13 clips and luggage compartment door cover.
| 2.
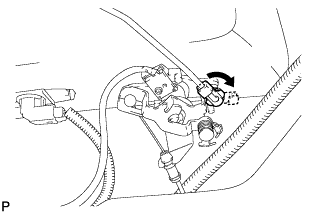
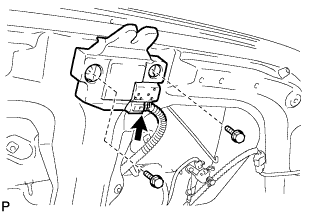
REMOVE LUGGAGE COMPARTMENT DOOR LOCK ASSEMBLY
|
|
- Disconnect the rod.
- Disconnect the connector.
Remove the 2 bolts and luggage compartment door lock assembly.
| 3.
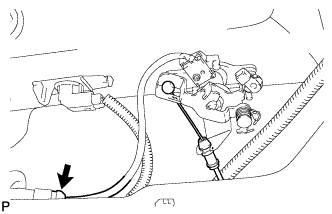
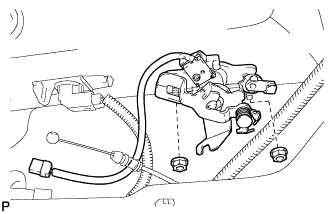
REMOVE LUGGAGE COMPARTMENT DOOR LOCK CYLINDER ASSEMBLY |
|
- Disconnect the cable and connector.
- Remove the 2 nuts and the luggage compartment door lock cylinder assembly.
| 4.
REMOVE REAR SPOILER (w/ Rear Spoiler)
|
|
- HINT:
- When removing the rear spoiler, heat the vehicle body and rear spoiler using a heat light.
- Heating temperature:
Item
|
Temperature
|
Vehicle Body
|
40 to 60°C (104 to 140°F)
|
Spoiler
|
20 to 30°C (68 to 86°F)
|
- NOTICE:
- Do not heat the vehicle body and spoiler excessively.
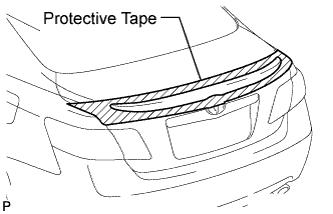
- Put protective tape around the rear spoiler.
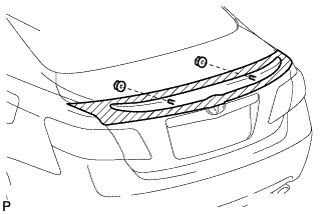
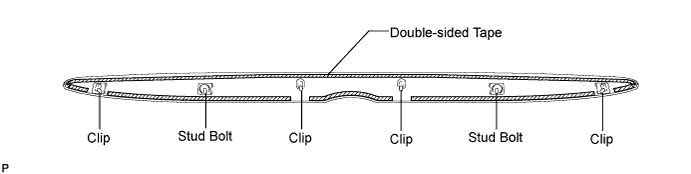
- Remove the 2 nuts.
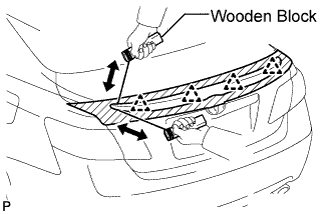
- Insert a piano wire between the vehicle body and rear spoiler.
Tie objects that can serve as handles (for example, wooden blocks) to both wire ends.
Pull the piano wire and scrape off the double-sided tape that holds the spoiler to the vehicle body.

- NOTICE:
- If reusing the spoiler, take care not to damage the spoiler.
- Be careful not to damage the vehicle body.
Disengage the 4 clips and remove the rear spoiler.
| 5.
REMOVE LUGGAGE COMPARTMENT DOOR OUTSIDE GARNISH ASSEMBLY
|
|
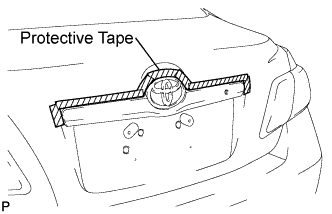
- Put protective tape around the luggage compartment door outside garnish assembly.
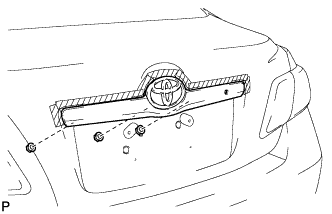
- Remove the 3 nuts.
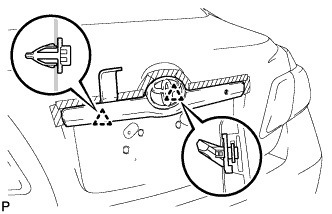
- Using a moulding remover, disengage the 2 clips and remove the luggage compartment door outside garnish assembly.
| 6.
REMOVE LUGGAGE DOOR OPENING SWITCH ASSEMBLY (w/ Smart Entry and Start System)
|
|
w/o Rear View Monitor System:
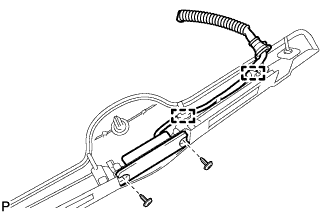
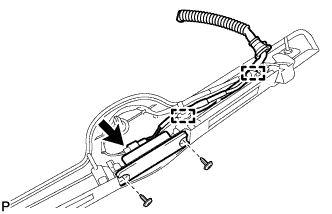
- Disengage the 2 clamps.
Remove the 2 screws and luggage door opening switch assembly.
w/ Rear View Monitor System:
- Disconnect the connector.
Disengage the 2 clamps.
Remove the 2 screws and luggage door opening switch assembly.
| 7.
REMOVE REAR TELEVISION CAMERA ASSEMBLY (w/ Rear View Monitor System) |
|
w/o Smart Entry and Start System: (Click here)w/ Smart Entry and Start System: (Click here)
| 8.
REMOVE REAR LIGHT ASSEMBLY LH
|
|
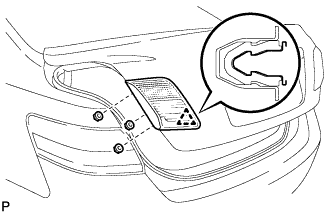
Disconnect the connector.
- Remove the 3 nuts.
Disengage the pin and remove the rear light assembly.
| 9.
REMOVE REAR LIGHT ASSEMBLY RH |
|
- HINT:
- Use the same procedure for the RH side and the LH side.
| 10.
REMOVE LICENSE PLATE LIGHT ASSEMBLY LH
|
|
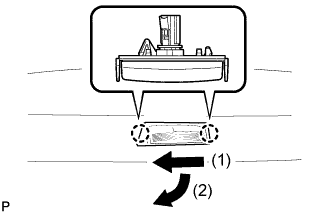
- Disconnect the connector.
Disengage the 2 claws and remove the license plate light assembly as shown in the illustration.
| 11.
REMOVE LICENSE PLATE LIGHT ASSEMBLY RH |
|
- HINT:
- Use the same procedure for the RH side and the LH side.