2006-2011 Camry Aurion · Service Manual ENGINE

REMOVAL

Removal / installation · Vehicles built Oct 2006 – May 2009

Versions by build date: Jun 2006 – Sep 2006 Oct 2006 – May 2009 from Jun 2009


1. DISCONNECT CABLE FROM NEGATIVE BATTERY TERMINAL

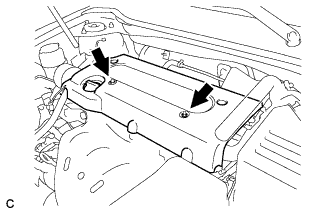
2. REMOVE NO. 1 ENGINE COVER SUB-ASSEMBLY

  1. A134904
    Remove the 2 nuts and cover.


3. REMOVE FRONT WHEEL RH

4. REMOVE ENGINE UNDER COVER LH

5. REMOVE ENGINE UNDER COVER RH

6. REMOVE FRONT FENDER APRON SEAL RH

7. DRAIN ENGINE OIL
  1. Remove the oil filler cap.

  1. Remove the oil drain plug and drain the oil into a container.


8. REMOVE FRONT EXHAUST PIPE ASSEMBLY
(Click here)

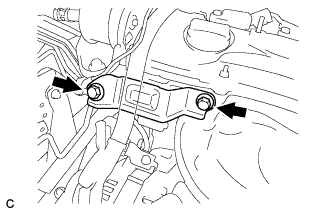
9. REMOVE NO. 2 ENGINE MOUNTING STAY RH

  1. A134912
    Remove the 2 bolts and No. 2 engine mounting stay RH.


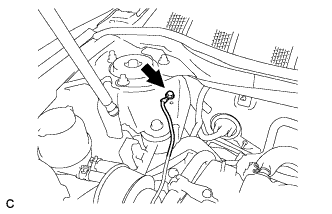
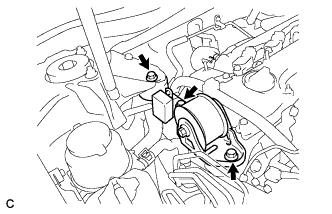
10. REMOVE ENGINE MOVING CONTROL ROD SUB-ASSEMBLY

  1. A134909
    Remove the bolt and disconnect the ground cable.

  1. A134910
    Remove the 3 bolts and the engine moving control rod sub-assembly.


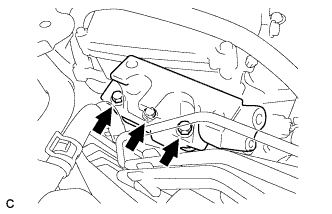
11. REMOVE NO. 2 ENGINE MOUNTING BRACKET RH

  1. A134911
    Remove the 3 bolts and No. 2 engine mounting bracket RH.


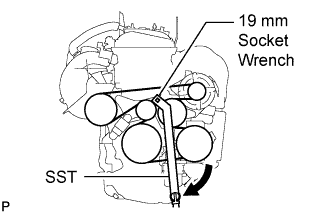
12. REMOVE V-RIBBED BELT

  1. A114351E03
    Using SST and a 19 mm socket wrench, loosen the V-ribbed belt tensioner arm clockwise, then remove the V-ribbed belt.
    SST
    09216-42010  

    NOTICE:
    1. Be sure to connect SST and the tools so that they are in line during use.
    2. When retracting the tensioner, turn it clockwise slowly for 3 seconds or more. Do not apply force rapidly.
    3. After the tensioner is fully retracted, do not apply more force than necessary.


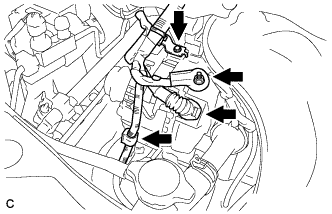
13. REMOVE GENERATOR ASSEMBLY

  1. A135170
    Disconnect the generator connector.

  1. Remove the nut and disconnect the wire harness from terminal B.

  1. Remove the bolt and wire harness clamp bracket.

  1. Remove the wire harness clamp.

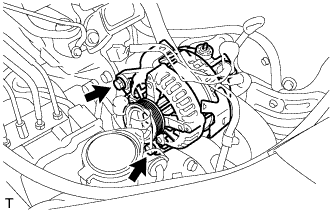
  1. A142104
    Remove the 2 bolts and generator assembly.


14. REMOVE VANE PUMP ASSEMBLY

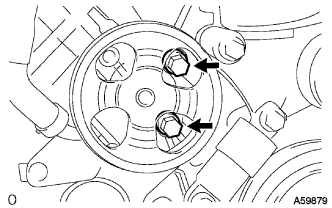
  1. A059879
    Disconnect the oil pressure switch connector.

  1. Loosen the 2 bolts and remove the vane pump from the engine.


15. REMOVE IGNITION COIL ASSEMBLY
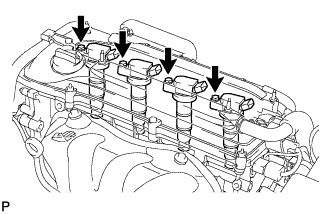
  1. Disconnect the 4 ignition coil connectors.

  1. A124400
    Remove the 4 bolts and 4 ignition coils.


16. DISCONNECT VENTILATION HOSE

17. DISCONNECT NO. 2 VENTILATION HOSE

18. REMOVE CYLINDER HEAD COVER SUB-ASSEMBLY

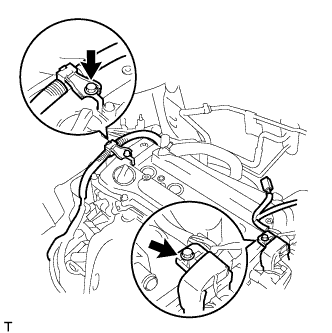
  1. A112210E01
    Remove the 2 bolts and disconnect the 2 engine wires.

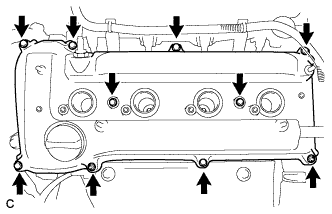
  1. A127550E02
    Remove the 8 bolts, 2 nuts, and the cylinder head cover.


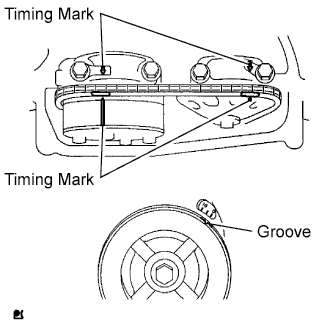
19. SET NO. 1 CYLINDER TO TDC/COMPRESSION

  1. A098345E09
    Turn the crankshaft pulley until its groove and the timing mark "0" of the timing chain cover are aligned.

  1. Check that each timing mark of the camshaft timing gear and sprocket is aligned with each timing mark located on the No. 1 and No. 2 bearing caps as shown in the illustration. If not, turn the crankshaft 1 revolution (360°) to align the timing marks as above.


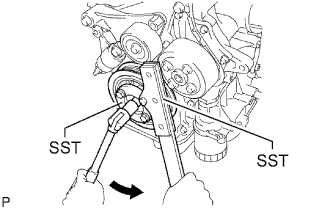
20. REMOVE CRANKSHAFT PULLEY

  1. A013697E02
    Using SST, hold the pulley in place and loosen the pulley bolt.
    SST
    09213-54015   (91651-60855)
    09330-00021  

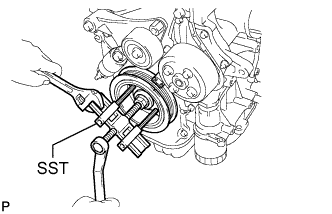
  1. A124860E01
    Using SST, remove the pulley bolt and pulley.
    SST
    09950-50013   (09951-05010, 09952-05010, 09953-05020, 09954-05021)
    09950-40011   (09957-04010)

    HINT:
    If necessary, remove the pulley and pulley bolt using SST.


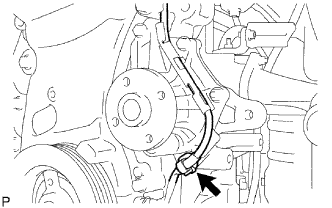
21. REMOVE CRANKSHAFT POSITION SENSOR

  1. A094516E01
    Remove the wire harness clamp.

  1. Separate the wire harness from the wire harness clamp bracket.
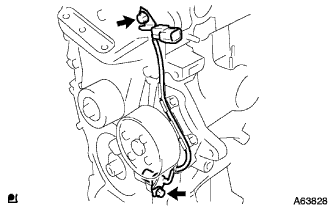
  1. A063828
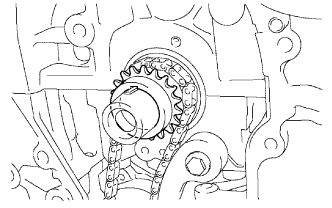
    Remove the 2 bolts and sensor.


22. REMOVE OIL PAN SUB-ASSEMBLY

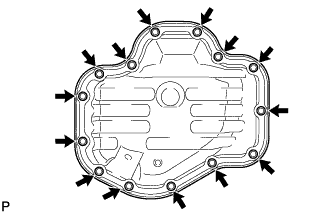
  1. A114333
    Remove the 12 bolts and 2 nuts.

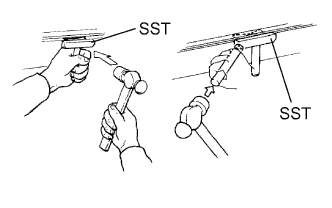
  1. A000019E05
    Insert the blade of SST between the crankcase and oil pan. Cut through the sealer and remove the oil pan.
    SST
    09032-00100  

    NOTICE:
    Be careful not to damage the contact surfaces of the crankcase, chain cover and oil pan.


23. REMOVE NO. 1 CHAIN TENSIONER ASSEMBLY

  1. A098348E01
    Remove the 2 nuts, tensioner and gasket.

    NOTICE:
    Do not turn the crankshaft without the chain tensioner.


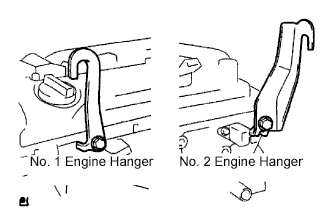
24. INSTALL ENGINE HANGERS

  1. A052507E05
    Install the No. 1 engine hanger and No. 2 engine hanger with the bolts as shown in the illustration.
    Part No.:
    No. 1 engine hanger
    12281-28010
    No. 2 engine hanger
    12282-28010
    Bolt
    91512-61020

    Torque:
    38 N*m{ 387 kgf*cm , 28 ft.*lbf }

  1. Attach the sling device to the engine hangers and chain block.


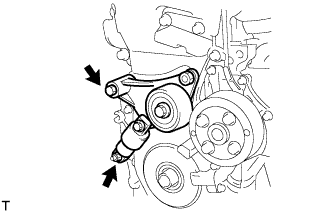
25. REMOVE V-RIBBED BELT TENSIONER ASSEMBLY
  1. Lift the engine upward using the chain block.

    NOTICE:
    Do not lift the engine more than necessary.

  1. A112212
    Remove the bolt, nut and V-ribbed belt tensioner.


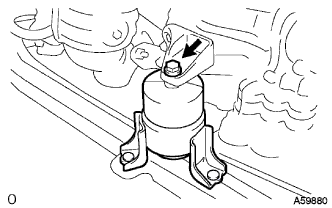
26. REMOVE ENGINE MOUNTING INSULATOR

  1. A059880
    Attach the engine chain hoist to the engine hangers.

    CAUTION:
    Do not attempt to hang the engine by hooking the chain to any other part.

  1. Remove the bolt and disconnect the engine mounting insulator FR.

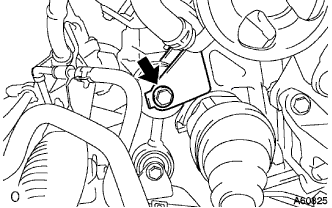
  1. A060825
    For manual transaxle:
    Remove the bolt and disconnect the engine lateral control rod.

  1. A138332
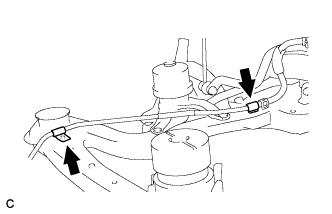
    Remove the 2 bolts and disconnect the steering gear return tube clamps from the frame.

  1. A059900
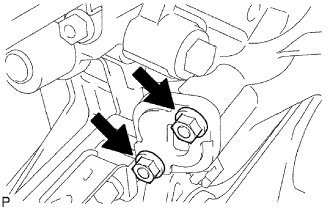
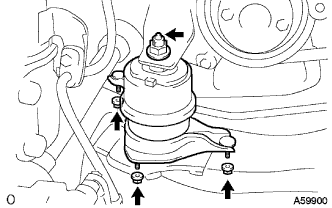
    Remove the 4 nuts from the engine mounting insulator RH.

  1. Raise the engine and remove the engine mounting insulator RH.


27. REMOVE ENGINE MOUNTING BRACKET RH

  1. A052481
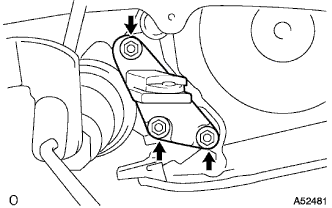
    Remove the 3 bolts and engine mounting bracket RH.


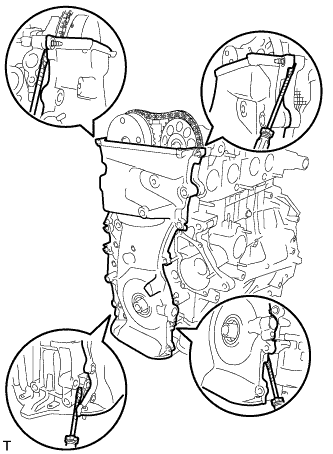
28. REMOVE TIMING CHAIN COVER SUB-ASSEMBLY

  1. A128178
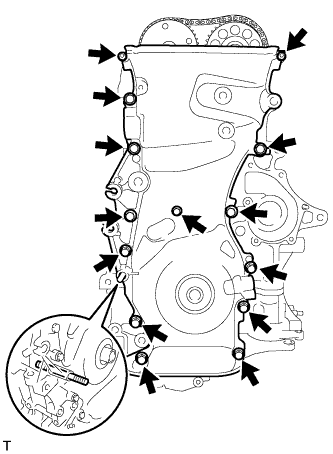
    Using a E10 "torx" socket, remove the stud bolt for the drive belt tensioner from the cylinder block.

  1. Remove the 12 bolts and 2 nuts.

  1. A128179
    Remove the timing chain cover by prying between the timing chain cover and cylinder head or cylinder block with a screwdriver.

    NOTICE:
    Be careful not to damage the contact surfaces of the timing chain cover, cylinder block and cylinder head.

    HINT:
    Tape the screwdriver tip before use.


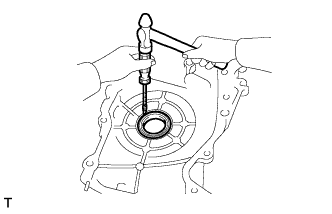
29. REMOVE TIMING GEAR CASE OR TIMING CHAIN CASE OIL SEAL

  1. A128180
    Using a screwdriver and a hammer, tap out the oil seal.

    HINT:
    Tape the screwdriver tip before use.


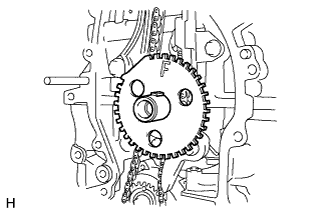
30. REMOVE NO. 1 CRANKSHAFT POSITION SENSOR PLATE

  1. A132571
    Remove the crankshaft position sensor plate.


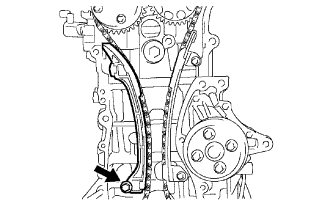
31. REMOVE CHAIN TENSIONER SLIPPER

  1. A125372
    Remove the bolt and chain tensioner slipper.


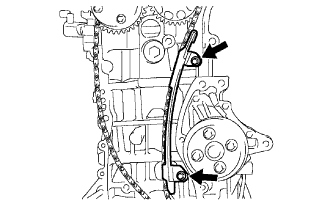
32. REMOVE NO. 1 CHAIN VIBRATION DAMPER

  1. A125371
    Remove the 2 bolts and chain vibration damper.


33. REMOVE TIMING CHAIN GUIDE

  1. A125373
    Remove the bolt and timing chain guide.


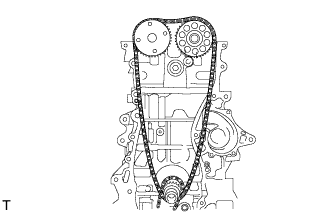
34. REMOVE CHAIN SUB-ASSEMBLY

  1. A128185
    Remove the chain sub-assembly.


35. REMOVE CRANKSHAFT TIMING SPROCKET

  1. A125374
    Remove the crankshaft timing sprocket.


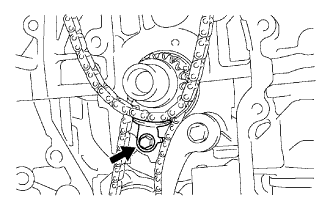
36. REMOVE NO. 2 CHAIN SUB-ASSEMBLY

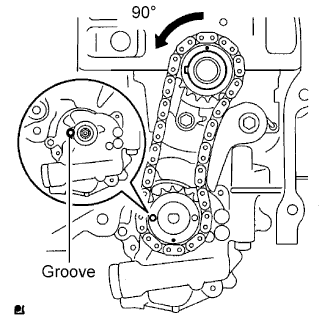
  1. A098351E01
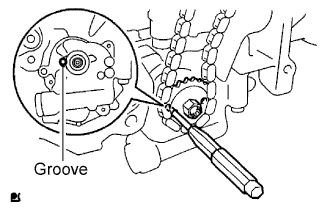
    Turn the crankshaft 90° counterclockwise to align the adjusting hole of the oil pump drive shaft gear with the groove of the oil pump.

  1. A098352E01
    Insert a 4 mm diameter bar into the adjusting hole of the oil pump drive shaft gear to lock the gear in position, and then remove the nut.

  1. B011415E03
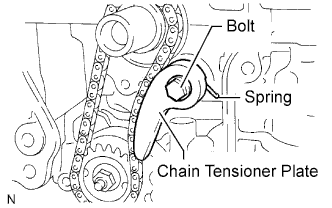
    Remove the bolt, chain tensioner plate and spring.

  1. A063847
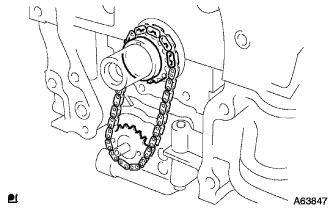
    Remove the chain tensioner, oil pump drive shaft gear, oil pump drive gear and chain.


37. REMOVE OIL PUMP ASSEMBLY

  1. B011673E01
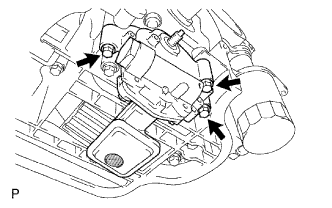
    Remove the 3 bolts, oil pump and gasket.

← REMOVAL (Jun 2006 – Sep 2006)REMOVAL (from Jun 2009) →