REMOVAL
Removal / installation · Vehicles built from Jun 2009
Versions by build date: Jun 2006 – May 2009 from Jun 2009
| 1.
REMOVE LUGGAGE COMPARTMENT FLOOR MAT (w/ Clearance Sonar System) |
|
| 2.
REMOVE SPARE WHEEL COVER CLAMP (w/ Clearance Sonar System) |
|
| 3.
REMOVE SPARE WHEEL COVER ASSEMBLY (w/ Clearance Sonar System) |
|
| 4.
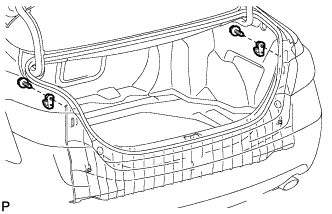
REMOVE NO. 1 LUGGAGE COMPARTMENT TRIM HOOK (w/ Clearance Sonar System)
|
 |
- Remove the 2 screws and the 2 No. 1 luggage compartment trim hooks.
| 5.
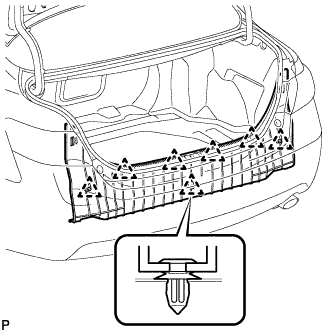
REMOVE REAR FLOOR FINISH PLATE (w/ Clearance Sonar System)
|
|
- Disengage the 7 clips and remove the rear floor finish plate.
| 6.
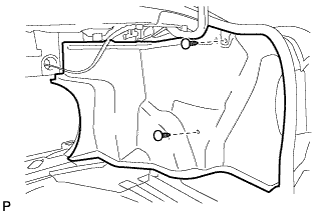
REMOVE LUGGAGE COMPARTMENT INNER TRIM COVER RH (w/ Clearance Sonar System)
|
|
- Remove the 2 clips and the luggage compartment inner trim cover RH.
| 7.
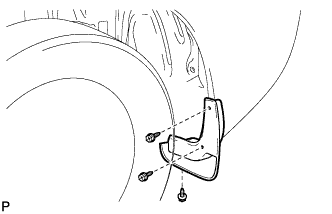
REMOVE REAR QUARTER PANEL MUDGUARD SUB-ASSEMBLY LH (w/o Rear Lower Spoiler) |
|
- Remove the 3 screws and rear quarter panel mudguard sub-assembly LH.
| 8.
REMOVE REAR QUARTER PANEL MUDGUARD SUB-ASSEMBLY RH (w/o Rear Lower Spoiler) |
|
- HINT:
- Use the same procedure for the RH side and LH side.
| 9.
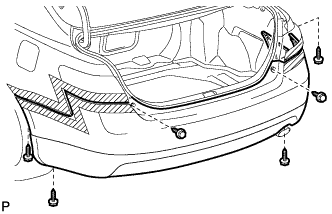
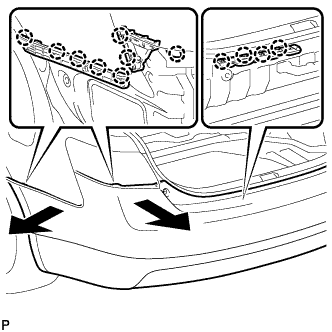
REMOVE REAR BUMPER ASSEMBLY (w/o Rear Lower Spoiler) |
|
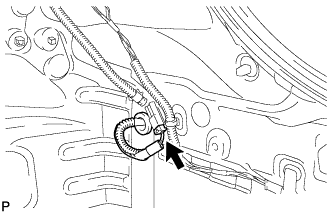
w/ Clearance Sonar System:
- Disconnect the connector.
Disengage the grommet.
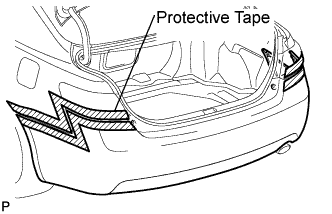
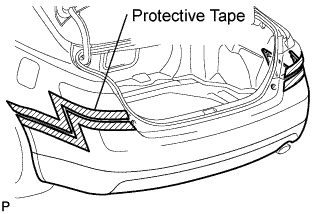
- Put protective tape around the rear bumper assembly.
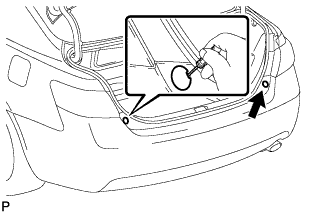
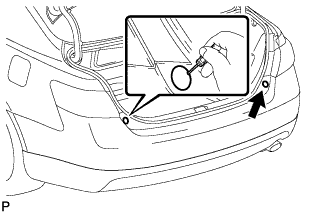
- Using a screwdriver, open the 2 rear bumper plates.
- HINT:
- Tape the screwdriver tip before use.
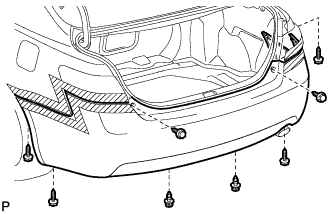
- Remove the 6 screws and 2 clips.
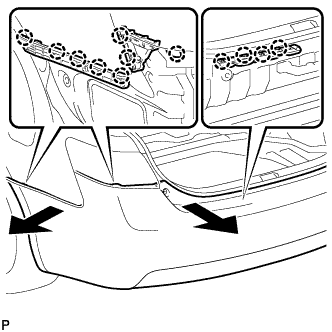
- Disengage the 12 claws and disconnect the rear bumper assembly as shown in the illustration.
- HINT:
- Use the same procedure for the RH side and LH side.
Remove the rear bumper assembly.
| 10.
REMOVE REAR FLOOR BOARD (w/ Rear Lower Spoiler) |
|
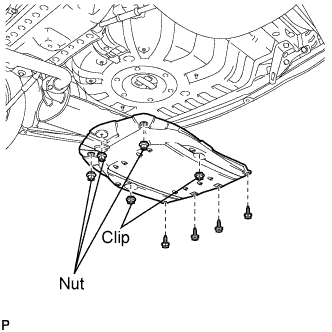
- Remove the 4 screws, 2 clips, 3 nuts and rear floor board.
| 11.
REMOVE REAR BUMPER ASSEMBLY (w/ Rear Lower Spoiler) |
|
w/ Clearance Sonar System:
- Disconnect the connector.
Disengage the grommet.
- Put protective tape around the rear bumper assembly.
- Using a screwdriver, open the 2 rear bumper plates.
- HINT:
- Tape the screwdriver tip before use.
- Remove the 6 screws.
- Disengage the 12 claws and disconnect the rear bumper assembly as shown in the illustration.
- HINT:
- Use the same procedure for the RH side and LH side.
Remove the rear bumper assembly.