REMOVAL
Removal / installation · Vehicles built from Jun 2009
| 1. REMOVE LUGGAGE COMPARTMENT DOOR COVER |

Using a clip remover, remove the 13 clips and luggage compartment door cover.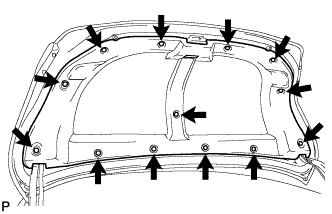

| 2. REMOVE LUGGAGE COMPARTMENT DOOR LOCK CYLINDER ASSEMBLY |
Disconnect the cable and connector.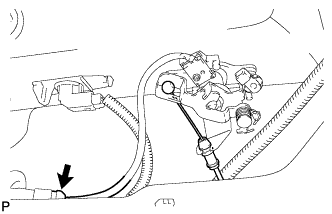
Remove the 2 nuts and the luggage compartment door lock cylinder assembly.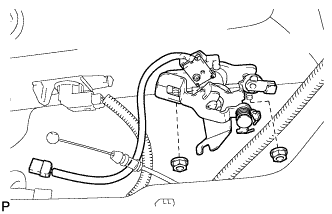
| 3. REMOVE LUGGAGE COMPARTMENT DOOR OUTSIDE GARNISH ASSEMBLY |
Put protective tape around the luggage compartment door outside garnish assembly.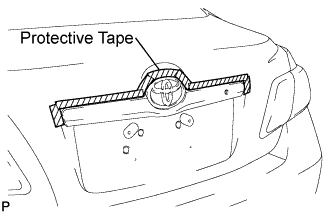
Remove the 3 nuts.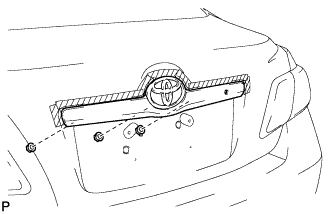
Using a moulding remover, disengage the 2 clips and remove the luggage compartment door outside garnish assembly.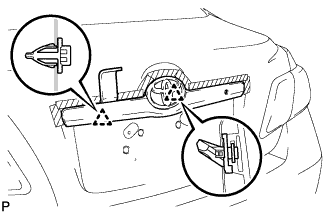
| 4. REMOVE REAR TELEVISION CAMERA ASSEMBLY (w/o Smart Entry and Start System) |
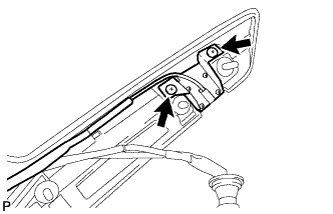
Remove the 2 screws and rear television camera assembly.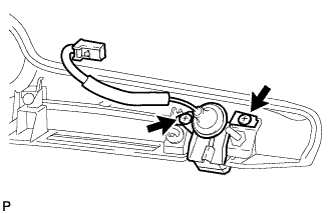
| 5. REMOVE REAR TELEVISION CAMERA ASSEMBLY (w/ Smart Entry and Start System) |
Disengage the 3 clamps, 3 guides and wire harness.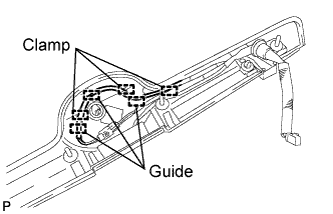
Disengage the clamp and wire harness.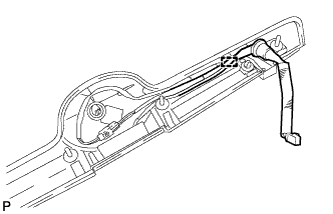
Separate the cushion tape enough to allow the connector to be disconnected.
- NOTICE:
- The cushion tape will be reused, so be careful not to damage it during removal.
Insert a 0.9 mm (0.0354 in.) spark plug gap gauge or similar tool to the side of the claw engagement portion as shown in the illustration, tilt up the claw on the connector and disconnect the camera connector.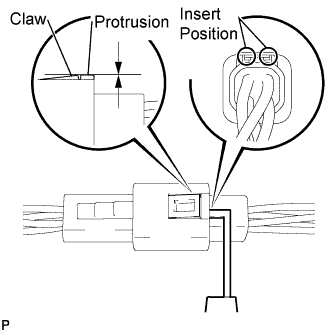
- NOTICE:
- Insert the gauge enough so that the claw becomes the same height as the protrusion of the connector housing. If the gauge is inserted too far, or if the notch on the claw is lifted directly using a screwdriver, the claw may be damaged.
- When the claw on the connector is damaged, replace the luggage door opening switch assembly.
- Insert the gauge enough so that the claw becomes the same height as the protrusion of the connector housing. If the gauge is inserted too far, or if the notch on the claw is lifted directly using a screwdriver, the claw may be damaged.
Remove the 2 screws and rear television camera assembly.