REMOVAL
Removal / installation · Vehicles built from Jun 2006
- HINT:
- Use the same procedures for the RH side and the LH side.
- The procedures listed below are for the LH side.
- Use the same procedures for the RH side and the LH side.
| 1. REMOVE REAR SEAT CUSHION ASSEMBLY (for Fixed Type) |

Detach the 2 front hooks of the seat cushion from the vehicle body.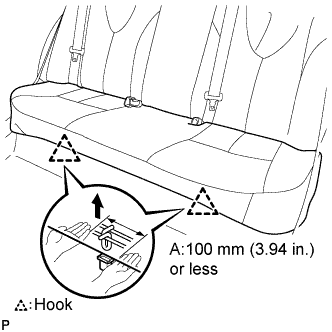

- NOTICE:
- Follow the instructions below carefully as the cushion frame can be deformed easily.
Choose a hook to detach first. Place your hands near the hook as shown in the illustration. Then lift the seat cushion to detach the hook.
Repeat the step above for the other hook.
Remove the rear seat cushion assembly.
| 2. REMOVE REAR SEAT HEADREST ASSEMBLY (for Fixed Type) |
| 3. REMOVE REAR CENTER SEAT HEADREST ASSEMBLY (for Fixed Type) |
| 4. REMOVE REAR SEATBACK ASSEMBLY (for Fixed Type) |
Remove the 3 rear seat belts from the 3 rear seat shoulder belt guides.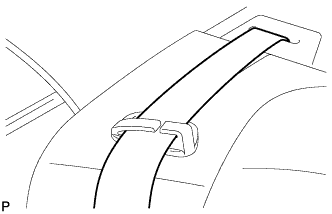
Remove the 4 bolts and rear seatback assembly.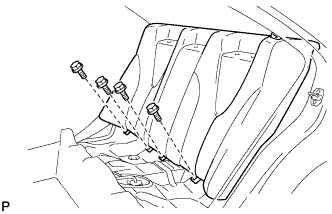
| 5. REMOVE REAR SEAT CUSHION ASSEMBLY (for Fold Down Seat Type) |
Detach the 2 front hooks of the seat cushion from the vehicle body.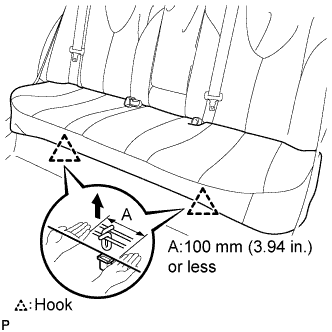
- NOTICE:
- Follow the instructions below carefully as the cushion frame can be deformed easily.
Choose a hook to detach first. Place your hands near the hook as shown in the illustration. Then lift the seat cushion to detach the hook.
Repeat the step above for the other hook.
Remove the seat cushion.
| 6. REMOVE REAR SEAT HEADREST ASSEMBLY (for Fold Down Seat Type) |
| 7. REMOVE REAR CENTER SEAT HEADREST ASSEMBLY (for Fold Down Seat Type) |
| 8. REMOVE SEPARATE TYPE REAR SEATBACK ASSEMBLY LH (for Fold Down Seat Type) |
Remove the 2 bolts and separate type rear seatback assembly LH.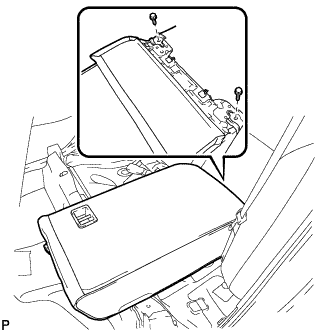
| 9. REMOVE SEPARATE TYPE REAR SEATBACK ASSEMBLY RH (for Fold Down Seat Type) |
Remove the 2 bolts and separate type rear seatback assembly RH.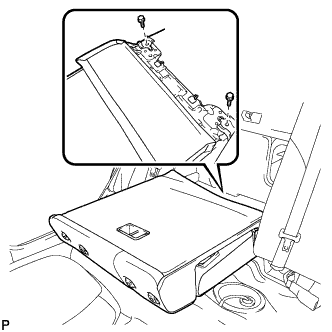
| 10. REMOVE REAR SIDE SEATBACK ASSEMBLY LH (for Fold Down Seat Type) |
Remove the bolt and rear side seatback assembly LH.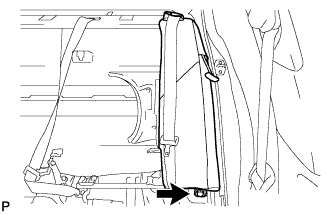
| 11. REMOVE REAR SIDE SEATBACK ASSEMBLY RH (for Fold Down Seat Type) |
- HINT:
- Use the same procedures for the RH side and LH side.
| 12. REMOVE REAR WHEEL |
| 13. SEPARATE REAR STABILIZER LINK ASSEMBLY |
Support the rear axle carrier with a jack.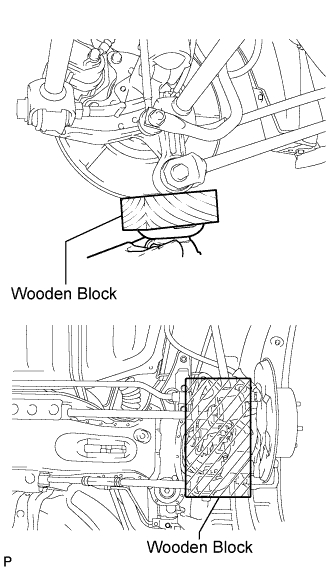
Remove the nut and separate the rear stabilizer link assembly from the rear shock absorber.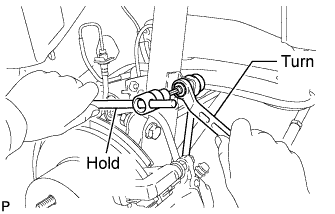
- HINT:
- If the ball joint turns together with the nut, use a hexagon wrench (5 mm) to hold the stud.
| 14. SEPARATE REAR SPEED SENSOR |
Remove the 2 bolts, and disconnect the rear brake flexible hose and rear speed sensor from the rear shock absorber with coil spring.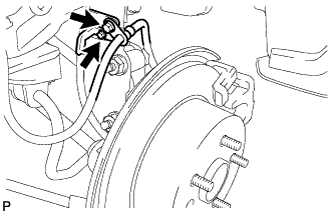
- NOTICE:
- Be sure to remove the rear speed sensor from the rear shock absorber with coil spring.
| 15. REMOVE NO. 1 REAR SUSPENSION SUPPORT COVER |
Using a screwdriver, disengage the 4 claws and remove the No. 1 rear suspension support cover.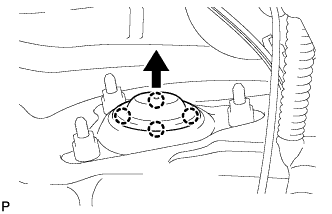
| 16. REMOVE REAR SHOCK ABSORBER WITH COIL SPRING |
Loosen the lock nut of the rear shock absorber with coil spring.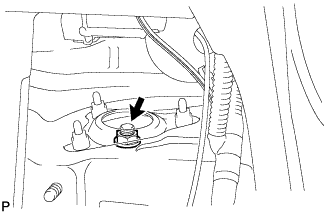
- NOTICE:
- Do not remove the lock nut.
- Only loosen the nut when disassembling the rear shock absorber with coil spring.
- Do not remove the lock nut.
Remove the 3 nuts on the upper side of the rear shock absorber with coil spring.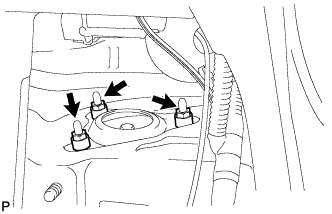
Remove the 2 nuts on the lower side of the rear shock absorber with coil spring.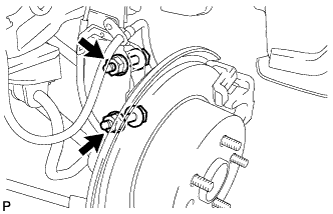
- NOTICE:
- When removing the nuts, keep the bolts from rotating.
- Keep one bolt inserted to secure the hub and disc rotor.
- When removing the nuts, keep the bolts from rotating.
Lower the rear axle carrier, and remove the 2 bolts on the lower side of the rear shock absorber with coil spring.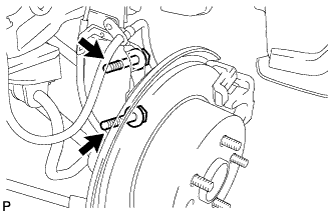
- NOTICE:
- Make sure that the rear speed sensor is disconnected from the rear shock absorber with coil spring.