Removal / installation · Vehicles built Oct 2006 – May 2009
Versions by build date: Oct 2006 – May 2009from Jun 2009
1.
DISCONNECT CABLE FROM NEGATIVE BATTERY TERMINAL
2.
DRAIN ENGINE COOLANT
NOTICE:
Do not remove the radiator cap sub-assembly while the engine and radiator are still hot. Pressurized, hot engine coolant and steam may be released and cause serious burns.
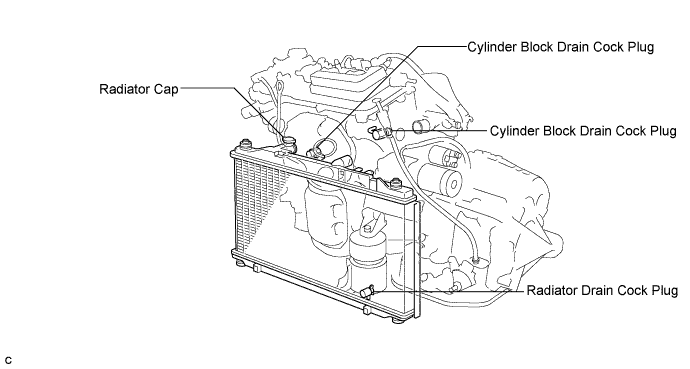
Remove the radiator cap sub-assembly from the radiator assembly.
Loosen the radiator drain cock plug and 2 cylinder block drain cock plugs, then drain the coolant.
HINT:
Collect the coolant in a container and dispose of it according to the regulations in your area.
3.
REMOVE WINDSHIELD WIPER MOTOR AND LINK ASSEMBLY
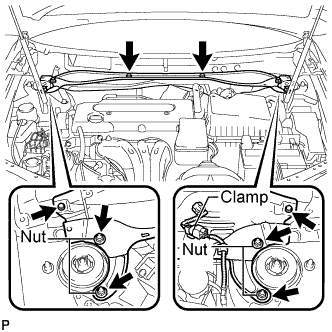
Remove the 4 nuts, the 4 bolts and the cowl top outer front panel sub-assembly.
5.
REMOVE V-BANK COVER SUB-ASSEMBLY
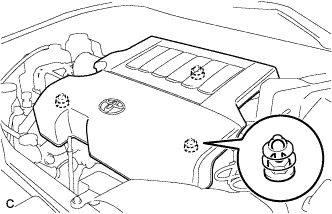
Hold the front of the V-bank cover and raise it to disengage the 2 clips on the front of the cover. Continue to raise the cover to disengage the clip on the rear of the cover and remove the cover.
NOTICE:
Attempting to disengage both front and rear clips at the same time may cause the cover to break.
6.
REMOVE AIR CLEANER CAP SUB-ASSEMBLY
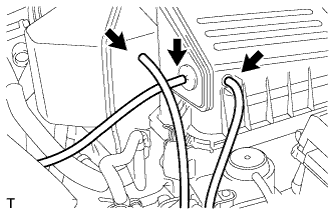
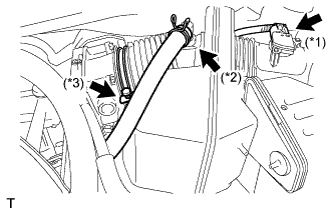
Disconnect the 3 vacuum hoses.
Disconnect the mass air flow meter connector (*1).
Disconnect the No. 2 ventilation hose (*2).
Disconnect the hose band (*3).
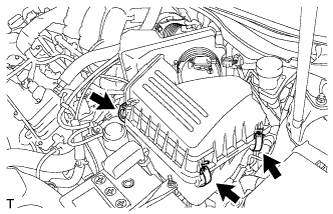
Disconnect the 3 bands, and remove the air cleaner cap sub-assembly.
7.
REMOVE INTAKE AIR SURGE TANK ASSEMBLY
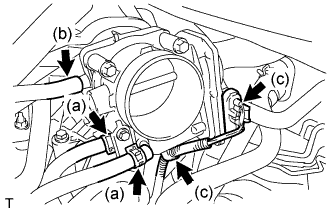
Disconnect the 2 water by-pass hoses from the throttle with motor body assembly.
Disconnect the vapor feed hose.
Disconnect the throttle with motor body assembly connector and clamp.
Disconnect the No. 1 ventilation hose.
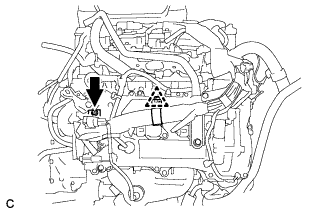
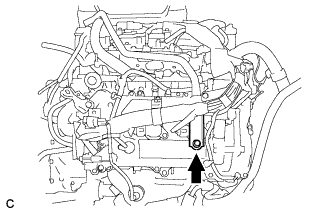
Remove the bolt and vacuum hose clamp.
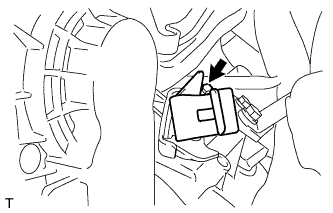
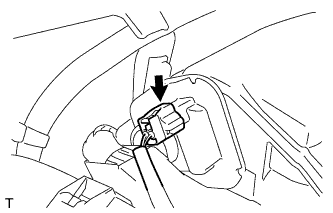
Disconnect the connector.
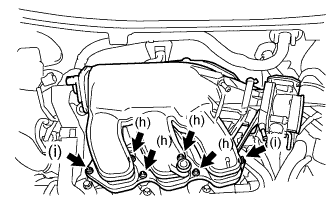
Remove the 4 bolts, No. 1 surge tank stay and throttle body bracket.
Using a 5 mm socket hexagon wrench, remove the 4 bolts.