2006-2011 Camry Aurion · Service Manual ENGINE

INSTALLATION

Removal / installation · Vehicles built Oct 2006 – May 2009

Versions by build date: Oct 2006 – May 2009 from Jun 2009


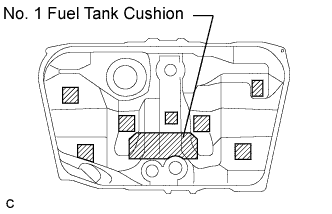
1. INSTALL NO. 1 FUEL TANK CUSHION

  1. A136010E01
    Install a new No. 1 fuel tank cushion to the fuel tank.


2. INSTALL NO. 2 FUEL TANK CUSHION
  1. Install 7 new No. 2 fuel tank cushions to the fuel tank.


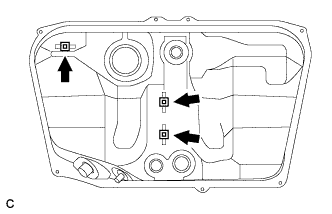
3. INSTALL NO. 4 FUEL TUBE CLAMP

  1. A136011
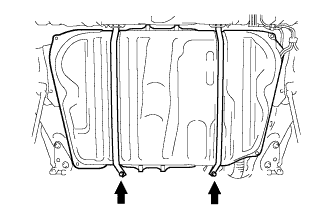
    Install the 3 clamps.


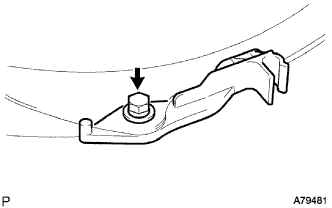
4. INSTALL FUEL MAIN TUBE SUPPORT

  1. A079481
    Install the fuel main tube support with the bolt.

    Torque:
    5.4 N*m{ 55 kgf*cm , 48 in.*lbf }


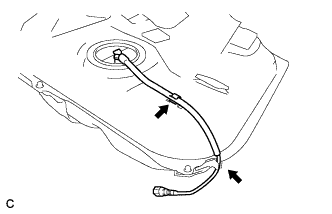
5. INSTALL FUEL PUMP TUBE SUB-ASSEMBLY

  1. A136006
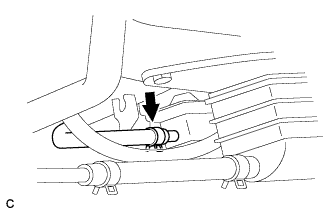
    Install the fuel pump tube to the fuel main tube support and the clamp.


6. INSTALL FUEL CUT OFF WITH TUBE VALVE ASSEMBLY
  1. Install 2 new gaskets to the fuel tank.

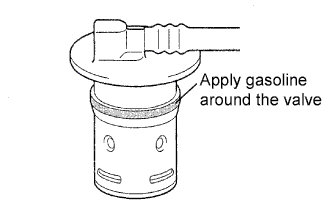
  1. A060494E02
    Apply a light coat of spindle oil or gasoline around 2 new fuel cut off valves as shown in the illustration, and carefully insert them into the tank.
    Be careful not to drop the gasket into the tank.

  1. Check that the fuel cut off valve is fully inserted.


7. INSTALL NO. 3 FUEL TANK PROTECTOR

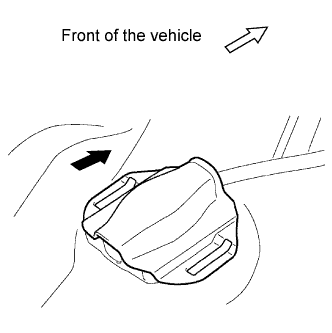
  1. A184697E01
    Install the No. 3 fuel tank protector by sliding it as shown in the illustration.


8. INSTALL NO. 2 FUEL TANK PROTECTOR

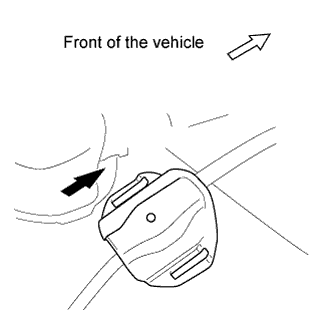
  1. A184698E01
    Install the No. 2 fuel tank protector by sliding it as shown in the illustration.


9. INSTALL FUEL TANK ASSEMBLY

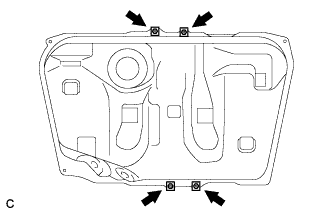
  1. A136004
    Install the 4 clip nuts.

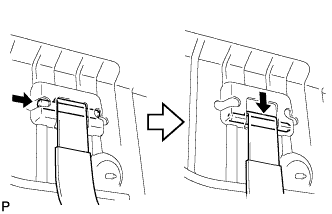
  1. A129491
    Install the 2 fuel tank bands with the 2 pins.

  1. Set the fuel tank assembly onto the transmission jack.

  1. A138644E04
    Raise the transmission jack so that the fuel tank vent hose can be connected as shown in the illustration.

    NOTICE:
    Slowly raise the jack not to drop the fuel tank assembly.

  1. A138643E04
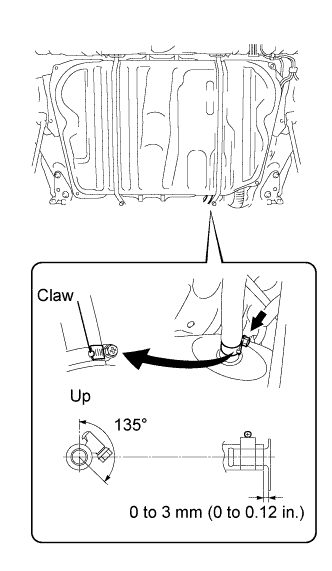
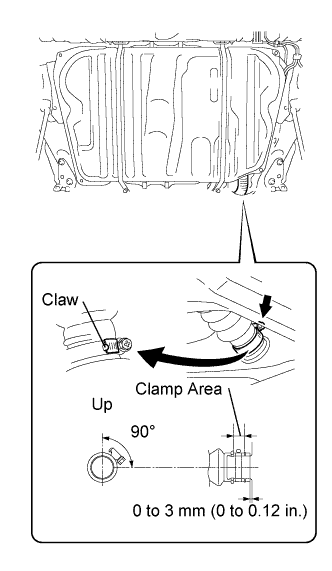
    Connect the fuel tank to filler pipe hose and tighten the hose clamp as shown in the illustration.

  1. A138642
    Tighten the 2 set bolts of the fuel tank bands.

    Torque:
    39 N*m{ 400 kgf*cm , 29 ft.*lbf }

  1. A135227
    Connect the fuel emission hose to the charcoal canister.

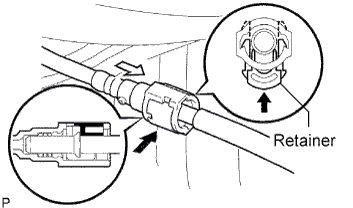
  1. A081598E03
    Connect the fuel pump tube.

    1. Push the fuel connector into the pipe and push up the retainer so that the claws engage.

      NOTICE:
      1. Before connecting the tube, make sure that it is not damaged. Make sure that there is no dirt present on the connecting surfaces.
      2. After connecting, check if the fuel tube connector and the pipe are securely connected by pulling on them.


10. INSTALL FUEL TANK PROTECTOR LOWER CENTER

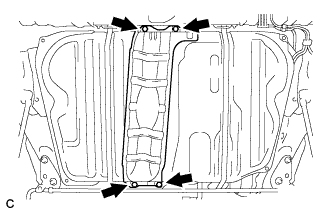
  1. A135224
    Install the 4 bolts and fuel tank protector.

    Torque:
    5.4 N*m{ 55 kgf*cm , 48 in.*lbf }


11. INSTALL REAR STABILIZER BAR NO. 1 BRACKET

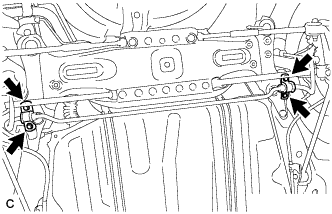
  1. A136008E01
    Install the 2 rear stabilizer bar No. 1 brackets with the 4 bolts.

    Torque:
    31 N*m{ 316 kgf*cm , 23 ft.*lbf }


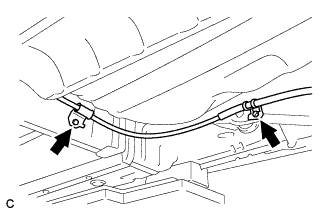
12. INSTALL NO. 3 PARKING BRAKE CABLE ASSEMBLY

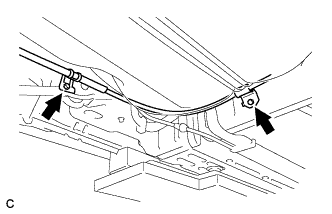
  1. A135223
    Install the No. 3 parking brake cable assembly with the bolt and nut.

    Torque:
    Bolt:
    6.0 N*m{ 61 kgf*cm , 53 in.*lbf }
    Nut:
    8.5 N*m{ 87 kgf*cm , 75 in.*lbf }


13. INSTALL NO. 2 PARKING BRAKE CABLE ASSEMBLY

  1. A135222
    Install the No. 2 parking brake cable assembly with the bolt and nut.
    Torque:
    Bolt:
    6.0 N*m{ 61 kgf*cm , 53 in.*lbf }
    Nut:
    8.5 N*m{ 87 kgf*cm , 75 in.*lbf }


14. INSTALL CENTER EXHAUST PIPE ASSEMBLY

HINT:
Click here.


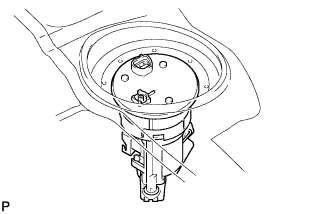
15. INSTALL FUEL SUCTION TUBE ASSEMBLY WITH PUMP AND GAUGE

  1. A129481
    Install a new gasket to the fuel suction tube.

  1. Install the fuel suction tube.

    NOTICE:
    1. Do not damage the fuel pump filter.
    2. Be careful that the arm of the sender gauge does not bend.


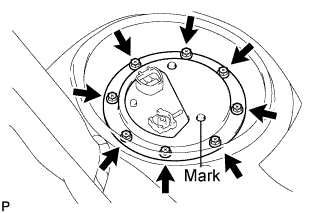
16. INSTALL FUEL TANK VENT TUBE SET PLATE

  1. A129480E01
    Align the mark of the set plate with the fuel suction tube.

  1. Install the set plate with the 8 bolts.

    Torque:
    5.9 N*m{ 60 kgf*cm , 52 in.*lbf }


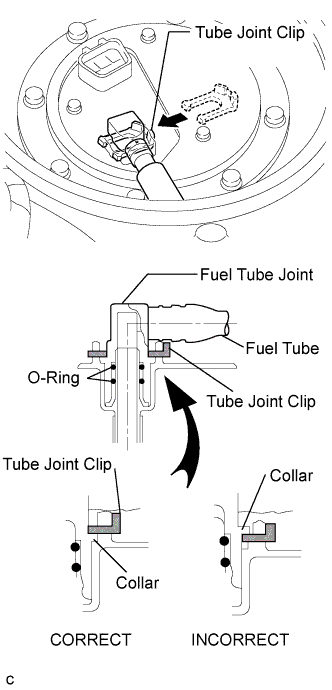
17. CONNECT FUEL PUMP TUBE SUB-ASSEMBLY

  1. A136247E01
    Install the fuel pump tube with the tube joint clip.

    NOTICE:
    1. Check that there are no scratches or foreign objects on the connecting part.
    2. Check that the fuel tube joint is inserted securely.
    3. Check that the tube joint clip is on the collar of the fuel tube joint.
    4. After installing the tube joint clip, check that the fuel tube joint cannot be pulled off.


18. ADD FUEL

19. CONNECT CABLE TO NEGATIVE BATTERY TERMINAL

20. INSPECT FOR FUEL LEAK

HINT:
Click here.


21. INSPECT FOR EXHAUST GAS LEAK

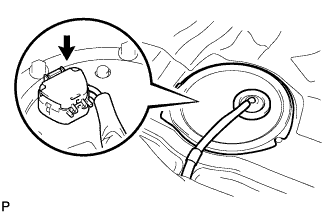
22. INSTALL REAR FLOOR SERVICE HOLE COVER

  1. A129478
    Connect the fuel pump connector.

  1. Install the rear floor service hole cover with new butyl tape.


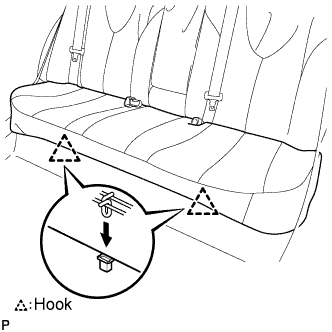
23. INSTALL REAR SEAT CUSHION ASSEMBLY (for Fold Down Seat Type)

  1. B140584E01
    Attach the front hooks of the bench type rear seat cushion assembly to the vehicle body.

  1. Confirm that the seat cushion is firmly installed.

    NOTICE:
    When installing the bench type rear seat cushion assembly, make sure that the seat belt buckle is not under the bench type rear seat cushion assembly.


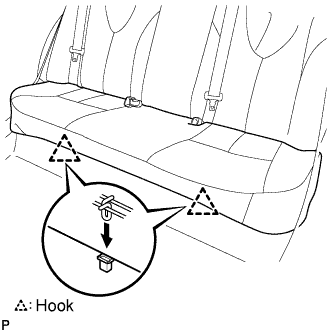
24. INSTALL REAR SEAT CUSHION ASSEMBLY (for Fixed Seat Type)

  1. B140589E01
    Attach the 2 front hooks of the seat cushion to the vehicle body.

  1. Confirm that the seat cushion is firmly installed.

    NOTICE:
    When installing the seat cushion, make sure the seat belt buckle is not under the seat cushion.

← REMOVAL (from Oct 2006)INSTALLATION (from Jun 2009) →