Removal / installation · Vehicles built Oct 2006 – May 2009
Versions by build date: Oct 2006 – May 2009from Jun 2009
1.
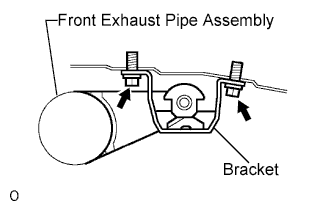
INSTALL REAR EXHAUST PIPE NO. 1 SUPPORT BRACKET
Install the rear support bracket with the 2 bolts.
Torque:
33 N*m{
337 kgf*cm
, 24 ft.*lbf
}
NOTICE:
Be sure to install the bracket in the correct direction.
2.
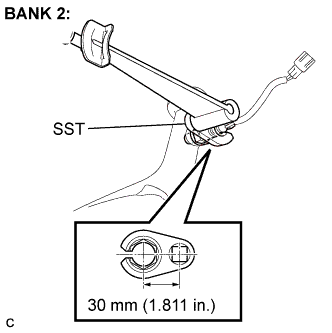
INSTALL HEATED OXYGEN SENSOR (for Bank 2)
Using SST, install the heated oxygen sensor.
SST
09224-00010
Torque:
44 N*m{
449 kgf*cm
, 32 ft.*lbf
}
NOTICE:
The torque shown above should be used for tightening without using SST. When the SST is used for tightening, the torque should be calculated based on the length of the SST (Click here).
3.
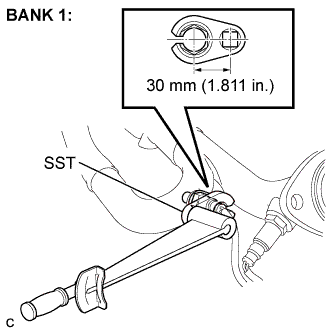
INSTALL HEATED OXYGEN SENSOR (for Bank 1)
Using SST, install the heated oxygen sensor.
SST
09224-00010
Torque:
44 N*m{
449 kgf*cm
, 32 ft.*lbf
}
NOTICE:
The torque shown above should be used for tightening without using SST. When the SST is used for tightening, the torque should be calculated based on the length of the SST (Click here).
4.
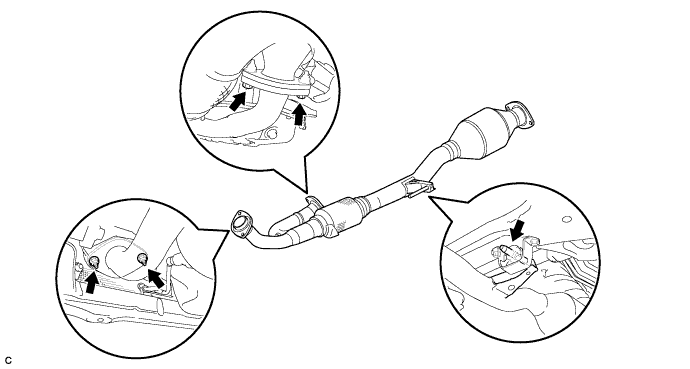
INSTALL EXHAUST FRONT PIPE ASSEMBLY
Install 2 new gaskets to the exhaust front pipe.
Install the exhaust front pipe to the exhaust manifolds with the 2 nuts and 2 bolts.
Torque:
62 N*m{
632 kgf*cm
, 46 ft.*lbf
}
5.
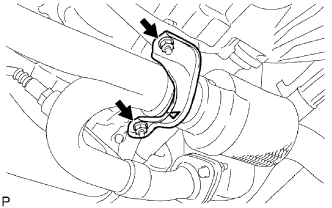
INSTALL FRONT EXHAUST PIPE NO. 1 SUPPORT BRACKET
Install the front support brackets with the 2 nuts.
Torque:
33 N*m{
337 kgf*cm
, 24 ft.*lbf
}
NOTICE:
Be sure to install the support brackets in the correct direction.
6.
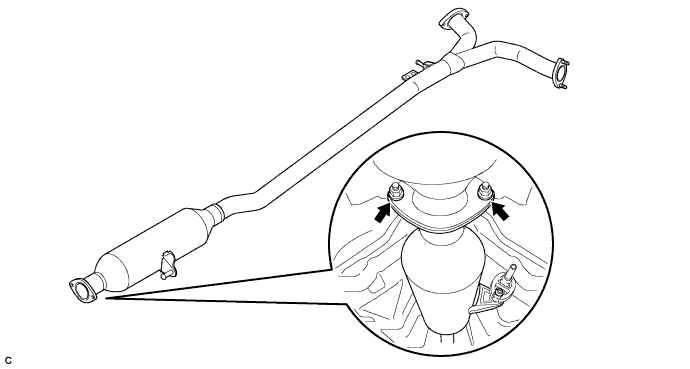
INSTALL CENTER EXHAUST PIPE ASSEMBLY
Install a new gasket to the center exhaust pipe assembly.
Install the center exhaust pipe to the exhaust front pipe with the 2 nuts and 2 bolts.
Torque:
56 N*m{
571 kgf*cm
, 41 ft.*lbf
}
7.
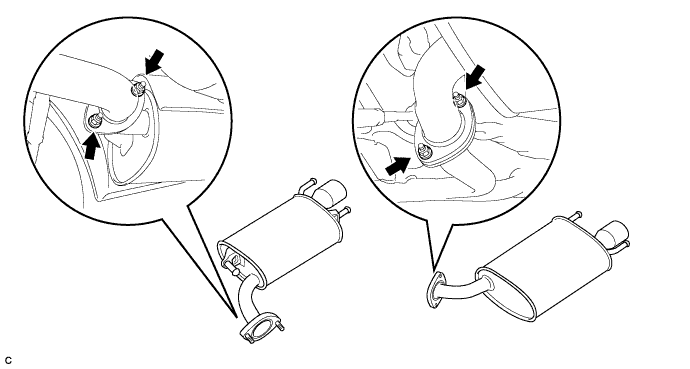
INSTALL EXHAUST TAIL PIPE ASSEMBLY
Install 2 new gaskets to the exhaust tail pipes.
Install the 2 exhaust tail pipes with the 4 nuts.
Torque:
43 N*m{
438 kgf*cm
, 32 ft.*lbf
}
8.
INSPECT FOR EXHAUST GAS LEAK
If gas is leaking, tighten the areas necessary to stop the leak. Replace the damaged parts as necessary.