DISASSEMBLY
Removal / installation · Vehicles built Jun 2006 – Sep 2006
Versions by build date: Jun 2006 – Sep 2006 Oct 2006 – May 2009 from Jun 2009
- NOTICE:
- Wear protective gloves. Sharp areas on the seat frame and adjuster may injure your hands.
| 1.
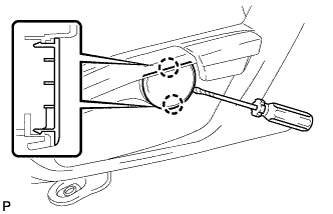
REMOVE VERTICAL ADJUSTER COVER LH (for Driver Seat) |
 |
- Using a screwdriver, disengage the 2 claws and remove the vertical adjuster cover LH.
- HINT:
- Tape the screwdriver tip before use.
| 2.
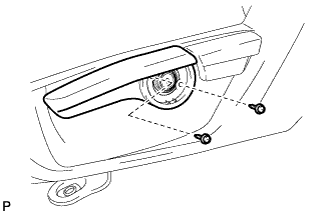
REMOVE VERTICAL ADJUSTING HANDLE (for Driver Seat) |
|
- Remove the 2 screws and vertical adjusting handle.
| 3.
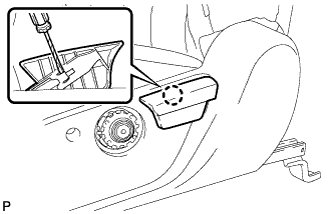
REMOVE RECLINING ADJUSTER RELEASE HANDLE |
|
- Lift the reclining adjuster release handle.
Using a screwdriver, disengage the claw and remove the reclining adjuster release handle.
- HINT:
- Tape the screwdriver tip before use.
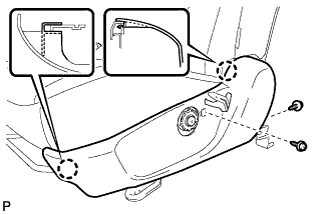
| 4.
REMOVE FRONT SEAT CUSHION SHIELD |
|
- Disengage the 2 hooks.
- Remove the 2 screws.
Disengage the 2 claws and separate the front seat cushion shield.
Disconnect the connector from the front power seat lumbar switch. (w/ lumber support)
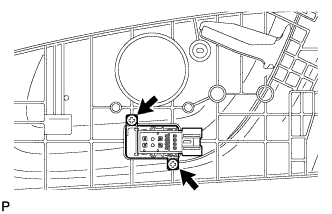
| 5.
REMOVE FRONT POWER SEAT LUMBAR SWITCH (w/ Lumbar Support) |
|
- Remove the 2 screws and front power seat lumbar switch.
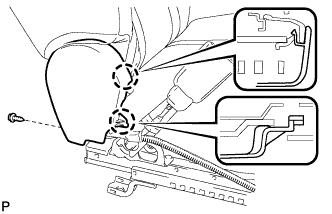
| 6.
REMOVE FRONT INNER SEAT CUSHION SHIELD |
|
- Remove the screw.
Disengage the 2 claws and remove the front inner seat cushion shield.
| 7.
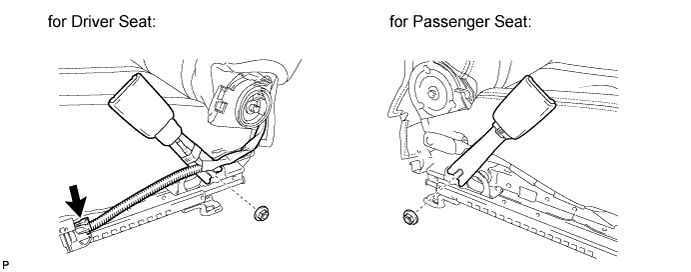
REMOVE FRONT SEAT INNER BELT ASSEMBLY
|
|
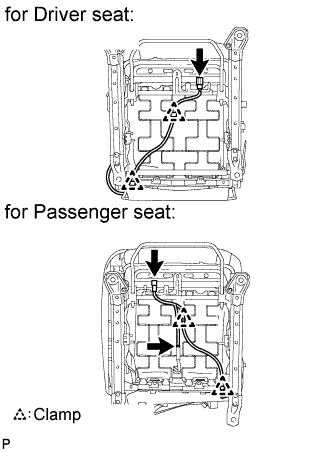
- for LHD:
Disengage the 2 hooks.
- Disconnect the connectors and disengage each clamp.
Disconnect the connector. (for Driver seat)
Remove the nut and front seat inner belt assembly.
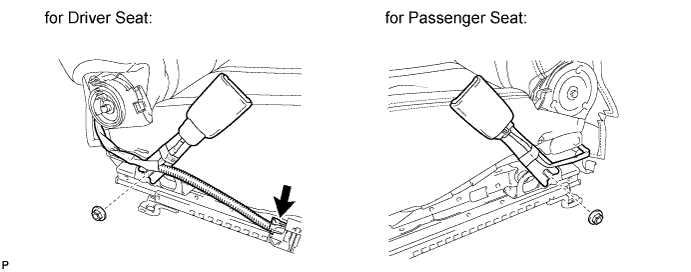

- for RHD:
Disengage the 2 hooks.
- Disconnect the connector and disengage the 2 clamps. (for Driver seat)
Disconnect the connector. (for Driver seat)
Remove the nut and front seat inner belt assembly.
| 8.
REMOVE FRONT SEAT CUSHION ASSEMBLY |
|
- Disengage the clamp.
Disengage the hooks and remove the front seat cushion assembly.
| 9.
REMOVE FRONT SEPARATE TYPE SEAT CUSHION COVER |
|
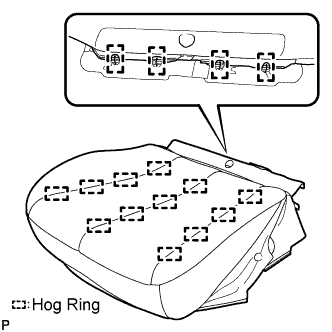
- Remove the 16 hog rings and front separate type seat cushion cover.
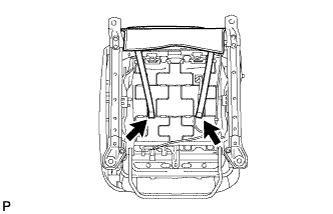
| 10.
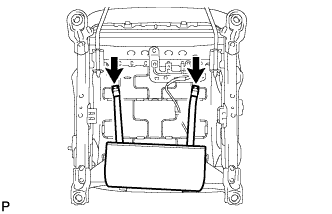
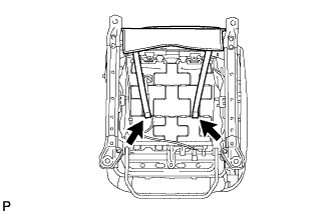
REMOVE FRONT SEATBACK BOARD SUB-ASSEMBLY |
|
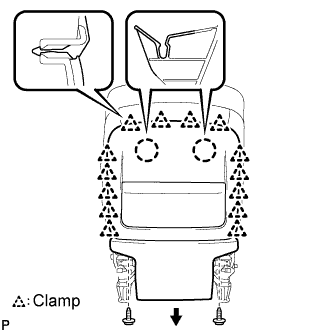
- Remove the 2 screws.
Disconnect the 14 clamps and front separate type seatback cover.
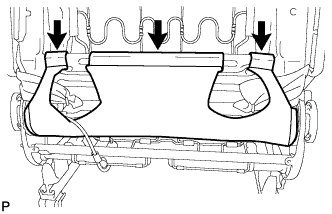
Pull the seatback board in the direction indicated by the arrow in the illustration to detach the 2 claws. Then, remove the seatback board.
| 11.
REMOVE FRONT SEAT HEADREST SUPPORT |
|
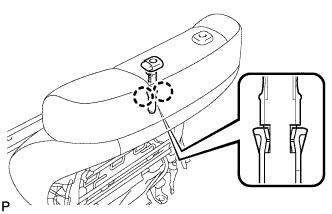
- Detach the 2 claws and remove the headrest support.
- HINT:
- Use the same procedure for the RH side and LH side.
| 12.
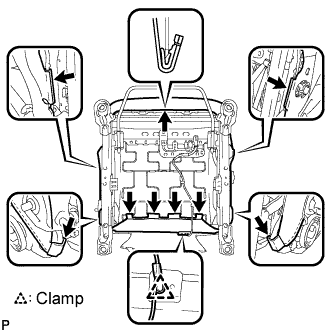
REMOVE FRONT SEATBACK ASSEMBLY (w/o Airbag System) |
|
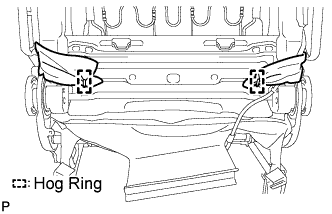
- Disengage the 3 hooks.
- Remove the 2 hog rings and front seatback assembly.
| 13.
REMOVE FRONT SEATBACK ASSEMBLY (w/ Airbag System) |
|
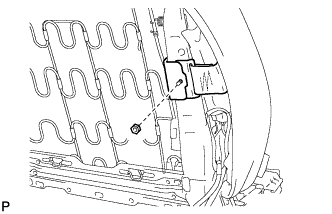
- Disengage the 3 hooks.
- Remove the 2 hog rings.
- Remove the nut and separate the 2 brackets.
Remove the front seatback assembly.
| 14.
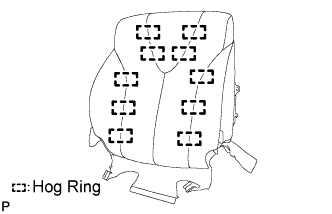
REMOVE FRONT SEPARATE TYPE SEATBACK COVER |
|
- Remove the 10 hog rings and front separate type seatback cover.
| 15.
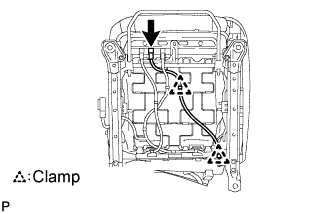
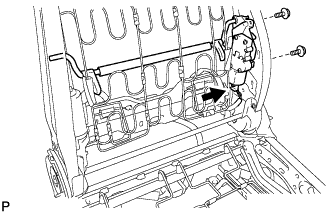
REMOVE LUMBAR SUPPORT ADJUSTER ASSEMBLY (w/ Lumbar Support) |
|
- Disconnect the connector.
Remove the 2 screws and lumbar support adjuster assembly.
| 16.
REMOVE LOWER RECLINING ADJUSTER INSIDE COVER LH |
|
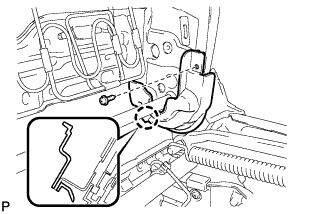
Disconnect the clamp.
- Remove the screw.
Disengage the claw and remove the lower reclining adjuster inside cover LH.
| 17.
REMOVE LOWER RECLINING ADJUSTER INSIDE COVER RH |
|
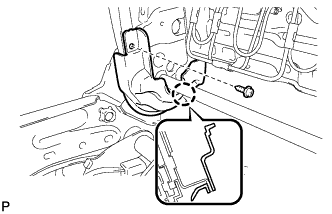
- Remove the screw.
Disengage the claw and remove the lower reclining adjuster inside cover RH.
| 18.
REMOVE UPPER RECLINING ADJUSTER INSIDE COVER LH |
|
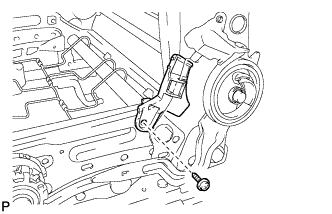
- Remove the screw and upper reclining adjuster inside cover LH.
| 19.
REMOVE UPPER RECLINING ADJUSTER INSIDE COVER RH |
|
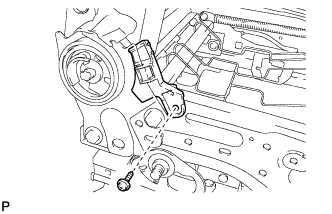
- Remove the screw and upper reclining adjuster inside cover RH.
| 20.
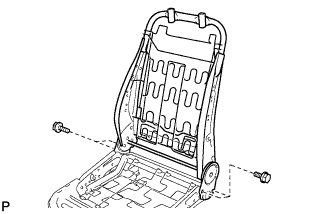
REMOVE FRONT SEPARATE TYPE SEATBACK SPRING ASSEMBLY |
|
- Remove the 4 bolts and front separate type seatback spring assembly.
| 21.
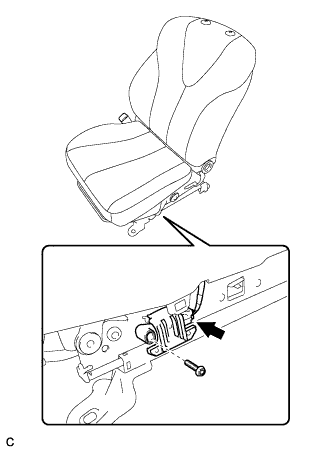
REMOVE SEAT POSITION SENSOR
|
|
- Disconnect the connector.
Using a "TORX" socket (T30), remove the "TORX" screw and seat position sensor with the seat slide position sensor protector.
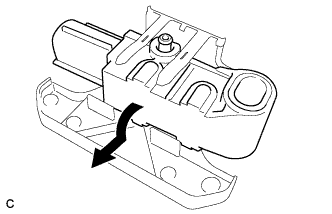
- Remove the seat position sensor from the seat slide position sensor protector as shown in the illustration.