REMOVAL
Removal / installation · Vehicles built from Jun 2009
| 1. DISCONNECT CABLE FROM NEGATIVE BATTERY TERMINAL (for Manual Seat) |

- CAUTION:
- Wait at least 90 seconds after disconnecting the cable from the negative (-) battery terminal to disable the SRS system.
| 2. REMOVE FRONT SEAT HEADREST ASSEMBLY (for Manual Seat) |
| 3. REMOVE OUTER SEAT TRACK BRACKET COVER RH (for Manual Seat) |
Move the front passenger's seat assembly fully forward by operating the slide handle.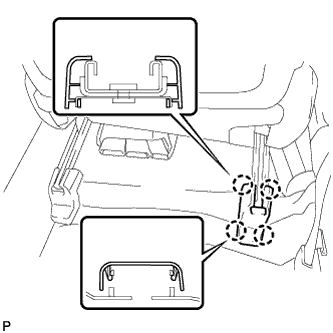

Using a screwdriver, disengage the 4 claws and remove the outer seat track bracket cover.
- HINT:
- Tape the screwdriver tip before use.
| 4. REMOVE INNER SEAT TRACK BRACKET COVER RH (for Manual Seat) |
Using a screwdriver, disengage the 4 claws and remove the inner seat track bracket cover.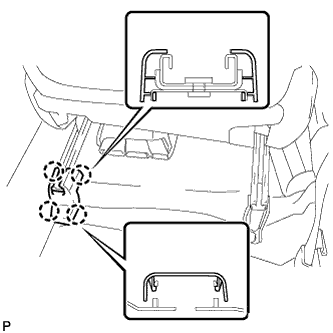
- HINT:
- Tape the screwdriver tip before use.
| 5. REMOVE FRONT SEAT ASSEMBLY RH (for Manual Seat) |
Move the front passenger's seat assembly to the rearmost position by operating the slide handle.
Remove the 2 bolts on the front seat track bracket.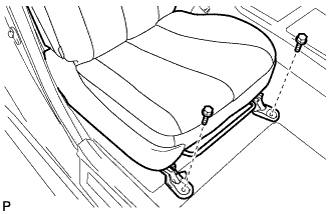
Move the front passenger's seat assembly fully forward by operating the slide handle.
Remove the 2 bolts on the rear seat track bracket.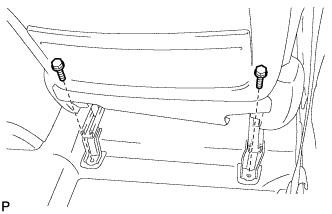
Move the front passenger's seat assembly to the center position and adjust the seatback to the vertical position by operating the slide and reclining adjuster release handle.
Disconnect the connectors and clamp.
Remove the front passenger's seat assembly.
| 6. REMOVE FRONT SEAT HEADREST ASSEMBLY (for Power Seat) |
| 7. REMOVE OUTER SEAT TRACK BRACKET COVER RH (for Power Seat) |
Move the front passenger's seat assembly fully forward by operating the slide and vertical power seat switch knob.
Using a screwdriver, disengage the 4 claws and remove the outer seat track bracket cover.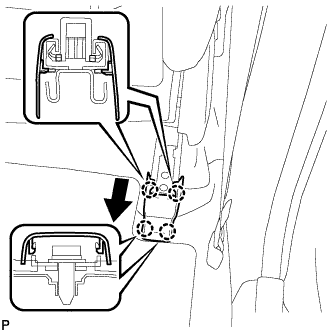
- HINT:
- Tape the screwdriver tip before use.
| 8. REMOVE INNER SEAT TRACK BRACKET COVER RH (for Power Seat) |
Using a screwdriver, disengage the 4 claws and remove the inner seat track bracket cover.
- HINT:
- Tape the screwdriver tip before use.
| 9. REMOVE FRONT SEAT ASSEMBLY RH (for Power Seat) |
Operate the power seat switch knob and move the seat to the rearmost position.
Remove the 2 bolts on the front seat track bracket.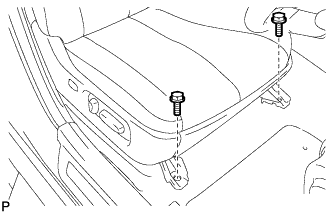
Operate the power seat switch knob and move the seat fully forward.
Remove the 2 bolts on the rear seat track bracket.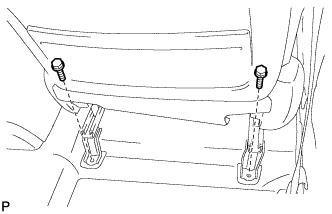
Disconnect the cable from the negative (-) battery terminal.
- CAUTION:
- Wait at least 90 seconds after disconnecting the cable from the negative (-) battery terminal to prevent the airbag and seat belt pretensioner from deploying (Click here).
Disconnect the connectors under the seat. Then remove the front passenger's seat assembly.
| 10. REMOVE AUDIO AMPLIFIER COVER |
Remove the 2 clips and audio amplifier cover.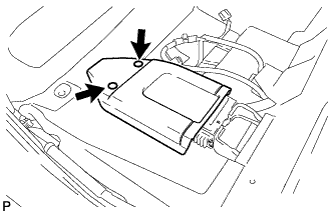
| 11. REMOVE STEREO COMPONENT AMPLIFIER ASSEMBLY |
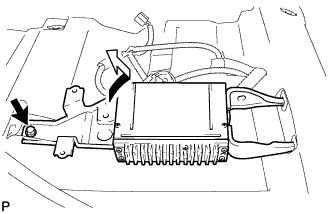
Disconnect the connector and remove the bolt.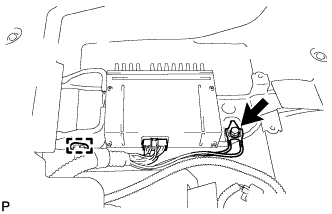
Disengage the clamp.
Remove the bolt and stereo component amplifier assembly as shown in the illustration.