INSTALLATION
Removal / installation · Vehicles built Oct 2006 – May 2009
Versions by build date: Oct 2006 – May 2009 from Jun 2009
| 1.
INSTALL STARTER ASSEMBLY |
 |
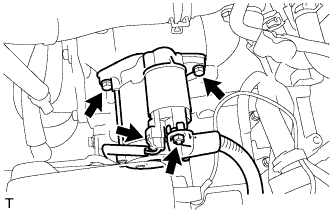
- Install the starter assembly with the 2 bolts.
-
Torque:
- 37 N*m{
380 kgf*cm
, 28 ft.*lbf
}
Connect the wire harness to terminal 30 and install the nut. Then, attach the terminal cap.
-
Torque:
- 9.8 N*m{
100 kgf*cm
, 87 in.*lbf
}
Connect the terminal 50 connector to the starter assembly.
| 2.
INSTALL NO. 1 AIR CLEANER INLET
|
|
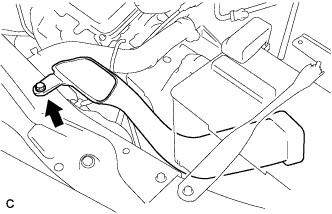
- Install the No. 1 air cleaner inlet with the bolt.
-
Torque:
- 5.0 N*m{
51 kgf*cm
, 44 in.*lbf
}
| 3.
INSTALL AIR CLEANER CASE SUB-ASSEMBLY
|
|
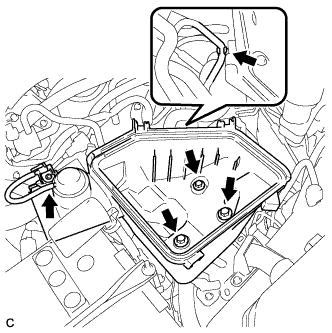
- Install the air cleaner case with the 3 bolts.
-
Torque:
- 5.0 N*m{
51 kgf*cm
, 44 in.*lbf
}
Connect the vacuum hose and hose clamp.
| 4.
INSTALL AIR CLEANER CAP SUB-ASSEMBLY
|
|
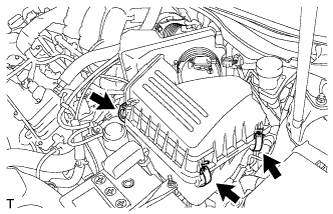
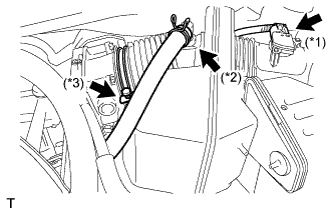
- Install the air cleaner cap sub-assembly, and connect the 3 bands.
- Connect the mass air flow meter connector (*1).
Connect the No. 2 ventilation hose (*2).
Connect the hose band (*3).
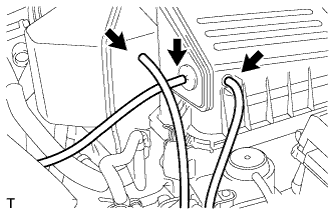
- Connect the 3 vacuum hoses.
| 5.
INSTALL AIR CLEANER INLET ASSEMBLY
|
|
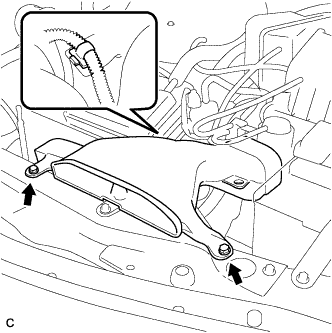
- Install the air cleaner inlet with the clamp and 2 bolts.
-
Torque:
- 5.0 N*m{
51 kgf*cm
, 44 in.*lbf
}
| 6.
INSTALL V-BANK COVER SUB-ASSEMBLY
|
|
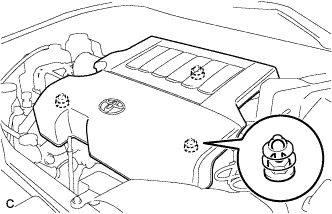
- Fit the 3 retainers and install the V-bank cover.
| 7.
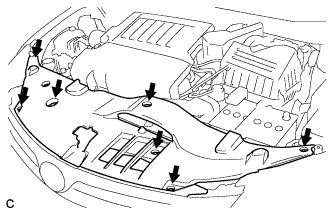
INSTALL COOL AIR INTAKE DUCT SEAL
|
|
- Install the intake duct seal with the 7 clips.
| 8.
CONNECT CABLE TO NEGATIVE BATTERY TERMINAL
|
|
-
Torque:
- 6.9 N*m{
70 kgf*cm
, 61 in.*lbf
}