DISASSEMBLY
Removal / installation · Vehicles built Oct 2006 – May 2009
Versions by build date: Oct 2006 – May 2009 from Jun 2009
| 1.
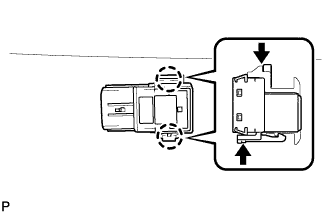
REMOVE NO. 1 ULTRASONIC SENSOR (w/ Clearance Sonar System)
|
 |
Disconnect the sensor connector.
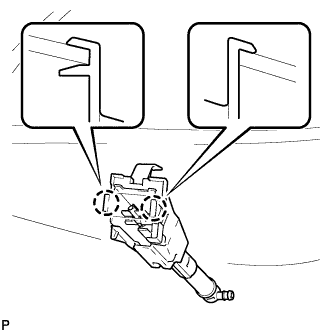
- While pushing down on the lever with a finger to release the claw, disengage the claw on the other side to remove the No. 1 ultrasonic sensor.
- HINT:
- The type of the claw on the top and bottom of the sensor are different. Observe the claws carefully before attempting to remove the sensor.
| 2.
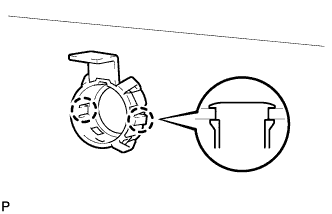
REMOVE NO. 1 ULTRASONIC SENSOR RETAINER (w/ Clearance Sonar System)
|
|
- Disengage the 2 claws and remove the No. 1 ultrasonic sensor retainer from the front bumper.
| 3.
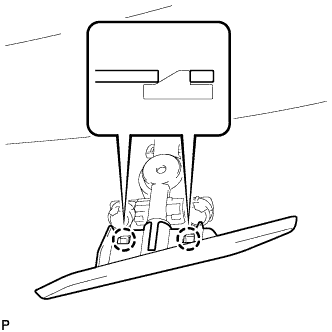
REMOVE HEADLIGHT CLEANER NOZZLE SUB-ASSEMBLY LH (w/ Headlight Cleaner System)
|
|
- Extend the headlight cleaner nozzle sub-assembly.
Disengage the 2 claws and remove the headlight cleaner nozzle sub-assembly.
| 4.
REMOVE HEADLIGHT CLEANER NOZZLE SUB-ASSEMBLY RH (w/ Headlight Cleaner System) |
|
- HINT:
- Use the same procedure for the RH side and LH side.
| 5.
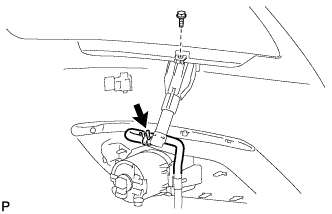
REMOVE HEADLIGHT CLEANER ACTUATOR SUB-ASSEMBLY LH (w/ Headlight Cleaner System)
|
|
- Disconnect the headlight cleaner hose.
Remove the bolt.
- Disengage the 2 claws and remove the headlight cleaner actuator sub-assembly.
| 6.
REMOVE HEADLIGHT CLEANER ACTUATOR SUB-ASSEMBLY RH (w/ Headlight Cleaner System) |
|
- HINT:
- Use the same procedure for the RH side and LH side.
| 7.
REMOVE HEADLIGHT CLEANER HOSE (w/ Headlight Cleaner System) |
|
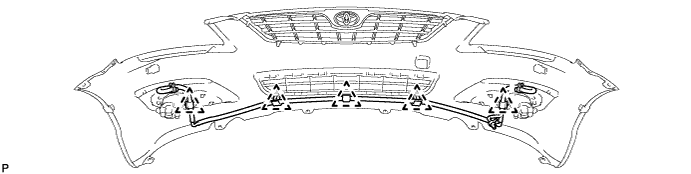
Disengage the 5 clips and remove the headlight cleaner hose.

| 8.
REMOVE FRONT SPOILER COVER |
|
Remove the 2 screws and 25 clips.
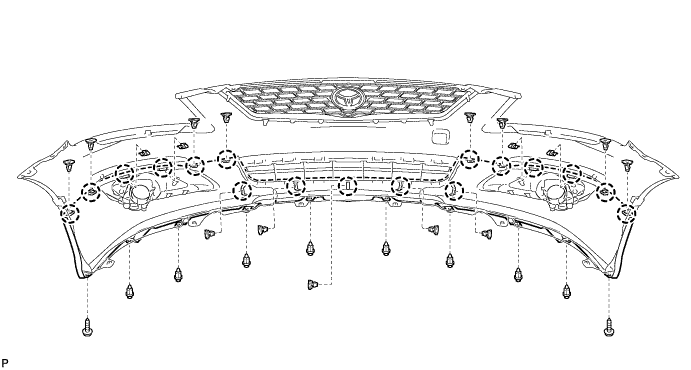
Disengage the 17 claws and remove the front spoiler cover.
| 9.
REMOVE FRONT BUMPER EXTENSION LH (w/ Front Spoiler) |
|
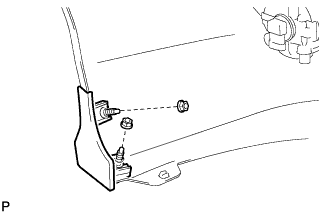
- Remove the 2 nuts and front bumper extension LH.
| 10.
REMOVE FRONT BUMPER EXTENSION RH (w/ Front Spoiler) |
|
- HINT:
- Use the same procedure for the RH side and LH side.
| 11.
REMOVE FRONT BUMPER EXTENSION MOUNTING BRACKET |
|
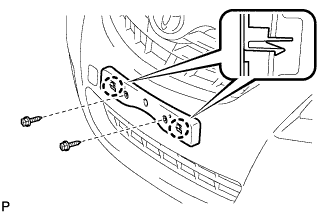
- Remove the 2 screws.
Disengage the 2 claws and remove the front bumper extension mounting bracket.
| 12.
REMOVE FRONT BUMPER LOWER COVER |
|
- Disengage the 2 claws and remove the front bumper lower cover.
| 13.
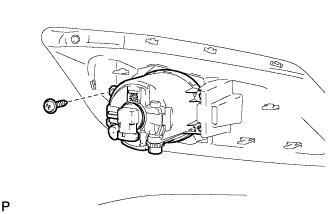
REMOVE FOG LIGHT ASSEMBLY LH
|
|
- Remove the screw and the fog light assembly.
| 14.
REMOVE FOG LIGHT ASSEMBLY RH |
|
- HINT:
- Use the same procedure for the RH side and LH side.
| 15.
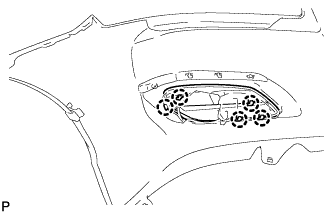
REMOVE FRONT BUMPER HOLE COVER LH (w/o Fog Light) |
|
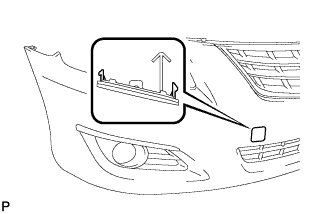
- Disengage the 5 claws and remove the front bumper hole cover LH.
| 16.
REMOVE FRONT BUMPER HOLE COVER RH (w/o Fog Light) |
|
- HINT:
- Use the same procedure for the RH side and LH side.
| 17.
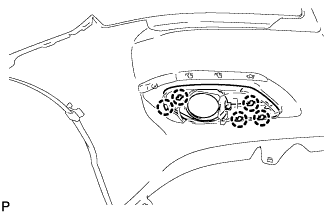
REMOVE FRONT BUMPER HOLE COVER LH (w/ Fog Light) |
|
- Disengage the 5 claws and remove the front bumper hole cover LH.
| 18.
REMOVE FRONT BUMPER HOLE COVER RH (w/ Fog Light) |
|
- HINT:
- Use the same procedure for the RH side and LH side.
| 19.
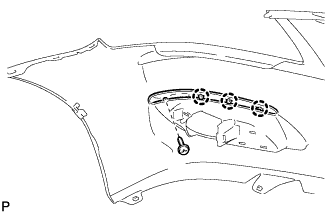
REMOVE FRONT BUMPER SIDE MOULDING LH (w/o Front Spoiler) |
|
- Remove the screw.
Disengage the 3 claws and remove the front bumper side moulding LH.
| 20.
REMOVE FRONT BUMPER SIDE MOULDING RH (w/o Front Spoiler) |
|
- HINT:
- Use the same procedure for the RH side and LH side.
| 21.
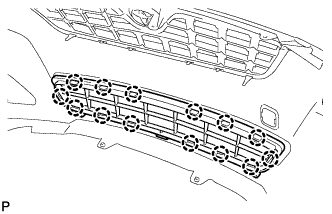
REMOVE LOWER RADIATOR GRILLE |
|
- Disengage the 14 claws and remove the lower radiator grille.
| 22.
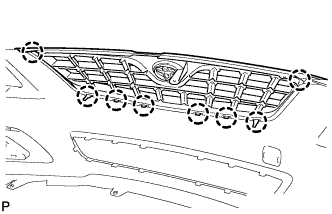
REMOVE RADIATOR GRILLE |
|
- Disengage the 8 claws and remove the radiator grille.
| 23.
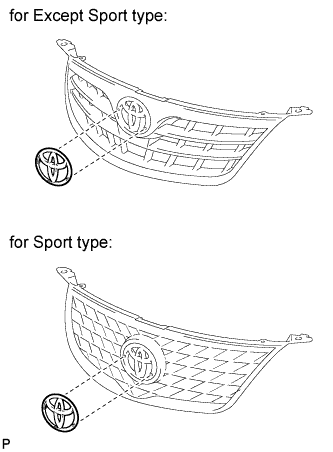
REMOVE RADIATOR GRILLE EMBLEM |
|
- HINT:
- When removing the emblem, heat the radiator grille and emblem using a heat light.
- Heating temperature:
Item
|
Temperature
|
Radiator Grille
|
20 to 30°C (68 to 86°F)
|
Emblem
|
20 to 30°C (68 to 86°F)
|
- NOTICE:
- Do not heat the radiator grille and emblem excessively.
- Peel off the double-sided tape and remove the radiator grille emblem.
| 24.
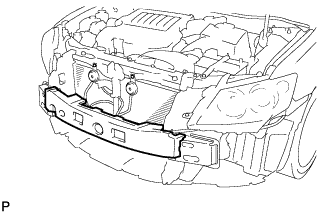
REMOVE FRONT BUMPER ENERGY ABSORBER |
|
- Remove the front bumper energy absorber from the front bumper reinforcement sub-assembly.
| 25.
REMOVE FRONT BUMPER REINFORCEMENT SUB-ASSEMBLY |
|
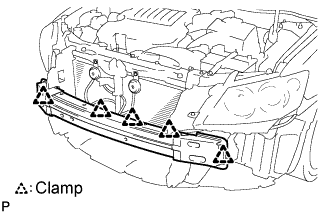
- Disengage each clamp.
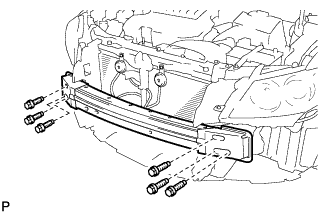
- Remove the 6 bolts and front bumper reinforcement sub-assembly.
| 26.
REMOVE FRONT BUMPER SIDE RETAINER LH |
|
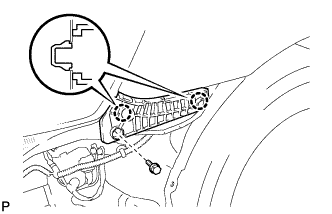
- Remove the screw.
Disengage the 2 claws and remove the front bumper side retainer LH.
| 27.
REMOVE FRONT BUMPER SIDE RETAINER RH |
|
- HINT:
- Use the same procedure for the RH side and LH side.