Front Shock Absorber
Suspension
COMPONENTS
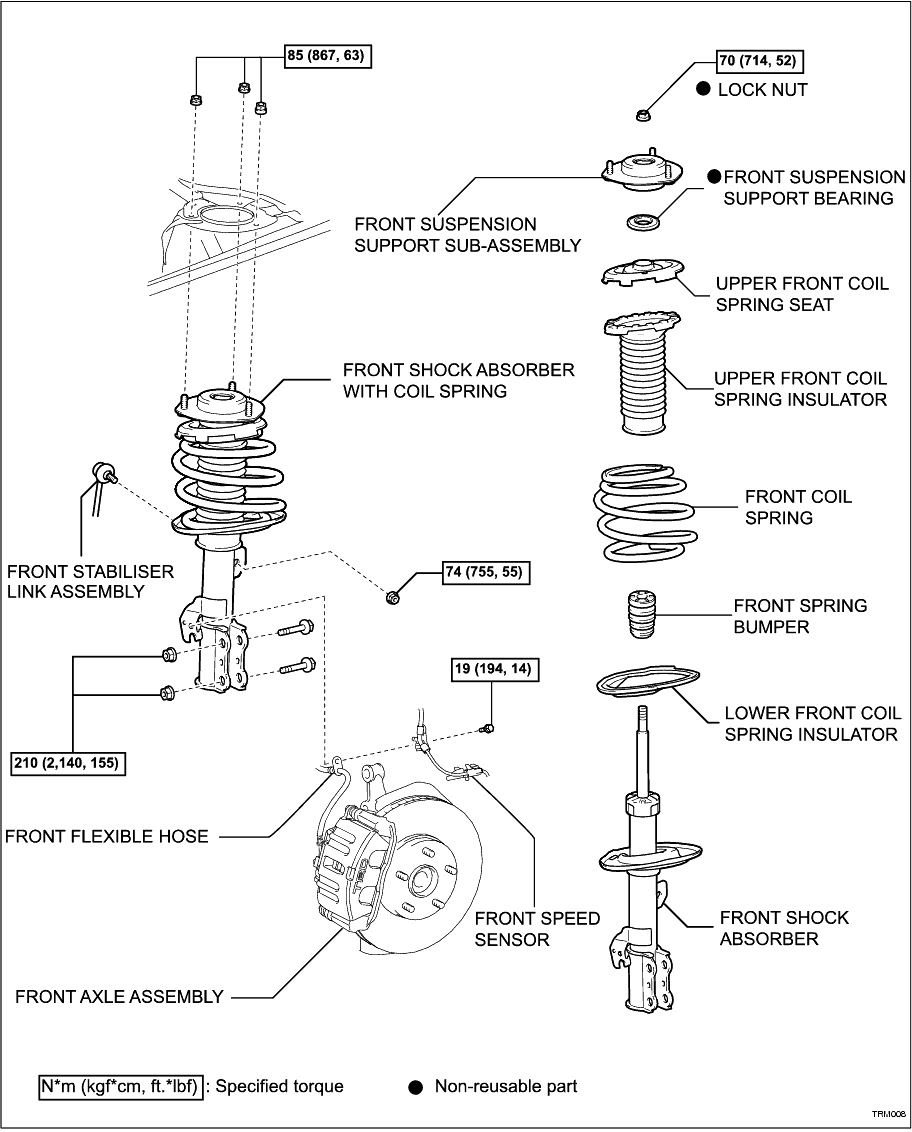
REMOVAL
HINT:
• Use the same procedures for the RH side and the LH side.
• The procedures listed below are for the LH side.
1. REMOVE FRONT WHEEL
2. DISCONNECT FRONT STABILISER LINK ASSEMBLY
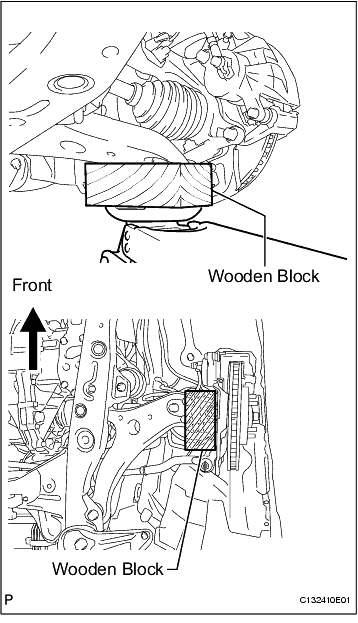
(a) Support the front suspension lower No. 1 arm with a jack using a wooden block.
-
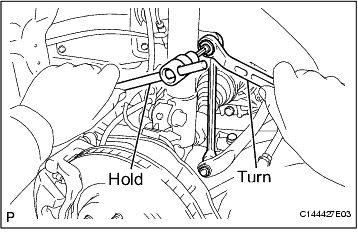
(b) Remove the nut and disconnect the front stabiliser link assembly from the front shock absorber with coil spring.
HINT:
If the ball joint turns together with the nut, use a hexagon wrench (6 mm) to hold the stud.
-
3. REMOVE FRONT SHOCK ABSORBER WITH COIL SPRING
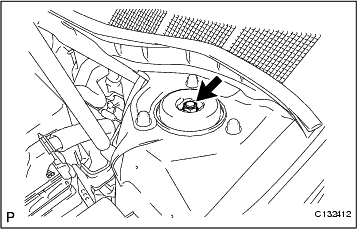
(a) Loosen the lock nut of the front shock absorber with coil spring.
NOTICE:
• Do not remove the lock nut.
• Only loosen the nut when disassembling the front shock absorber with coil spring.
-
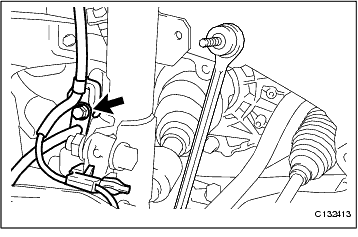
(b) Remove the bolt and disconnect the front flexible hose and front speed sensor wire harness from the front shock absorber with coil spring.
NOTICE:
Remove the front speed sensor from the front shock absorber with coil spring.
-
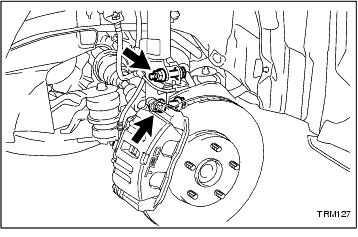
(c) Remove the 2 nuts on the lower side of the front shock absorber with coil spring.
NOTICE:
• When removing the nuts, keep the bolts from rotating.
• Keep the bolts inserted to secure the front axle assembly.
-
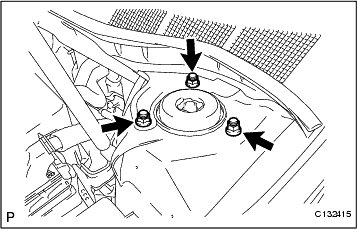
(d) Remove the 3 nuts on the upper side of the front shock absorber with coil spring.
-
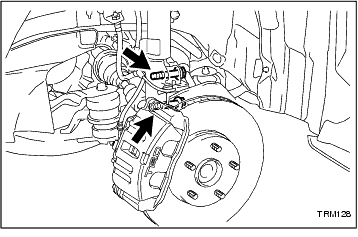
(e) Remove the 2 bolts and front shock absorber with coil spring.
NOTICE:
Ensure the front speed sensor is disconnected from the front shock absorber with coil spring.
-
DISASSEMBLY
1. SECURE FRONT SHOCK ABSORBER WITH COIL SPRING
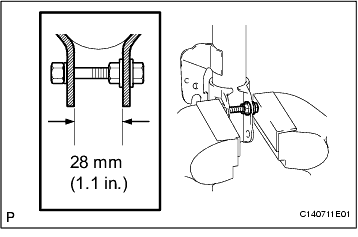
(a) As shown in the illustration, secure the front shock absorber with coil spring in a vice using aluminum plates by clamping onto a double nutted bolt affixed to the bracket at the bottom of the absorber.
-
2. REMOVE FRONT SHOCK ABSORBER
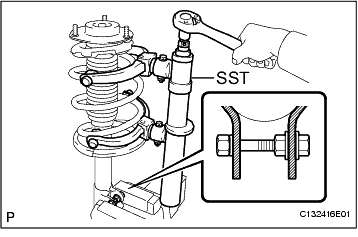
(a) Using SST, compress the front coil spring.
SST
09727-30021
(09727-00010
09727-00021
09727-00031)
NOTICE:
Do not use an impact wrench.
HINT:
If the front coil spring is compressed at an angle, using 2 SST will make the work easier.
-
(b) Remove the lock nut.
-
(c) Remove the front suspension support sub-assembly, front suspension support bearing, upper front coil spring seat, upper front coil spring insulator, front coil spring, front spring bumper, and lower front coil spring insulator from the front shock absorber.
-
INSPECTION
1. INSPECT FRONT SHOCK ABSORBER
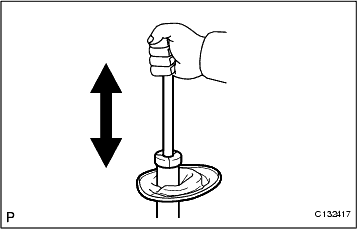
(a) Compress and extend the shock absorber rod 4 or more times.
Standard:
There is no abnormal resistance or sound and operation resistance is normal.
HINT:
If there is any abnormality, replace the front shock absorber with a new one.
-
REASSEMBLY
1. INSTALL FRONT SHOCK ABSORBER
(a) Install the front spring bumper to the piston rod.
-
(b) Install the lower front coil spring insulator onto the front shock absorber.
-
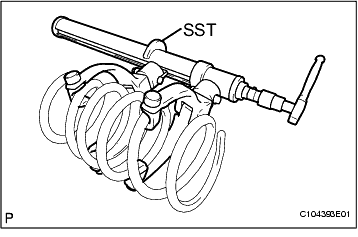
(c) Using SST, compress the front coil spring.
SST
09727-30021
(09727-00010
09727-00021
09727-00031)
NOTICE:
Do not use an impact wrench.
HINT:
If the front coil spring is compressed at an angle, using 2 SST will make the work easier.
-
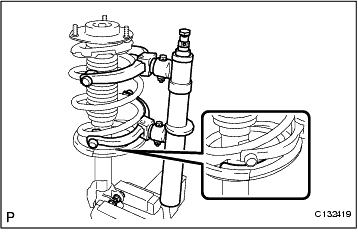
(d) Install the front coil spring to the front shock absorber.
NOTICE:
The smaller diameter end of the front coil spring must face upward.
HINT:
Fit the lower end of the front coil spring into the gap of the insulator.
-
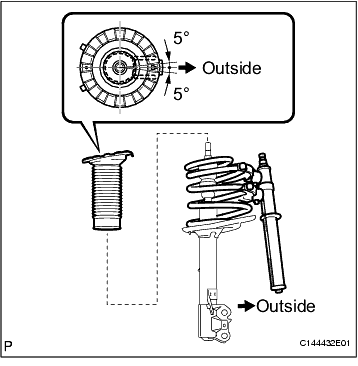
(e) Install the upper front coil spring insulator as shown in the illustration.
HINT:
Any misalignment between the front shock absorber lower bracket and the matchmark must be +-5?.
-
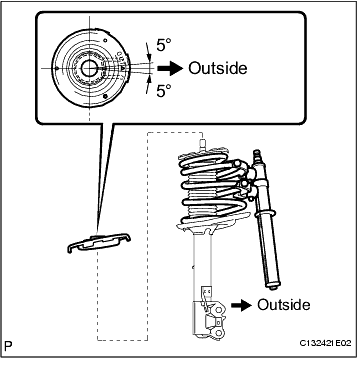
(f) Install the front coil spring upper seat with the mark facing to the outside of the vehicle.
HINT:
Any misalignment between the front shock absorber lower bracket and the matchmark must be +-5?.
-
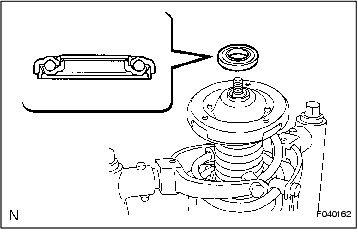
(g) Install a new front suspension support bearing as shown in the illustration.
HINT:
If there is foreign matter inside the front suspension support bearing, replace it with a new one.
-
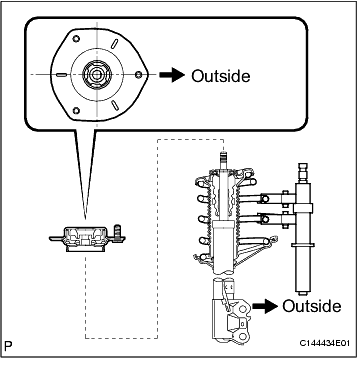
(h) Install the front suspension support sub-assembly as shown in the illustration.
Temporarily tighten a new lock nut.
NOTICE:
Check the flats on the piston rod and the flats on the front suspension support sub-assembly are aligned.
-
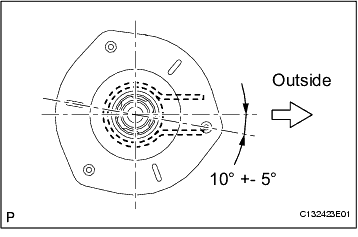
(i) Remove the SST slowly in order to release the coil spring.
NOTICE:
Do not use an impact wrench.
HINT:
Any misalignment between the front shock absorber lower bracket and the arrows must be +-5?.
-
INSTALLATION
1. INSTALL FRONT SHOCK ABSORBER WITH COIL SPRING
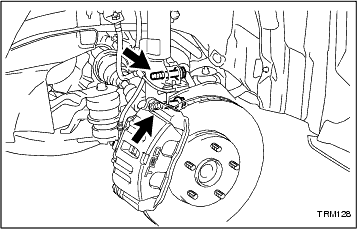
(a) Install the front shock absorber with coil spring to the front axle assembly and insert the 2 bolts from the rear of the vehicle.
-
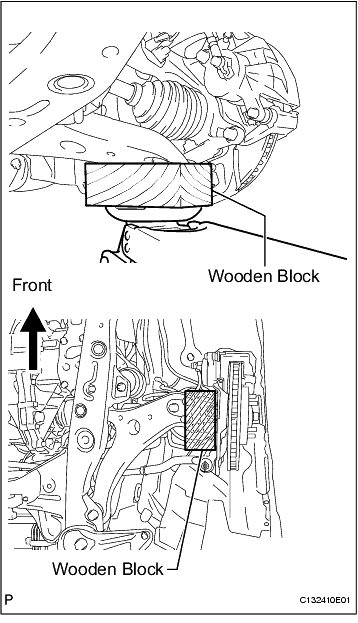
(b) Slowly jack up the vehicle using a wooden block and install the front shock absorber with coil spring (upper side) to the vehicle.
-
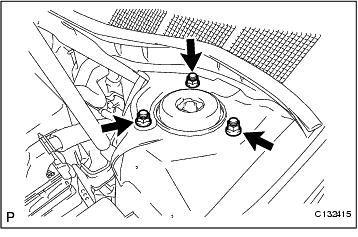
(c) Install the 3 nuts to the upper side of the front shock absorber with coil spring.
Torque:
85 N*m
(867 kgf*cm,
63 ft.*lbf)
-
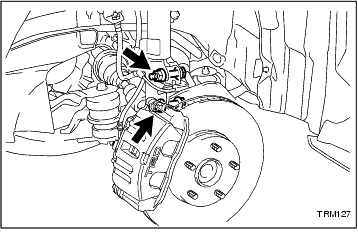
(d) Install the 2 nuts to the lower side of the front shock absorber with coil spring.
Torque:
210 N*m
(2,140 kgf*cm,
155 ft.*lbf)
NOTICE:
When installing the nuts, keep the bolts from rotating.
-
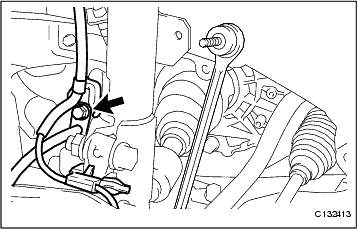
(e) Connect the front flexible hose and front speed sensor wire harness with the bolt to the shock absorber with coil spring.
Torque:
19 N*m
(194 kgf*cm,
14 ft.*lbf)
NOTICE:
Do not twist the front speed sensor wire harness when installing it.
-
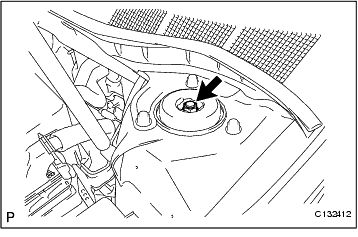
(f) Fully tighten the lock nut.
Torque:
70 N*m
(714 kgf*cm,
52 ft.*lbf)
-
2. CONNECT FRONT STABILISER LINK ASSEMBLY
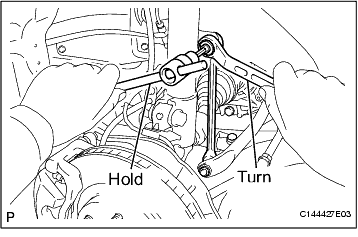
(a) Connect the front stabiliser link assembly with the nut to the front shock absorber with coil spring.
Torque:
74 N*m
(755 kgf*cm,
55 ft.*lbf)
HINT:
If the ball joint turns together with the nut, use a hexagon wrench (6 mm) to hold the stud.
-
3. INSTALL FRONT WHEEL
4. CHECK VSC SPEED SENSOR SIGNAL (
Click Here
)
5. INSPECT AND ADJUST FRONT WHEEL ALIGNMENT (
Click Here
)
DISPOSAL
1. DISPOSE OF FRONT SHOCK ABSORBER
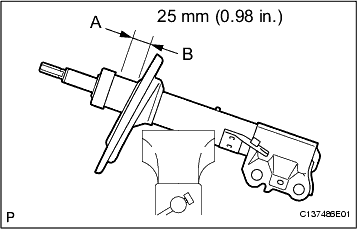
(a) Fully extend the shock absorber rod.
-
(b) Using a drill, make a hole in the cylinder between A and B as shown in the illustration to discharge the gas inside.
CAUTION:
• Take care when drilling. Always use the proper safety equipment.
• The gas is colourless, odourless and non-poisonous.
-