Luggage Door Hinge Torsion BAR
Engine Hood / Door
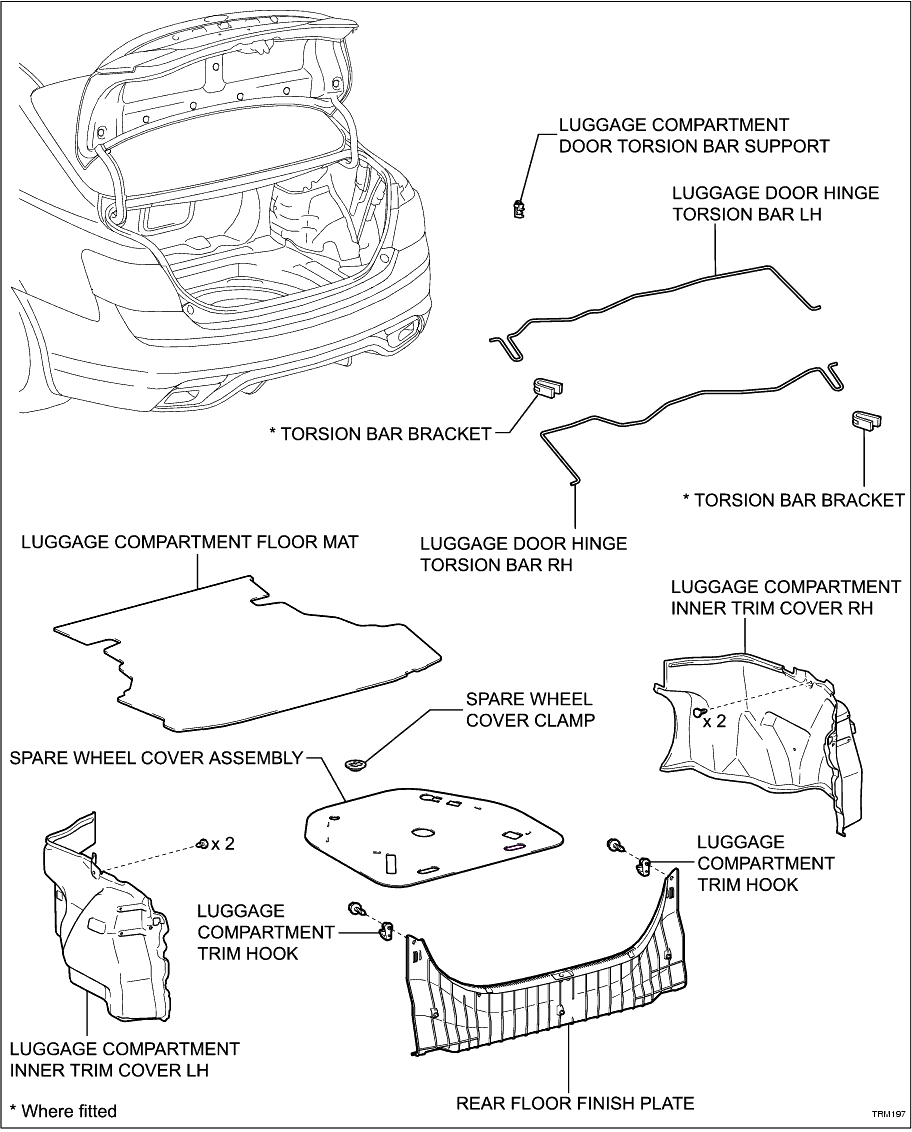
COMPONENTS
ON-VEHICLE INSPECTION
HINT:
The luggage compartment lid operation is divided into three ranges:
• Initial open range
• Normal operating range
• Auto lift range
If the luggage compartment lid does not operate as described below, adjust the torsion bar or install one or two torsion bar brackets as required (
Click Here
)
1. INSPECT LUGGAGE COMPARTMENT LID INITIAL OPEN RANGE
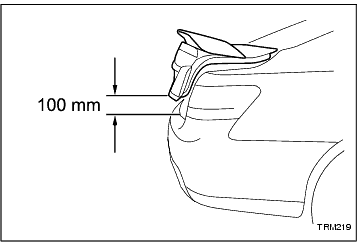
(a) Close the luggage compartment lid.
-
(b) Open the luggage compartment lid with the release lever or door control transmitter.
-
(c) Inspect initial open range.
Standard:
More than 100 mm
-
2. INSPECT LUGGAGE COMPARTMENT LID NORMAL OPERATING RANGE
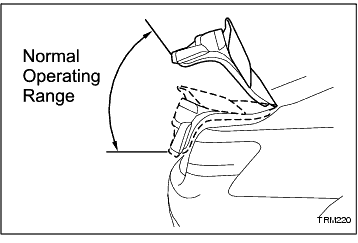
(a) Open the luggage compartment lid by hand to several points within the normal operating range.
Normal operating range:
Top of initial open range to 75% of entire opening range
-
(b) Inspect normal operating range.
Standard:
The luggage compartment lid does not lower under its own weight
-
3. INSPECT LUGGAGE COMPARTMENT LID AUTO LIFT RANGE
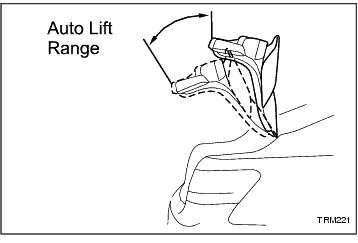
(a) Open the luggage compartment lid by hand to various points within the auto lift range.
Auto Lift range:
Top of normal operating range to fully open
-
(b) Inspect auto lift range.
Standard:
The luggage compartment lid opens fully
-
REMOVAL
1. REMOVE LUGGAGE COMPARTMENT FLOOR MAT
2. REMOVE SPARE WHEEL COVER CLAMP
3. REMOVE SPARE WHEEL COVER ASSEMBLY
4. REMOVE LUGGAGE COMPARTMENT TRIM HOOK
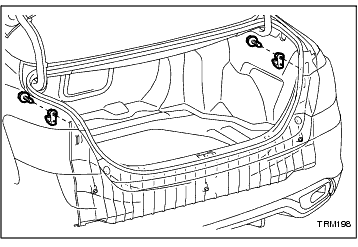
(a) Remove the 2 screws and the 2 luggage compartment trim hooks.
-
5. REMOVE REAR FLOOR FINISH PLATE
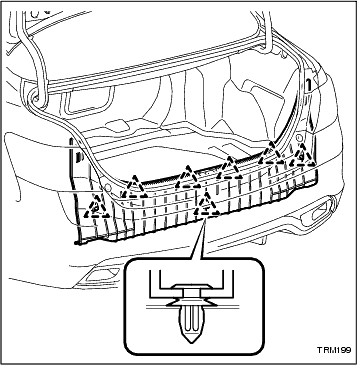
(a) Disengage the 7 clips and remove the rear floor finish plate.
-
6. REMOVE LUGGAGE COMPARTMENT INNER TRIM COVER LH
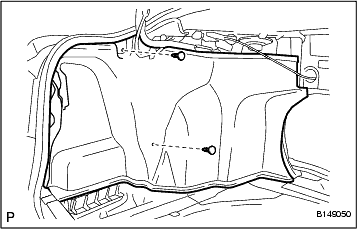
(a) Remove the 2 clips and the luggage compartment inner trim cover LH.
-
7. REMOVE LUGGAGE COMPARTMENT INNER TRIM COVER RH
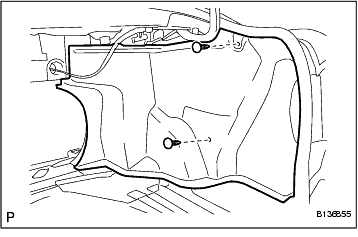
(a) Remove the 2 clips and the luggage compartment inner trim cover RH.
-
8. REMOVE LUGGAGE DOOR HINGE TORSION BAR RH
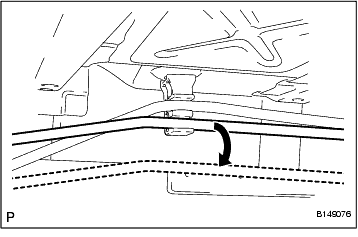
(a) Disconnect the luggage door hinge torsion bar RH from the luggage compartment door torsion bar support as shown in the illustration.
-
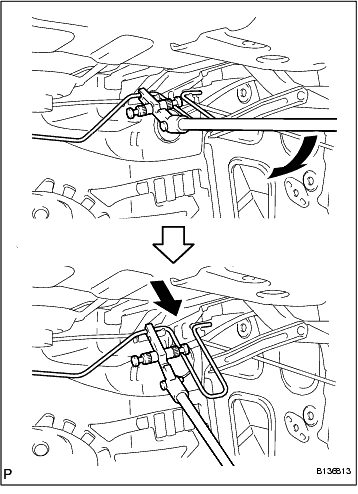
(b) Using SST, disconnect the luggage door hinge torsion bar RH from the luggage door hinge and the right side of the vehicle body as shown in the illustration.
SST
09804-24010
-
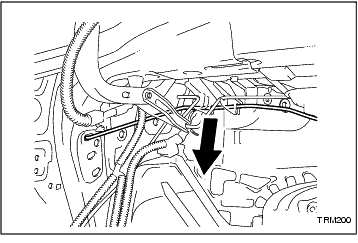
(c) Remove the luggage door hinge torsion bar RH from the left side of the vehicle body as shown in the illustration.
-
9. REMOVE LUGGAGE DOOR HINGE TORSION BAR LH
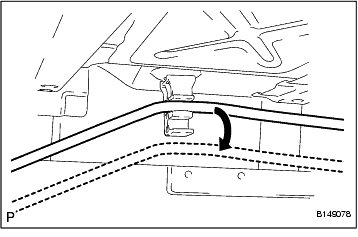
(a) Disconnect the luggage door hinge torsion bar LH from the luggage compartment door torsion bar support as shown in the illustration.
-
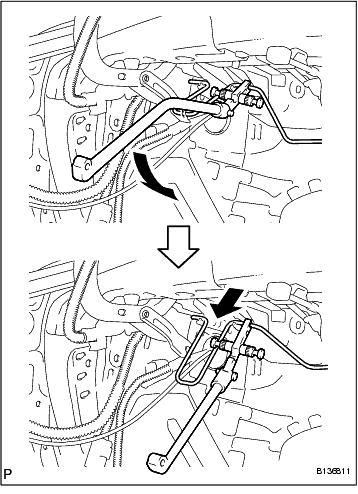
(b) Using SST, disconnect the luggage door hinge torsion bar LH from the luggage door hinge and the left side of the vehicle body as shown in the illustration.
SST
09804-24010
-
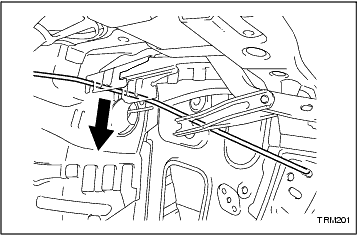
(c) Remove the luggage door hinge torsion bar LH from the right side of the vehicle body as shown in the illustration.
-
10. REMOVE TORSION BAR BRACKET
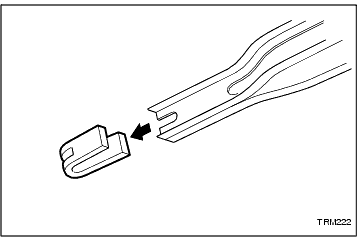
(a) If fitted, remove the torsion bar bracket from the RH and/or LH hinge as shown in the illustration.
-
11. REMOVE LUGGAGE COMPARTMENT DOOR TORSION BAR SUPPORT
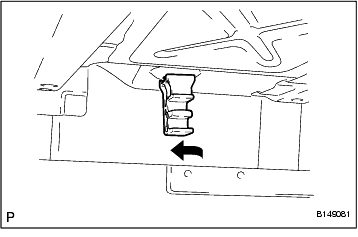
(a) Remove the luggage compartment door torsion bar support as shown in the illustration.
-
INSTALLATION
HINT:
After installing the torsion bar, use your hand to open and close the luggage door. Ensure the luggage door can be opened and closed smoothly.
1. INSTALL LUGGAGE COMPARTMENT DOOR TORSION BAR SUPPORT
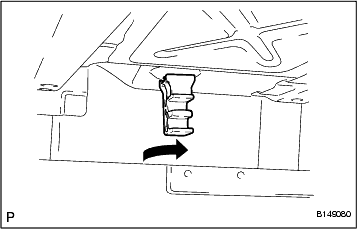
(a) Install the luggage compartment door torsion bar support as shown in the illustration.
-
2. INSTALL TORSION BAR BRACKET
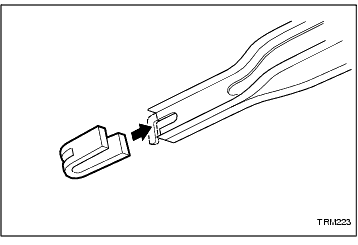
(a) Install the torsion bar bracket if originally fitted, or as required, to the RH and/or LH hinge as shown in the illustration.
HINT:
Torsion bar brackets are used to compensate for the additional weight of the rear spoilers. If the luggage compartment lid does not open as described in ON-VEHICLE INSPECTION, install a bracket to the RH hinge.
If the luggage compartment lid does not open correctly after a further test, install a bracket to the LH hinge.
Fine tuning can be performed by adjusting the position of the torsion bar in the installation holes.
-
3. INSTALL LUGGAGE DOOR HINGE TORSION BAR LH
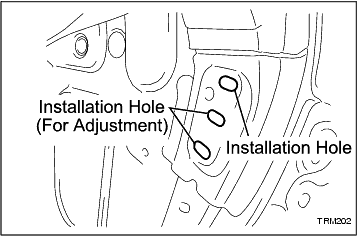
(a) Set the tip of the luggage door hinge torsion bar LH in the top installation hole. The centre and lower installation holes are used for adjustment.
-
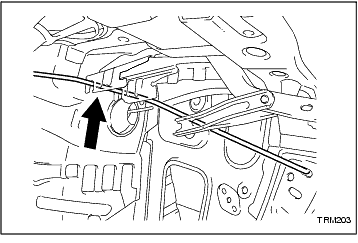
(b) Connect the luggage door hinge torsion bar LH to the right side of the vehicle body as shown in the illustration.
-
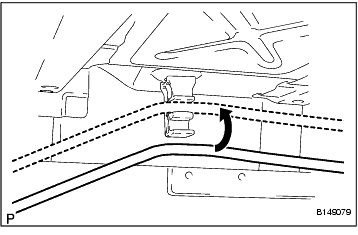
(c) Connect the luggage door hinge torsion bar LH to the luggage compartment door torsion bar support as shown in the illustration.
-
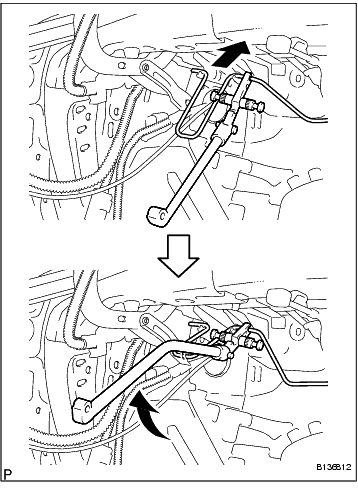
(d) Using SST, install the luggage door hinge torsion bar LH to the luggage door hinge and the left side of the vehicle body as shown in the illustration.
SST
09804-24010
-
4. INSTALL LUGGAGE DOOR HINGE TORSION BAR RH
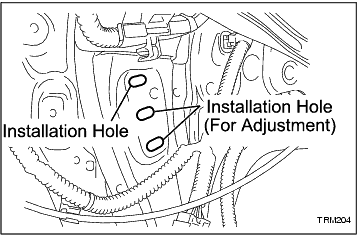
(a) Set the tip of the luggage door hinge torsion bar RH in the top installation hole. The centre and lower installation holes are used for adjustment.
-
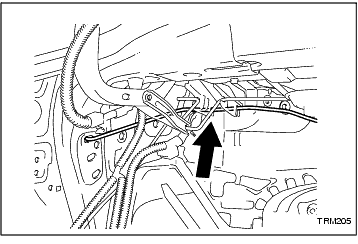
(b) Connect the luggage door hinge torsion bar RH to the left side of the vehicle body as shown in the illustration.
-
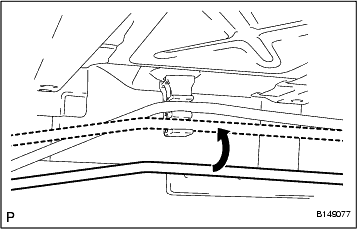
(c) Connect the luggage door hinge torsion bar RH to the luggage compartment door torsion bar support as shown in the illustration.
-
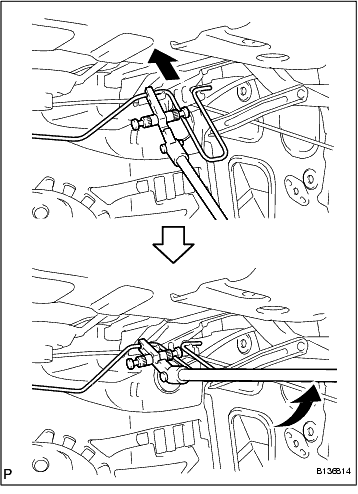
(d) Using SST, install the luggage door hinge torsion bar RH to the luggage door hinge and the right side of the vehicle body as shown in the illustration.
SST
09804-24010
-
5. CHECK LUGGAGE COMPARTMENT LID OPERATION (
Click Here
)
6. INSTALL LUGGAGE COMPARTMENT INNER TRIM COVER LH
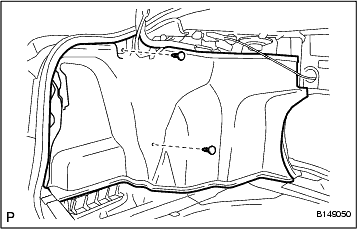
(a) Install the luggage compartment inner trim cover LH with the 2 clips.
-
7. INSTALL LUGGAGE COMPARTMENT INNER TRIM COVER RH
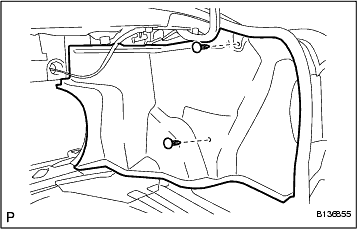
(a) Install the luggage compartment inner trim cover RH with the 2 clips.
-
8. INSTALL REAR FLOOR FINISH PLATE
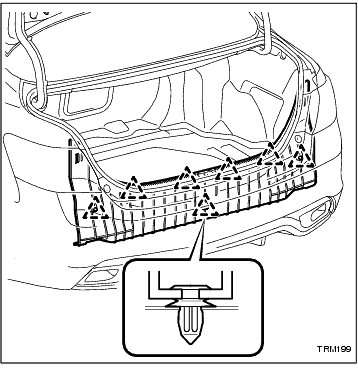
(a) Engage the 7 clips and install the rear floor finish plate.
-
9. INSTALL LUGGAGE COMPARTMENT TRIM HOOK
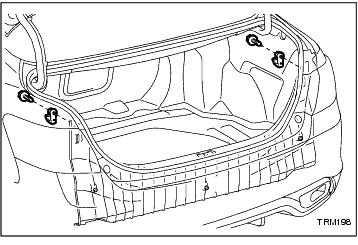
(a) Install the 2 luggage compartment trim hooks with the 2 screws.
-
10. INSTALL SPARE WHEEL COVER ASSEMBLY
11. INSTALL SPARE WHEEL COVER CLAMP
12. INSTALL LUGGAGE COMPARTMENT FLOOR MAT