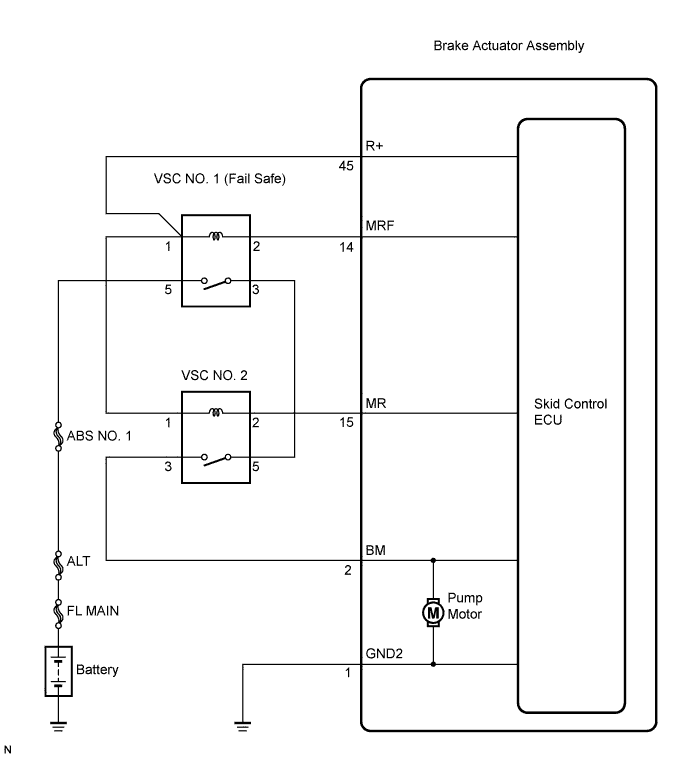
DTC C0273/13 Open in ABS Motor Relay Circuit |
DTC C0274/14 Short to B+ in ABS Motor Relay Circuit |
DTC C1361/91 Short Circuit in ABS Motor Fail Safe Relay Circuit |
| DTC No. | DTC Detection Condition | Trouble Area |
| C0273/13 | When any of the following (1 or 2) is detected: 1. All of the following conditions continue for 0.12 seconds or more.
|
|
| C0274/14 | When the motor relay is OFF, the VSC NO. 2 relay remains closed for 4 seconds or more. |
|
| C1361/91 | Immediately after the ignition switch is turned on (IG), the relay contact is closed for 4 seconds or more when the VSC NO. 1 (fail safe) relay is OFF. |
|
| 1.INSPECT ABS NO. 1 FUSE |
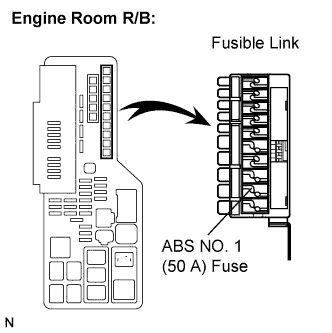 |
Remove the fusible link from the engine room R/B.
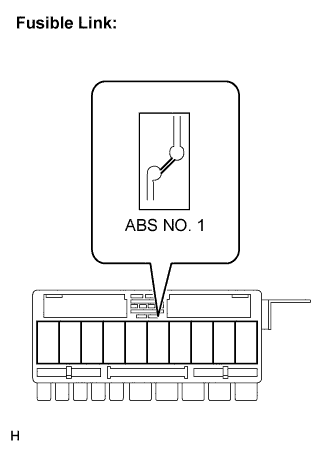 |
Check if the fusible link is melted.
Install the fusible link to the engine room R/B with the nut.
|
| ||||
| OK | |
 |
| 2.INSPECT VSC NO. 2 RELAY |
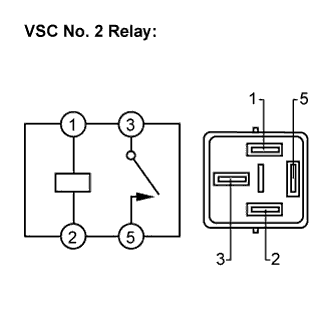 |
Remove the VSC NO. 2 relay.
Measure the resistance according to the value(s) in the table below.
| Tester Connection | Condition | Specified Condition |
| 3 - 5 | Always | 10 kΩ or higher |
| 3 - 5 | Apply B+ between terminals 1 and 2 | Below 1 Ω |
|
| ||||
| OK | |
|
| 3.INSPECT VSC NO. 1 (FAIL SAFE) RELAY |
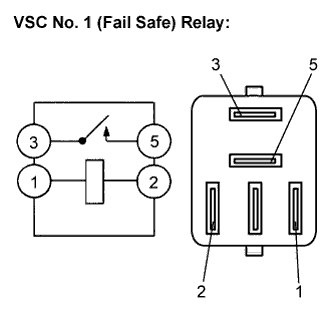 |
Remove the VSC NO. 1 (fail safe) relay.
Measure the resistance according to the value(s) in the table below.
| Tester Connection | Condition | Specified Condition |
| 3 - 5 | Always | 10 kΩ or higher |
| 3 - 5 | Apply B+ between terminals 1 and 2 | Below 1 Ω |
|
| ||||
| OK | |
|
| 4.INSPECT ENGINE ROOM RELAY BLOCK (POWER SOURCE TERMINAL) |
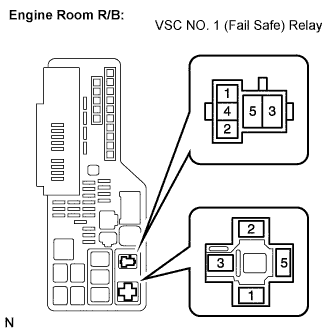 |
Measure the voltage according to the value(s) in the table below.
| Tester Connection | Condition | Specified Condition |
| VSC NO. 1 (fail safe) relay terminal 5 - Body ground | Always | 10 to 14 V |
|
| ||||
| OK | |
|
| 5.INSPECT ENGINE ROOM RELAY BLOCK |
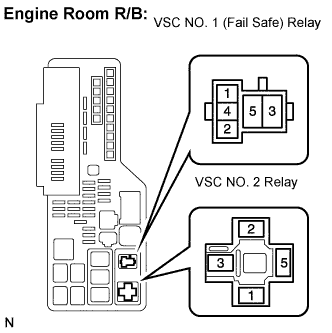 |
Measure the resistance according to the value(s) in the table below.
| Tester Connection | Condition | Specified Condition |
| VSC NO. 1 (fail safe) relay terminal 3 - VSC NO. 2 relay terminal 5 | Always | Below 1 Ω |
| VSC NO. 1 (fail safe) relay terminal 3 - Body ground | Always | 10 kΩ or higher |
|
| ||||
| OK | |
|
| 6.CHECK HARNESS AND CONNECTOR (SKID CONTROL ECU - ENGINE ROOM RELAY BLOCK) |
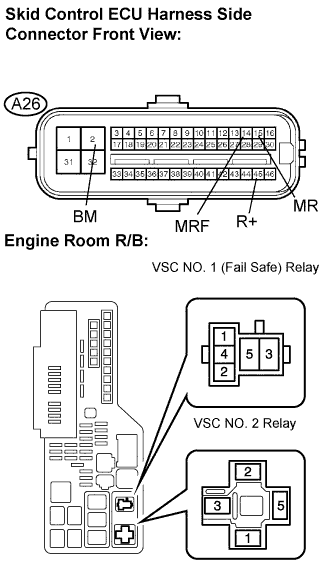 |
Disconnect the skid control ECU connector.
Measure the resistance according to the value(s) in the table below.
| Tester Connection | Condition | Specified Condition |
| A26-2 (BM) - VSC NO. 2 relay terminal 3 | Always | Below 1 Ω |
| A26-2 (BM) - Body ground | Always | 10 kΩ or higher |
| A26-14 (MRF) - VSC NO. 1 (fail safe) relay terminal 2 | Always | Below 1 Ω |
| A26-14 (MRF) - Body ground | Always | 10 kΩ or higher |
| A26-15 (MR) - VSC NO. 2 relay terminal 2 | Always | Below 1 Ω |
| A26-15 (MR) - Body ground | Always | 10 kΩ or higher |
| A26-45 (R+) - VSC NO. 1 (fail safe) relay terminal 1 | Always | Below 1 Ω |
| A26-45 (R+) - Body ground | Always | 10 kΩ or higher |
|
| ||||
| OK | |
|
| 7.RECONFIRM DTC |
Clear the DTC (Click here).
Start the engine.
Drive the vehicle at the speed of 4 mph (6 km/h) or more.
Check if the same DTC is recorded (Click here).
| Condition | Proceed to |
| DTCs (C0273/13, C0274/14 and/or C1361/91) are not output | A |
| DTCs (C0273/13, C0274/14 and/or C1361/91) are output | B |
|
| ||||
| A | ||
 | ||
| ||
