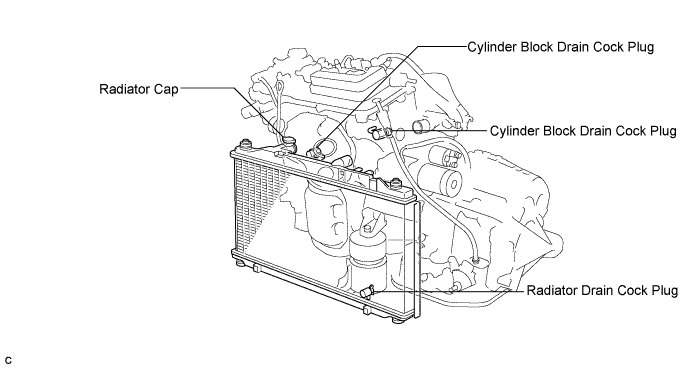
Loosen the radiator drain cock plug and 2 cylinder block drain cock plugs, then drain the coolant.
- HINT:
- Collect the coolant in a container and dispose of it according to the regulations in your area.
ENGINE ASSEMBLY > REMOVAL |
| 1. DISCHARGE FUEL SYSTEM PRESSURE |
| 2. DISCONNECT CABLE FROM NEGATIVE BATTERY TERMINAL |
| 3. PLACE FRONT WHEELS FACING STRAIGHT AHEAD |
| 4. REMOVE FRONT WHEELS |
| 5. REMOVE ENGINE UNDER COVER LH |
| 6. REMOVE ENGINE UNDER COVER RH |
| 7. REMOVE FRONT FENDER APRON SEAL RH |
| 8. DRAIN ENGINE OIL |
Remove the oil filler cap.
Remove the oil drain plug and drain the oil into a container.
| 9. DRAIN ENGINE COOLANT |
Remove the radiator cap sub-assembly from the radiator assembly.
Loosen the radiator drain cock plug and 2 cylinder block drain cock plugs, then drain the coolant.
| 10. DRAIN AUTOMATIC TRANSAXLE FLUID |
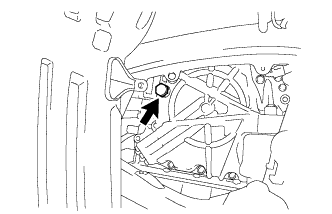 |
Remove the refill plug and gasket.
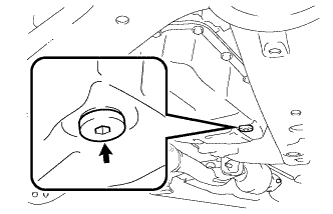 |
Using a 6 mm socket hexagon wrench, remove the overflow plug and gasket.
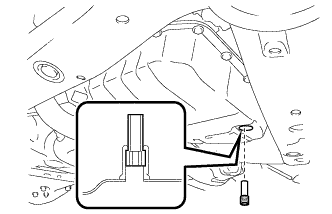 |
Using a 6 mm socket hexagon wrench, remove the No. 1 transmission oil filler tube.
Drain the automatic transaxle fluid.
|
Using a 6 mm socket hexagon wrench, install the No. 1 transmission oil filler tube.
|
Using a 6 mm socket hexagon wrench, install the overflow plug with a new gasket.
|
Install the refill plug with a new gasket.
| 11. REMOVE WINDSHIELD WIPER LINK ASSEMBLY |
| 12. REMOVE COWL TOP PANEL OUTER SUB-ASSEMBLY |
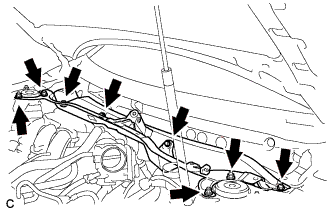 |
Remove the 4 bolts, 4 nuts and cowl top panel outer sub-assembly.
| 13. REMOVE COOL AIR INTAKE DUCT SEAL |
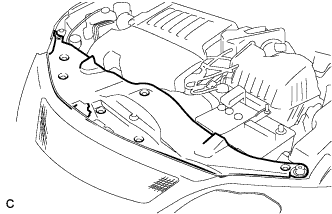 |
Remove the 7 clips and intake duct seal.
| 14. REMOVE V-BANK COVER SUB-ASSEMBLY |
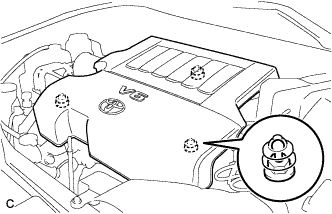 |
Hold the front of the V-bank cover and raise it to disengage the 2 retainers on the front of the cover. Continue to raise the cover to disengage the retainer on the rear of the cover and remove the cover.
| 15. REMOVE V-RIBBED BELT |
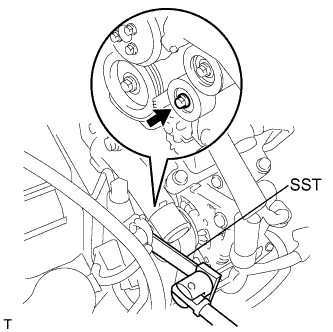 |
Using SST, release the belt tension by turning the belt tensioner counterclockwise, and remove the V-ribbed belt from the belt tensioner.
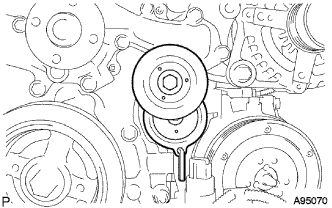 |
While turning the belt tensioner counterclockwise, align with its holes, and then insert the 5 mm bi-hexagon wrench into the holes to fix the V-ribbed belt tensioner.
| 16. REMOVE AIR CLEANER INLET ASSEMBLY |
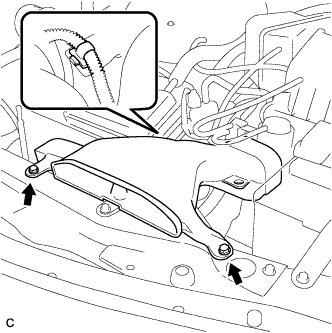 |
Remove the 2 bolts, clamp and air cleaner inlet.
| 17. REMOVE AIR CLEANER CAP SUB-ASSEMBLY |
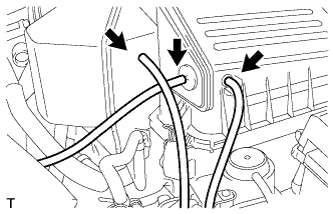 |
Disconnect the 3 vacuum hoses.
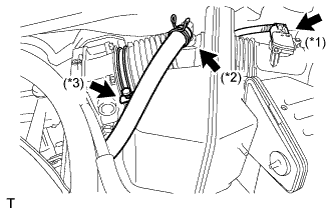 |
Disconnect the mass air flow meter connector (*1).
Disconnect the No. 2 ventilation hose (*2).
Disconnect the hose band (*3).
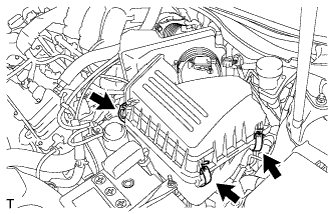 |
Disconnect the 3 bands, and remove the air cleaner cap sub-assembly.
| 18. REMOVE AIR CLEANER CASE SUB-ASSEMBLY |
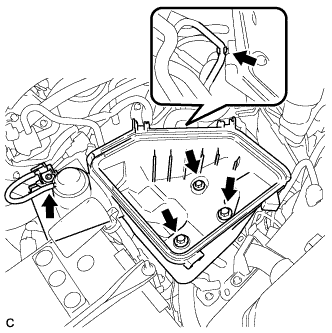 |
Disconnect the vacuum hose and hose clamp.
Remove the 3 bolts and air cleaner case.
| 19. REMOVE NO. 1 AIR CLEANER INLET |
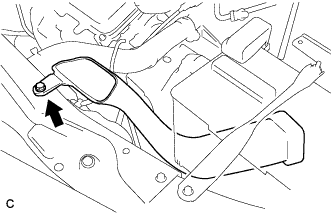 |
Remove the bolt and No. 1 air cleaner inlet.
| 20. REMOVE BATTERY |
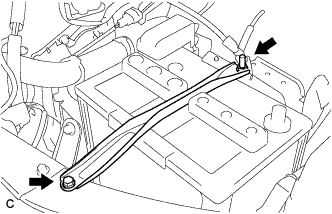 |
Loosen the bolt and nut, and remove the battery clamp.
Remove the battery and battery tray.
| 21. REMOVE INTAKE AIR RESONATOR SUB-ASSEMBLY |
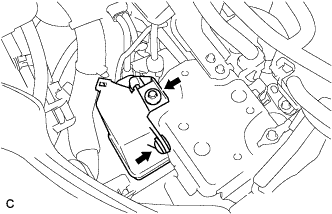 |
Remove the clip, bolt and intake air resonator.
| 22. REMOVE NO. 2 ENGINE MOUNTING STAY RH |
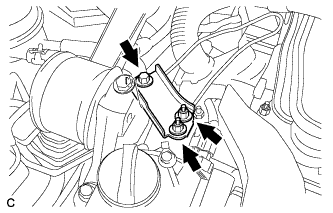 |
Remove the bolt, 2 nuts, and No. 2 mounting stay RH.
| 23. REMOVE ENGINE MOVING CONTROL ROD SUB-ASSEMBLY |
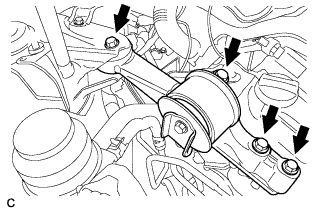 |
Remove the 4 bolts and engine moving control rod.
| 24. DISCONNECT NO. 1 FUEL VAPOR FEED HOSE |
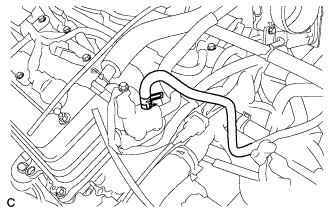 |
Remove the clamp and disconnect the No. 1 fuel vapor feed hose.
| 25. DISCONNECT CHECK VALVE TO BRAKE BOOSTER HOSE |
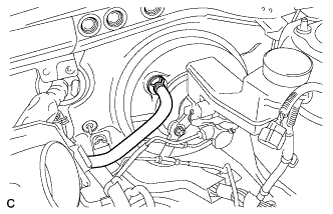 |
Remove the clamp and disconnect the check valve to brake booster hose.
| 26. REMOVE RADIATOR HOSE INLET |
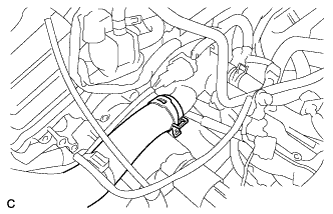 |
Remove the clamp and disconnect the radiator hose inlet.
| 27. REMOVE RADIATOR HOSE OUTLET |
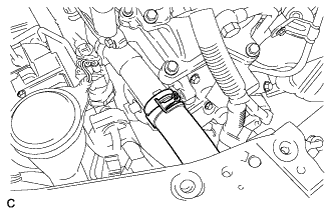 |
Remove the clamp and disconnect the radiator hose outlet.
| 28. DISCONNECT NO. 1 OIL COOLER INLET HOSE |
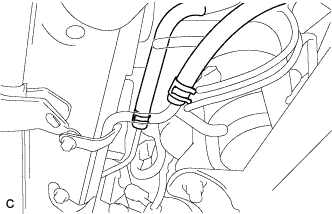 |
Remove the clamp and disconnect the oil cooler inlet hose.
| 29. DISCONNECT NO. 1 OIL COOLER OUTLET HOSE |
Remove the clamp and disconnect the oil cooler outlet hose.
| 30. DISCONNECT HEATER WATER HOSE INLET |
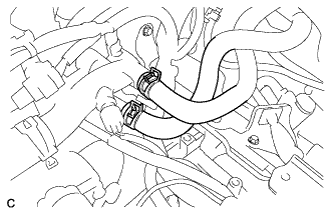 |
Disconnect the heater inlet water hose.
| 31. DISCONNECT HEATER WATER HOSE OUTLET |
Disconnect the heater outlet water hose.
| 32. REMOVE ECM |
| 33. REMOVE RELAY BLOCK COVER UPPER |
| 34. DISCONNECT ENGINE WIRE |
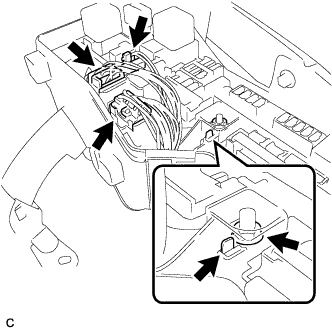 |
Disconnect the engine wire from the engine room junction block.
Remove the nut and separate the wire harness.
Using a screwdriver, unlock the engine room junction block. Pull the engine room junction block upward.
Disconnect the engine wire connectors.
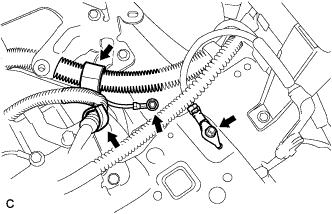 |
Remove the 2 bolts and 2 clamps from the body.
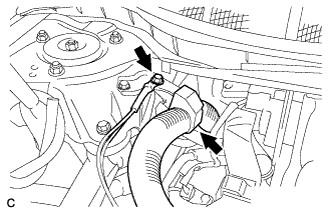 |
Remove the bolt and clamp from the bracket.
| 35. DISCONNECT TRANSMISSION CONTROL CABLE ASSEMBLY |
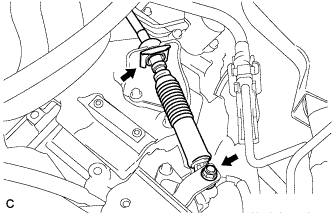 |
Remove the clip and nut, and separate the cable from the transaxle.
| 36. SEPARATE FUEL TUBE SUB-ASSEMBLY |
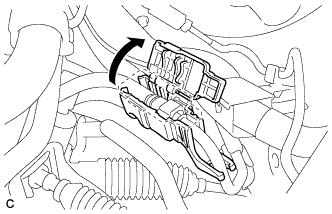 |
Remove the No. 1 fuel pipe clamp.
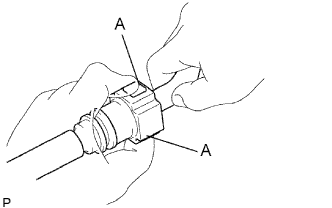 |
Disconnect the connector from the tube while pinching part A with your fingers as shown in the illustration.
| 37. DISCONNECT NO. 1 OIL RESERVOIR TO PUMP HOSE |
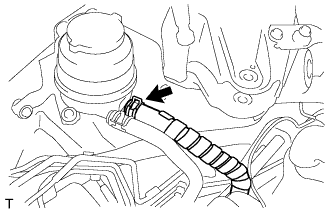 |
Disconnect the No. 1 oil reservoir to pump hose.
| 38. DISCONNECT RETURN TUBE SUB-ASSEMBLY |
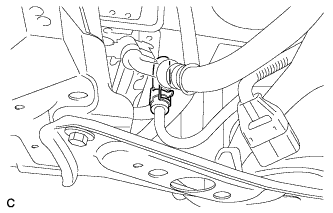 |
Disconnect the return tube sub-assembly.
| 39. REMOVE EXHAUST PIPE NO. 1 SUPPORT BRACKET |
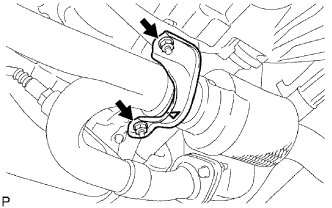 |
Remove the 2 nuts and front support brackets.
| 40. REMOVE EXHAUST PIPE ASSEMBLY FRONT |
Disconnect the 2 heated oxygen sensor (bank 1, 2 sensor 2) connectors.
Remove the 2 nuts from the exhaust front pipe (left bank exhaust manifold side).
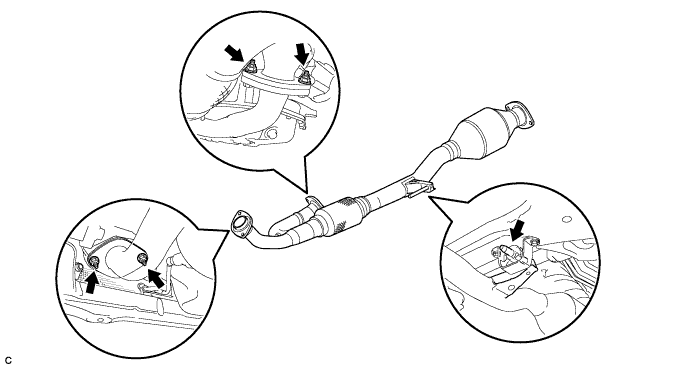
Remove the 2 nuts from the exhaust front pipe (right bank exhaust pipe manifold side).
Remove the exhaust front pipe.
Remove the 2 gaskets from the exhaust front pipe.
| 41. REMOVE FRONT AXLE HUB NUT LH |
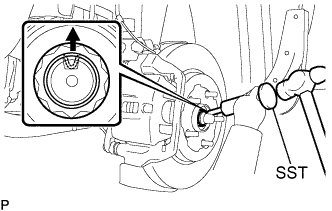 |
Using SST and a hammer, release the staked part of the front axle hub nut.
While applying the brakes, remove the front axle hub nut.
| 42. REMOVE FRONT AXLE HUB NUT RH |
| 43. DISCONNECT FRONT STABILIZER LINK ASSEMBLY LH |
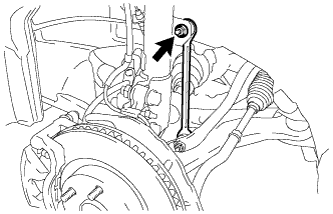 |
Remove the nut and separate the front stabilizer link assembly.
| 44. DISCONNECT FRONT STABILIZER LINK ASSEMBLY RH |
| 45. DISCONNECT FRONT SPEED SENSOR LH |
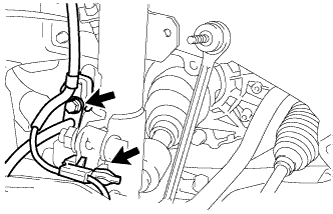 |
Remove the bolt and clip, and separate the speed sensor wire and flexible hose from the shock absorber.
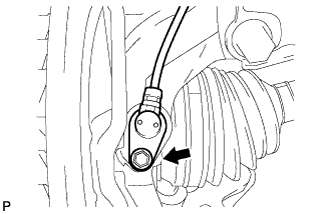 |
Remove the bolt and separate the speed sensor from the steering knuckle.
| 46. DISCONNECT FRONT SPEED SENSOR RH |
| 47. DISCONNECT TIE ROD ASSEMBLY LH |
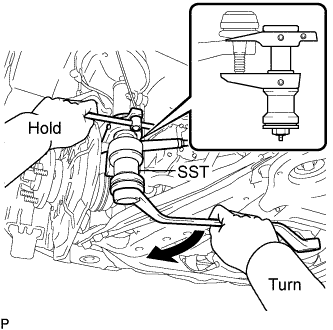 |
Remove the cotter pin and nut.
Using SST, separate the tie rod end sub-assembly from the steering knuckle.
| 48. DISCONNECT TIE ROD ASSEMBLY RH |
| 49. DISCONNECT FRONT SUSPENSION LOWER NO. 1 ARM LH |
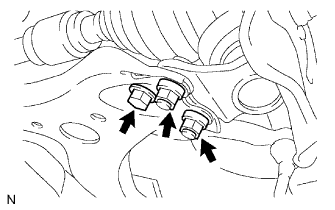 |
Remove the bolt and 2 nuts, and separate the front suspension lower No. 1 arm from the lower ball joint.
| 50. DISCONNECT FRONT SUSPENSION LOWER NO. 1 ARM RH |
| 51. SEPARATE FRONT AXLE ASSEMBLY LH |
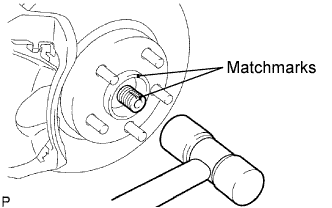 |
Put matchmarks on the front drive shaft assembly and the axle hub.
Using a plastic hammer, separate the front drive shaft assembly from the front axle assembly.
| 52. SEPARATE FRONT AXLE ASSEMBLY RH |
| 53. REMOVE NO. 1 EXHAUST PIPE SUPPORT BRACKET |
Remove the bolt and No. 1 exhaust pipe support bracket.
| 54. REMOVE DRIVE PLATE AND TORQUE CONVERTER CLUTCH SETTING BOLT |
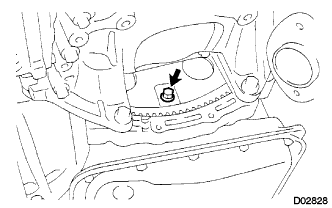 |
Turn the crankshaft to gain access and remove the 6 bolts while holding the crankshaft pulley bolt with a wrench.
| 55. DISCONNECT STEERING SLIDING YOKE |
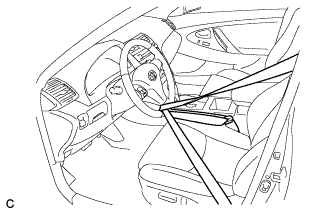 |
Secure the steering wheel with the seat belt in order to prevent rotation.
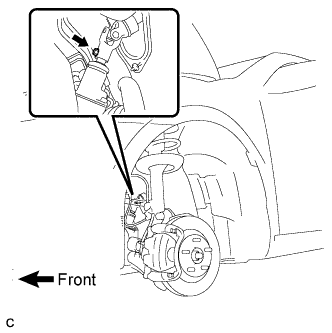 |
Remove the bolt and slide the steering sliding yoke.
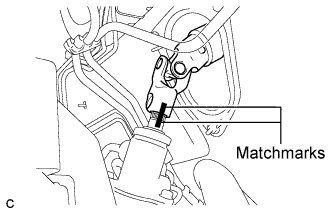 |
Put matchmarks on the steering sliding yoke and the power steering link assembly.
Separate the steering sliding yoke from the power steering link assembly.
| 56. REMOVE GENERATOR ASSEMBLY |
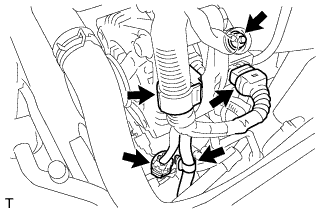 |
Remove the terminal cap.
Remove the nut and disconnect the wire harness from terminal B.
Disconnect the generator connector from the generator assembly.
Disconnect the connector from the compressor and magnetic clutch.
Disconnect the 2 wire harness clamps.
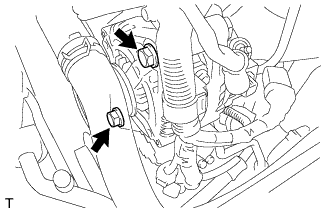 |
Remove the 2 bolts.
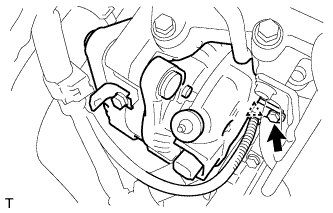 |
Remove the bolt from the cylinder block.
Disconnect the wire harness clamp and remove the generator assembly.
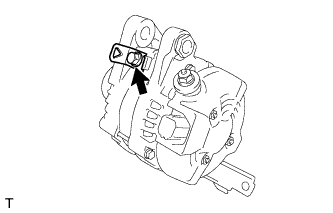 |
Remove the bolt and wire harness clamp stay.
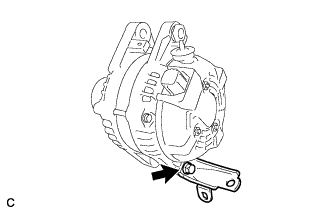 |
Remove the bolt and bracket.
| 57. SEPARATE COOLER COMPRESSOR ASSEMBLY |
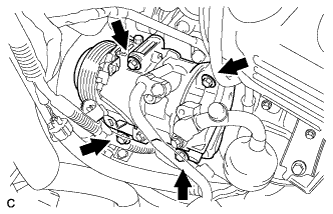 |
Remove the 2 connector clamps.
Remove the 4 bolts and separate the compressor.
| 58. REMOVE ENGINE ASSEMBLY WITH TRANSAXLE |
Set the engine lifter.
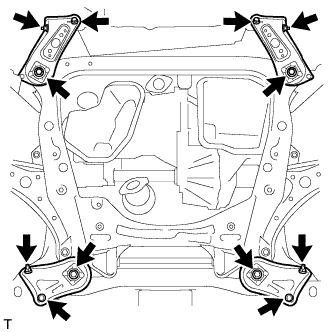 |
Remove the 4 bolts, 2 nuts, and frame side rail plates RH and LH.
Remove the 4 bolts, 2 nuts, and front suspension member brace rear RH and LH.
Slowly remove the engine assembly from the vehicle using the engine lifter.
| 59. REMOVE VANE PUMP ASSEMBLY |
Disconnect the power steering oil pressure switch connector.
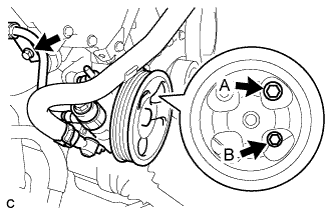 |
Remove the pressure feed tube clamp bolt.
Loosen bolt A.
Remove bolt B and the vane pump.
| 60. INSTALL ENGINE HANGERS |
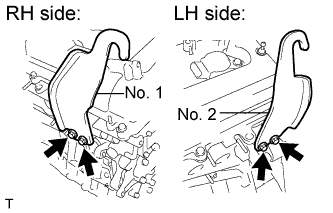 |
Install the 2 engine hangers with the 4 bolts as shown in the illustration.
Attach an engine sling device and hang the engine with a chain block.
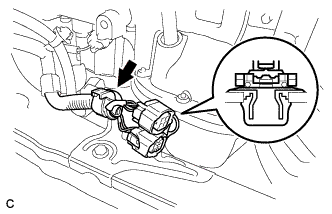
| 61. REMOVE FRONT FRAME ASSEMBLY |
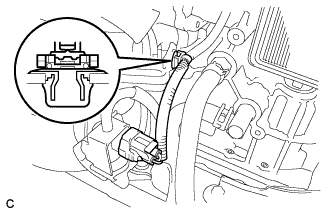 |
Disconnect the connector and clamp.
 |
Disconnect the 2 clamps.
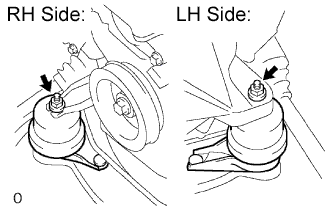 |
Remove the 2 nuts and disconnect the engine mounting insulators RH and LH.
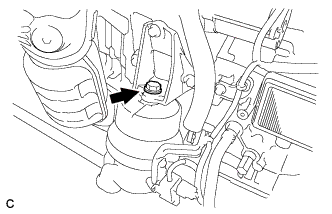 |
Remove the bolt and disconnect the engine mounting insulator FR.
| 62. REMOVE FRONT DRIVE SHAFT ASSEMBLY LH |
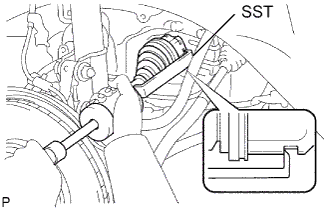 |
Using SST, remove the front drive shaft assembly LH.
| 63. REMOVE FRONT DRIVE SHAFT ASSEMBLY RH |
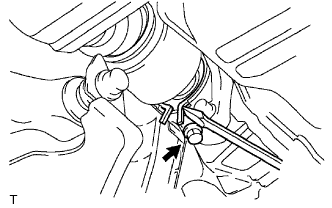 |
Using a screwdriver, remove the bearing bracket hole snap ring.
Remove the bolt and front drive shaft assembly RH from the drive shaft bearing bracket.
| 64. REMOVE ENGINE WIRE |
| 65. REMOVE STARTER ASSEMBLY |
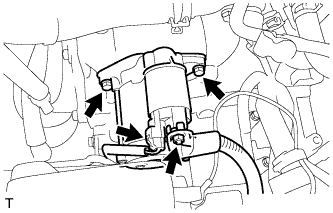 |
Disconnect the terminal 50 connector from the starter assembly.
Remove the nut and disconnect the wire harness from terminal 30.
Remove the 2 bolts and starter assembly.
| 66. REMOVE AUTOMATIC TRANSAXLE ASSEMBLY |
| 67. REMOVE DRIVE PLATE AND RING GEAR SUB-ASSEMBLY |
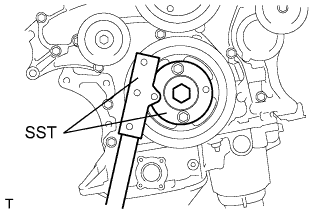 |
Using SST, hold the crankshaft.
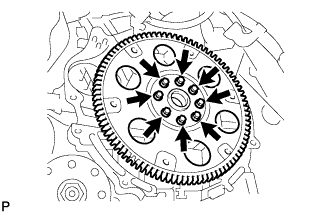 |
Remove the 8 bolts, front spacer, drive plate and rear spacer.
| 68. SECURE ENGINE |
Secure the engine onto an engine stand with the bolts.
| 69. REMOVE INTAKE AIR SURGE TANK ASSEMBLY |
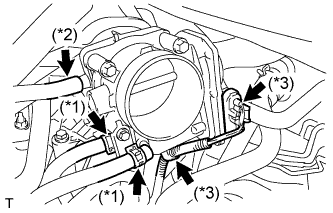 |
Disconnect the 2 water by-pass hoses from the throttle body assembly (*1).
Disconnect the vapor feed hose (*2).
Disconnect the throttle body assembly connector and clamp (*3).
Disconnect the No. 1 ventilation hose.
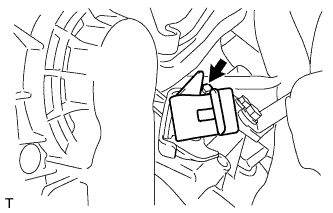 |
Remove the bolt and vacuum hose clamp.
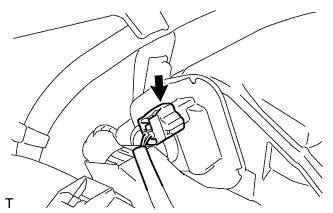 |
Disconnect the connector.
Remove the 4 bolts, No. 1 surge tank stay and throttle body bracket.
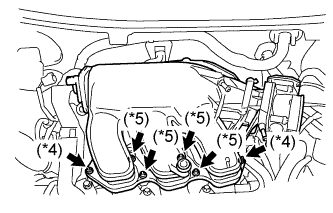 |
Using a 5 mm socket hexagon wrench, remove the 4 bolts (*4).
Remove the 2 nuts and intake air surge tank (*5).
Remove the gasket from the intake air surge tank.
| 70. REMOVE IGNITION COIL ASSEMBLY |
Remove the 6 bolts and 6 ignition coils.
| 71. REMOVE NO. 2 ENGINE MOUNTING STAY RH |
Remove the bolt and No. 2 engine mounting stay RH.
| 72. REMOVE INTAKE MANIFOLD |
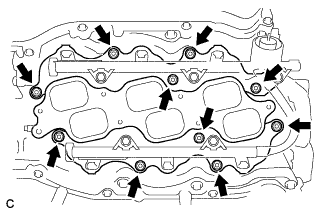 |
Uniformly loosen and remove the 6 bolts and 4 nuts.
Remove the intake manifold and 2 gaskets.
| 73. REMOVE EXHAUST MANIFOLD SUB-ASSEMBLY RH |
Disconnect the A/F sensor connector clamp.
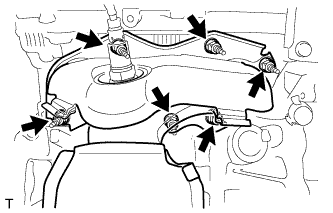 |
Uniformly loosen and remove the 6 nuts.
Remove the manifold and gasket.
| 74. REMOVE OIL LEVEL GAUGE GUIDE SUB-ASSEMBLY |
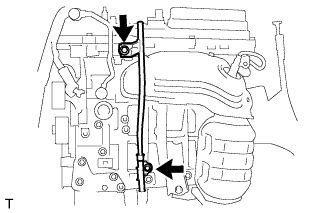 |
Remove the oil level gauge.
Remove the 2 bolts, oil level gauge guides No. 1 and No. 2.
Remove the O-rings from the oil level gauge guide.
| 75. REMOVE NO. 2 MANIFOLD STAY |
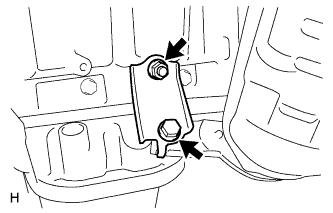 |
Remove the bolt, nut and No. 2 manifold stay.
| 76. REMOVE NO. 2 EXHAUST MANIFOLD HEAT INSULATOR |
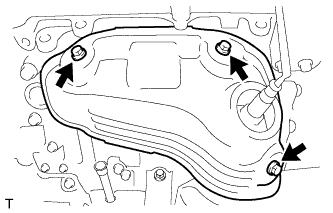 |
Remove the 3 bolts and No. 2 insulator.
| 77. REMOVE EXHAUST MANIFOLD SUB-ASSEMBLY LH |
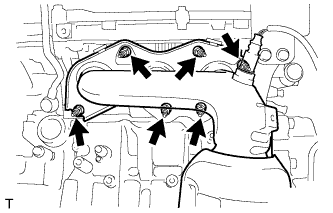 |
Uniformly loosen and remove the 6 nuts.
Remove the manifold and gasket.
| 78. REMOVE ENGINE MOUNTING BRACKET RH |
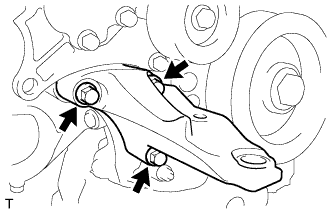 |
Remove the 3 bolts and engine mounting bracket RH.
| 79. REMOVE DRIVE SHAFT BEARING BRACKET |
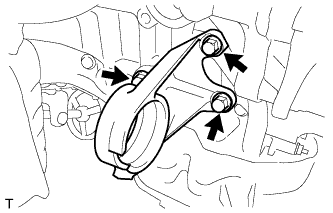 |
Remove the 3 bolts and drive shaft bearing bracket.
| 80. REMOVE V-RIBBED BELT TENSIONER ASSEMBLY |
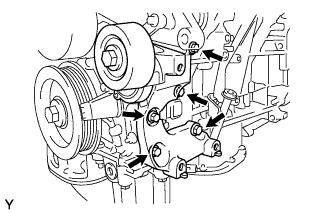 |
Remove the 5 bolts and V-ribbed belt tensioner assembly.
| 81. REMOVE NO. 2 TIMING GEAR COVER |
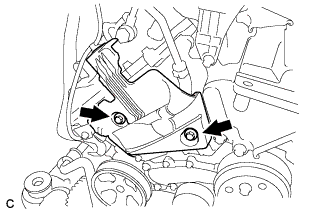 |
Remove the 2 bolts and No. 2 timing gear cover.
| 82. REMOVE NO. 2 IDLER PULLEY SUB-ASSEMBLY |
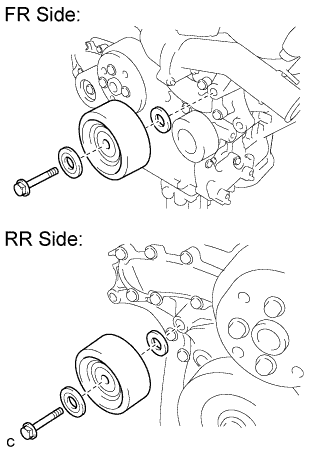 |
Remove the bolt, 2 plates and No. 2 idler pulley sub-assembly.
| 83. REMOVE WATER PUMP PULLEY |
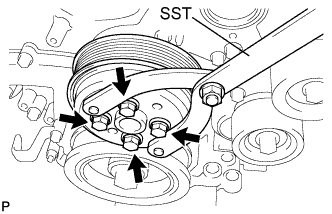 |
Using SST, hold the water pump pulley.
Remove the 4 bolts and water pump pulley.
| 84. REMOVE NO. 1 ENGINE MOUNTING BRACKET FRONT LH |
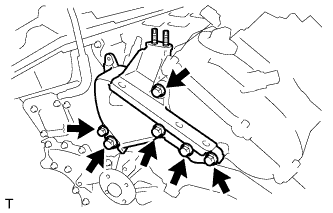 |
Remove the 6 bolts and No. 1 engine mounting bracket front LH.
| 85. REMOVE RADIO SETTING CONDENSER |
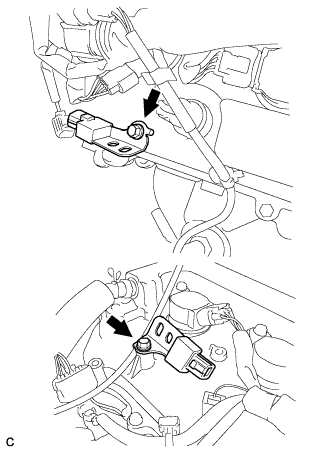 |
Remove the 2 bolts and 2 radio setting condensers.
| 86. REMOVE NO. 1 VACUUM SWITCHING VALVE ASSEMBLY |
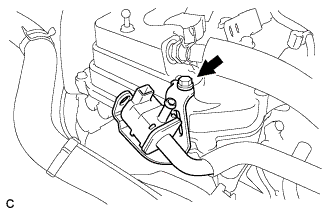 |
Remove the bolt and No. 1 vacuum switching valve.
| 87. REMOVE ENGINE OIL PRESSURE SWITCH ASSEMBLY |
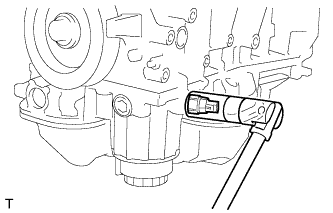 |
Using a 24 mm deep socket wrench, remove the engine oil pressure switch assembly.
| 88. REMOVE KNOCK CONTROL SENSOR |
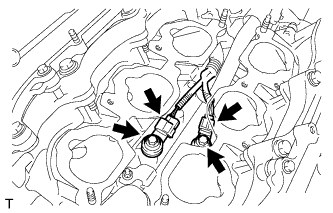 |
Disconnect the 2 knock control sensor connectors.
Remove the 2 bolts and 2 knock control sensors.
| 89. REMOVE ENGINE COOLANT TEMPERATURE SENSOR |
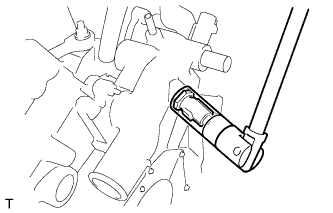 |
Using a 19 mm deep socket wrench, remove the engine coolant temperature sensor and gasket.