EB62 MANUAL TRANSMISSION / TRANSAXLE INPUT SHAFT REASSEMBLY
PROCEDURE

 33311A
1.INSTALL FRONT INPUT SHAFT BEARING
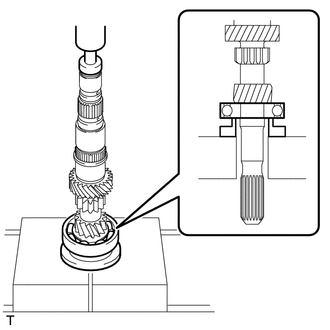
Using SST and a press, press in the front input shaft bearing to the input shaft.
- SST
- 09506-35010
33333A
2.INSTALL 3RD GEAR NEEDLE ROLLER BEARING
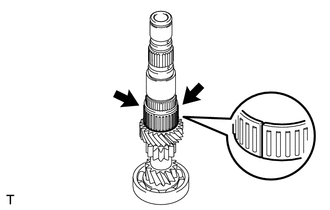
Coat the 2 pieces of the 3rd gear needle roller bearing with gear oil and install them to the input shaft.
33333
3.INSTALL 3RD GEAR
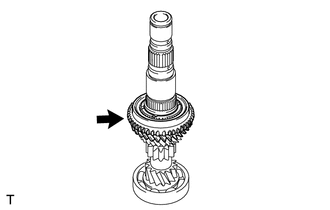
Coat the 3rd gear with gear oil and install it to the input shaft.
33369
4.INSTALL NO. 3 SYNCHRONIZER RING
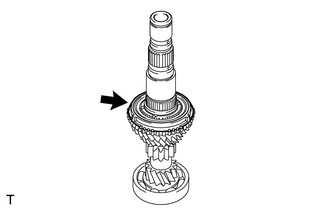
Coat the No. 3 synchronizer ring with gear oil and install it to the 3rd gear.
33362
5.INSTALL NO. 2 TRANSMISSION CLUTCH HUB
Coat the No. 2 transmission clutch hub with gear oil.
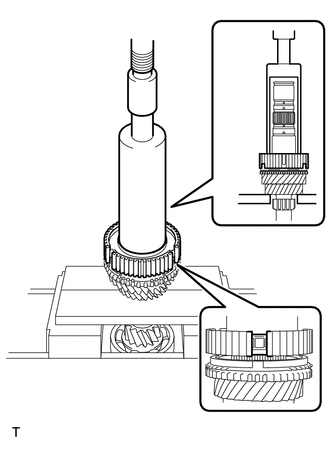
Using SST and a press, press in the No. 2 transmission clutch hub onto the input shaft.
- SST
- 09527-21011
09316-60011 (09316-00011)
- NOTICE:
-
When installing the No. 2 transmission clutch hub, align the protrusion of the No. 3 synchronizer ring with the cutout of the No. 2 transmission clutch hub.
33362A
6.INSTALL NO. 2 CLUTCH HUB SETTING SHAFT SNAP RING
Select a new No. 2 clutch hub setting shaft snap ring that will allow minimal axial play.
- Standard clearance:
0.1 mm (0.00394 in.) or less
- Standard Snap Ring Thickness:
Mark Specified Condition Mark Specified Condition 0 2.30 mm (0.0905 in.) 3 2.48 mm (0.0976 in.) 1 2.36 mm (0.0929 in.) 4 2.54 mm (0.0999 in.) 2 2.42 mm (0.0952 in.) 5 2.60 mm (0.1023 in.)
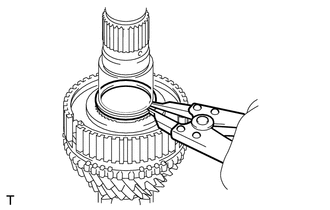
Using a snap ring expander, install the No. 2 clutch hub setting shaft snap ring.
- NOTICE:
- ·
Be sure to properly install the snap ring as it easily expands.
·Do not damage the journal surface of the snap ring.
33366
7.INSTALL NO. 2 SYNCHROMESH SHIFTING KEY
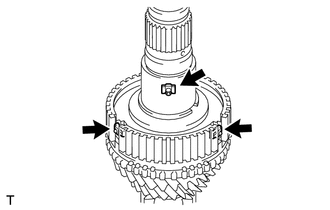
Install the 3 No. 2 synchromesh shifting keys to the No. 2 transmission clutch hub.
33364
8.INSTALL NO. 2 TRANSMISSION HUB SLEEVE
Coat the No. 2 transmission hub sleeve with gear oil.
Install the No. 2 transmission hub sleeve to the No. 2 transmission clutch hub.
33334B
9.INSTALL 4TH GEAR BEARING SPACER
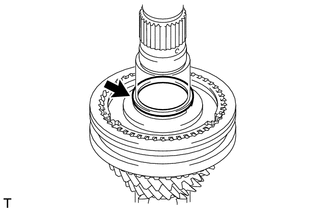
Install the 4th gear bearing spacer to the input shaft.
33368H
10.INSTALL 4TH GEAR SYNCHRONIZER RING
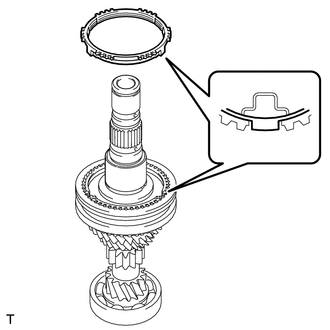
Coat the 4th gear synchronizer ring with gear oil and install it to the No. 2 transmission clutch hub.
- NOTICE:
-
When installing the 4th gear synchronizer ring, align the protrusion of the 4th gear synchronizer ring with the cutout of the No. 2 transmission clutch hub.
33334
11.INSTALL 4TH GEAR
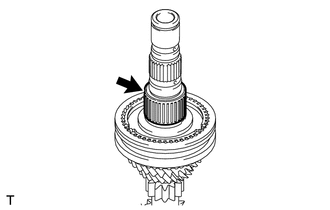
Coat the 4th gear needle roller bearing and 4th gear bearing spacer with gear oil and install the 4th gear needle roller bearing to the input shaft.
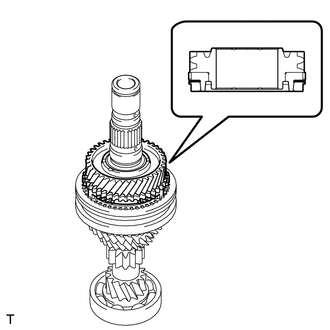
Coat the 4th gear with gear oil and install it to the input shaft.
- NOTICE:
-
Install the 4th gear as shown in the illustration.
33359A
12.INSTALL INNER 5TH GEAR BEARING RACE LOCK BALL
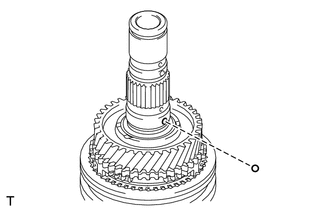
Coat the inner 5th gear bearing race lock ball with gear oil and install it to the input shaft.
33359
13.INSTALL INNER 5TH GEAR BEARING RACE
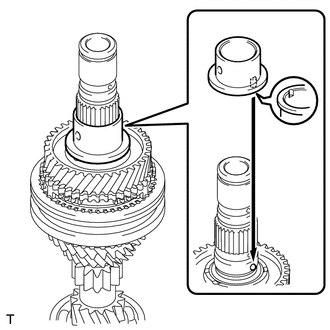
Coat the inner 5th gear bearing race with gear oil and install it to the input shaft.
- NOTICE:
-
Align the groove of the inner 5th gear bearing race with the ball.
33336A
14.INSTALL 5TH GEAR NEEDLE ROLLER BEARING
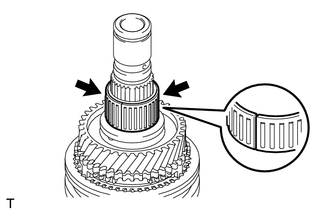
Coat the 2 pieces of the 5th gear needle roller bearing and inner 5th gear bearing race with gear oil and install the 5th gear needle roller bearing to the input shaft.
33336
15.INSTALL 5TH GEAR
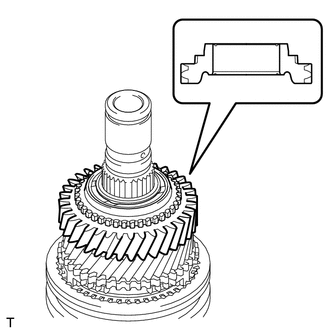
Coat the 5th gear with gear oil and install it to the input shaft.
- NOTICE:
-
Install the 5th gear as shown in the illustration.
33396C
16.INSTALL NO. 5 SYNCHRONIZER RING
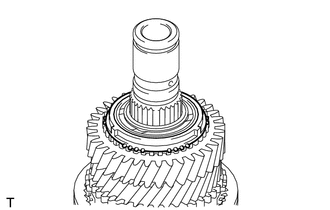
Coat the No. 5 synchronizer ring (for 5th Gear) with gear oil and install it to the 5th gear.
33393
17.INSTALL NO. 3 TRANSMISSION CLUTCH HUB
Coat the No. 3 transmission clutch hub with gear oil.
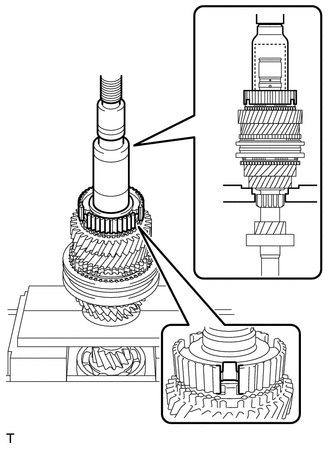
Using SST and a press, press in the No. 3 transmission clutch hub to the input shaft.
- SST
- 09309-37010
09527-21011
- NOTICE:
-
When installing the No. 3 transmission clutch hub, align the protrusion of the No. 5 synchronizer ring with the cutout of the No. 3 transmission clutch hub.
33394
18.INSTALL NO. 3 SYNCHROMESH SHIFTING KEY
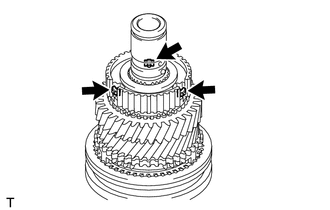
Install the 3 No. 3 synchromesh shifting keys to the No. 3 transmission clutch hub.
33275C
19.INSTALL INNER 6TH GEAR BEARING RACE LOCK BALL
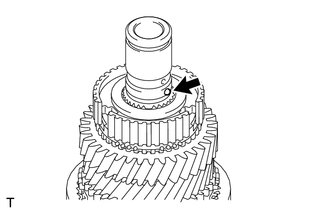
Coat the inner 6th gear bearing race lock ball with gear oil and install it to the input shaft.
33395
20.INSTALL NO. 3 TRANSMISSION HUB SLEEVE
Coat the No. 3 transmission hub sleeve with gear oil.
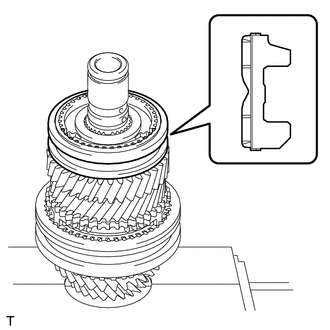
Install the No. 3 transmission hub sleeve to the No. 3 transmission clutch hub.
- NOTICE:
-
Install the No. 3 transmission hub sleeve as shown in the illustration.
3335A
21.INSTALL INNER 6TH GEAR BEARING RACE
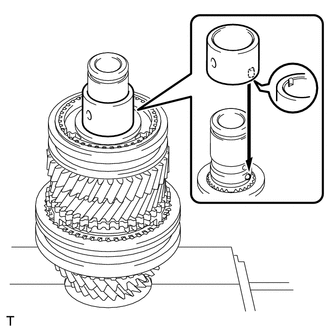
Coat the inner 6th gear bearing race with gear oil and install it to the input shaft.
- NOTICE:
-
Align the groove of the inner 6th gear bearing race with the ball.
33337A
22.INSTALL 6TH GEAR NEEDLE ROLLER BEARING
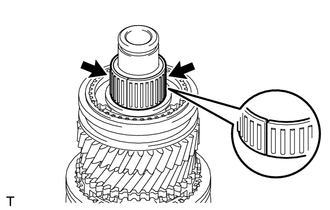
Coat the 2 pieces of the 6th gear needle roller bearing and inner 6th gear bearing race with gear oil and install the 6th gear needle roller bearing to the input shaft.
33396C
23.INSTALL NO. 5 SYNCHRONIZER RING (for 6th Gear)
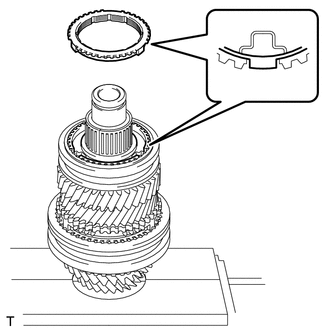
Coat the No. 5 synchronizer ring (for 6th Gear) with gear oil and install it to the No. 3 transmission clutch hub.
- NOTICE:
-
When installing the No. 5 synchronizer ring, align the protrusion of the No. 5 synchronizer ring with the cutout of the No. 3 transmission clutch hub.
33337
24.INSTALL 6TH GEAR
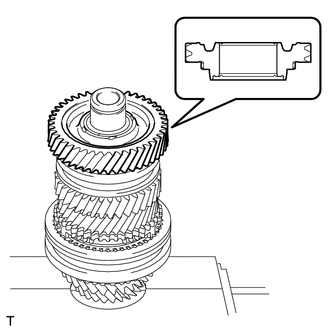
Coat the 6th gear with gear oil and install it to the input shaft.
- NOTICE:
-
Install the 6th gear as shown in the illustration.
33311E
25.INSTALL REAR INPUT SHAFT RADIAL BALL BEARING
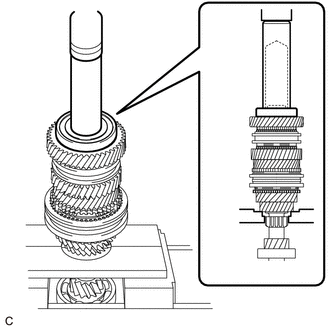
Using SST and a press, press in the rear input shaft radial ball bearing to the input shaft.
- SST
- 09527-21011
09608-04031
33311Y
26.INSTALL REAR INPUT SHAFT BEARING SHAFT SNAP RING
Select a new rear input shaft bearing shaft snap ring that will allow minimal axial play.
- Standard clearance:
0.1 mm (0.00394 in.) or less
- Standard Snap Ring Thickness:
Mark Specified Condition Mark Specified Condition 0 1.90 mm (0.0748 in.) 6 2.26 mm (0.0889 in.) 1 1.96 m (0.0771 in.) 7 2.32 mm (0.0913 in.) 2 2.02 mm (0.0795 in.) 8 2.38 mm (0.0937 in.) 3 2.08 mm (0.0818 in.) 9 2.44 mm (0.0960 in.) 4 2.14 mm (0.0842 in.) A 2.50 mm (0.0984 in.) 5 2.20 mm (0.0866 in.) - -
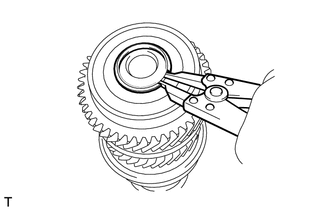
Using a snap ring expander, install the rear input shaft bearing shaft snap ring.
- NOTICE:
- ·
Be sure to properly install the snap ring as it easily expands.
·Do not damage the journal surface of the snap ring.
27.INSPECT 3RD GEAR RADIAL CLEARANCE
28.INSPECT 4TH GEAR RADIAL CLEARANCE
29.INSPECT 5TH GEAR RADIAL CLEARANCE
30.INSPECT 6TH GEAR RADIAL CLEARANCE
31.INSPECT 3RD GEAR THRUST CLEARANCE
32.INSPECT 4TH GEAR THRUST CLEARANCE
33.INSPECT 5TH GEAR THRUST CLEARANCE
34.INSPECT 6TH GEAR THRUST CLEARANCE