EXTERIOR PANELS / TRIM FRONT DOOR BELT MOULDING REMOVAL
PROCEDURE

 1. PRECAUTION
- NOTICE:
-
After turning the ignition switch off, waiting time may be required before disconnecting the cable from the negative (-) battery terminal. Therefore, make sure to read the disconnecting the cable from the negative (-) battery terminal notices before proceeding with work.
-
Click hereGeneral>INTRODUCTION>REPAIR INSTRUCTION>PRECAUTION
2.DISCONNECT CABLE FROM NEGATIVE BATTERY TERMINAL
- NOTICE:
-
When disconnecting the cable, some systems need to be initialized after the cable is reconnected.
-
Click hereGeneral>INTRODUCTION>REPAIR INSTRUCTION>INITIALIZATION
87940
3.REMOVE OUTER REAR VIEW MIRROR ASSEMBLY
67832
4.REMOVE FRONT DOOR SERVICE HOLE COVER
68102
5.REMOVE FRONT DOOR GLASS SUB-ASSEMBLY
75720
6.REMOVE FRONT DOOR BELT MOULDING ASSEMBLY
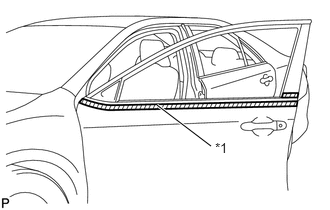
| *1 | Protective Tape |
Put protective tape around the front door belt moulding assembly.
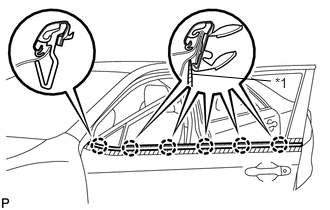
| *1 | Protective Tape |
Using a screwdriver with the tip wrapped with protective tape, disengage the 6 claws and remove the front door belt moulding assembly.
- HINT:
-
Tape the screwdriver tip before use.