 |
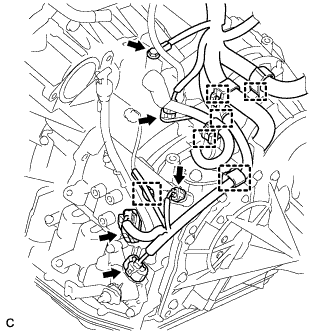
Remove the bolt and disconnect the 4 connectors, 6 clamps and engine wire from the automatic transaxle assembly.
AUTOMATIC TRANSAXLE ASSEMBLY > REMOVAL |
| 1. REMOVE ENGINE ASSEMBLY WITH TRANSAXLE |
| 2. DISCONNECT ENGINE WIRE |
|
Remove the bolt and disconnect the 4 connectors, 6 clamps and engine wire from the automatic transaxle assembly.
| 3. REMOVE FRONT FRAME ASSEMBLY |
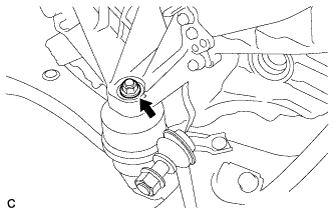 |
Remove the nut and separate the engine mounting insulator LH .
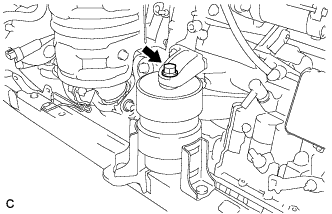 |
Remove the bolt and separate the front engine mounting insulator.
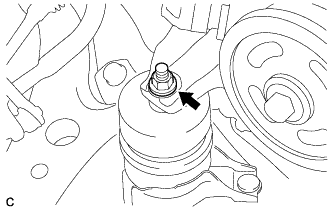 |
Remove the nut and separate the engine mounting insulator RH.
Remove the front frame assembly.
Using a height adjustable attachment and plate lift attachment, place the engine assembly with transaxle on a flat level surface.
| 4. REMOVE AUTOMATIC TRANSAXLE ASSEMBLY |
Using a transmission jack attachment, set the automatic transaxle assembly on a transmission jack.
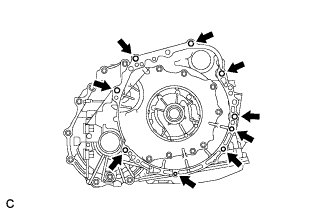 |
Remove the 9 bolts and automatic transaxle assembly.
| 5. REMOVE FRONT ENGINE MOUNTING BRACKET |
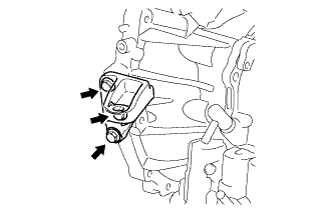 |
Remove the 3 bolts and front engine mounting bracket from the automatic transaxle assembly.
| 6. REMOVE NO. 1 FLEXIBLE HOSE CLAMP |
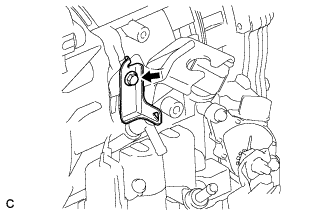 |
Remove the bolt and No. 1 flexible hose clamp from the No. 1 transmission control cable bracket.
| 7. REMOVE NO. 1 TRANSMISSION CONTROL CABLE BRACKET |
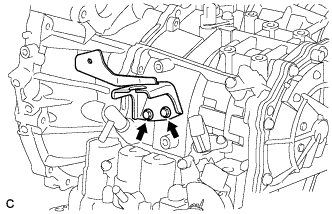 |
Remove the 2 bolts and No. 1 transmission control cable bracket from the automatic transaxle assembly.
| 8. REMOVE NO. 2 TRANSMISSION CONTROL CABLE BRACKET |
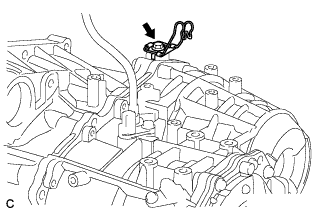 |
Remove the bolt and No. 2 transmission control cable bracket from the automatic transaxle assembly.
| 9. REMOVE WIRE HARNESS CLAMP BRACKET |
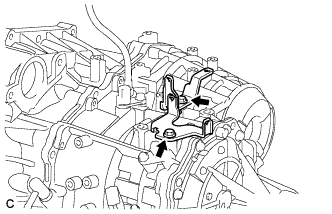 |
Remove the 2 bolts and 2 wire harness clamp brackets from the automatic transaxle assembly.
| 10. REMOVE TRANSMISSION OIL FILLER TUBE SUB-ASSEMBLY |
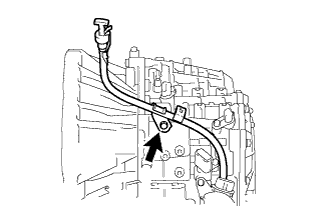 |
Remove the transmission oil level gauge sub-assembly from the transmission oil filler tube sub-assembly.
Remove the bolt and transmission oil filler tube sub-assembly from the automatic transaxle assembly.
Remove the O-ring from the transmission oil filler tube sub-assembly.
| 11. REMOVE SPEEDOMETER DRIVEN HOLE COVER SUB-ASSEMBLY |
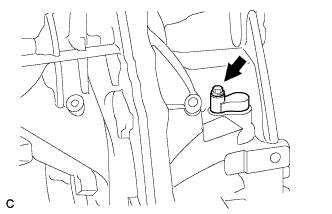 |
Remove the bolt and speedometer driven hole cover sub-assembly from the automatic transaxle assembly.
Remove the O-ring from the speedometer driven hole cover sub-assembly.
| 12. REMOVE TORQUE CONVERTER ASSEMBLY |
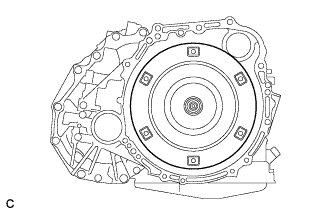 |
Remove the torque converter assembly from the automatic transaxle assembly.