Home › Engine / Hybrid System ยท 2GR-FE › COOLING › RADIATOR

RADIATOR > REMOVAL

for Preparation Click here


1. PRECAUTION

NOTICE:
After turning the engine switch off, waiting time may be required before disconnecting the cable from the negative (-) battery terminal. Therefore, make sure to read the disconnecting the cable from the negative (-) battery terminal notice before proceeding with work (Click here).


2. DRAIN ENGINE COOLANT

NOTICE:
Do not remove the radiator cap sub-assembly, cylinder block drain cock plugs and radiator drain cock plug while the engine and radiator are still hot. Pressurized, hot engine coolant and steam may be released and cause serious burns.

  1. Loosen the radiator drain cock plug.

  1. Loosen the 2 cylinder block drain cock plugs.


  1. Remove the radiator cap sub-assembly.
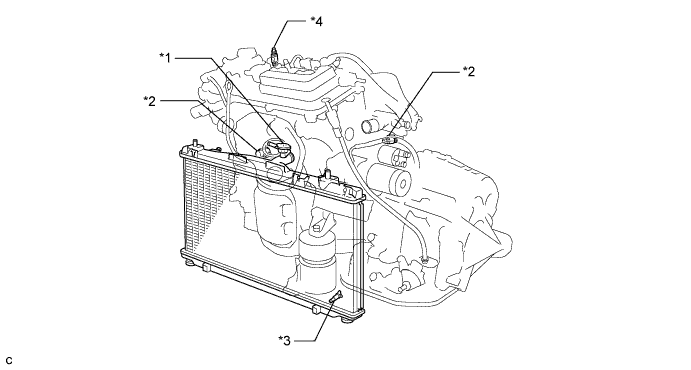

    A255284E01


    Text in Illustration 
    *1
    Radiator Cap Sub-assembly
    *2
    Cylinder Block Drain Cock Plug
    *3
    Radiator Drain Cock Plug
    *4
    Air Drain Cock Plug

    HINT:
    Collect the coolant in a container and dispose of it according to the regulations in your area.


3. REMOVE FRONT WHEEL OPENING EXTENSION PAD RH


4. REMOVE FRONT WHEEL OPENING EXTENSION PAD LH


5. REMOVE ENGINE UNDER COVER RH


6. REMOVE ENGINE UNDER COVER LH


7. DISCONNECT CABLE FROM NEGATIVE BATTERY TERMINAL

NOTICE:
When disconnecting the cable, some systems need to be initialized after the cable is reconnected (Click here).


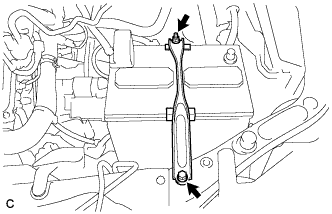
8. REMOVE BATTERY


    A256224
  1. Disconnect the positive (+) cable from the positive (+) battery terminal.

  1. Loosen the nut and remove the bolt.

  1. Remove the battery and battery tray.


9. REMOVE FRONT BUMPER ASSEMBLY
(Click here)


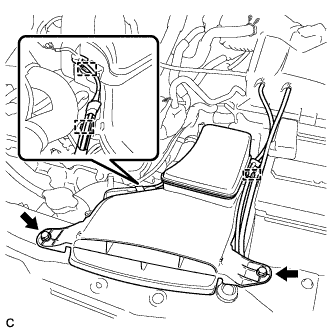
10. REMOVE INLET NO. 2 AIR CLEANER


    A255421
  1. Disconnect the 2 wire harness clamps and vacuum hose clamp.

  1. Remove the 2 bolts and inlet No. 2 air cleaner.


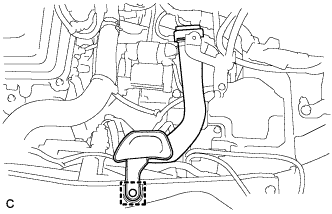
11. REMOVE INLET NO. 1 AIR CLEANER


    A256225
  1. Disengage the pin and remove the inlet No. 1 air cleaner.


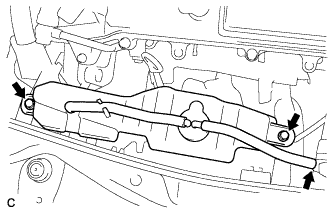
12. REMOVE RADIATOR RESERVE TANK ASSEMBLY


    A255301
  1. Disconnect the radiator reserve tank hose.

  1. Remove the 2 bolts and radiator reserve tank assembly.


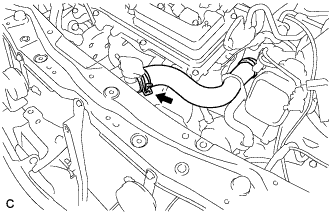
13. DISCONNECT NO. 1 RADIATOR HOSE


    A255305
  1. Disconnect the No. 1 radiator hose.


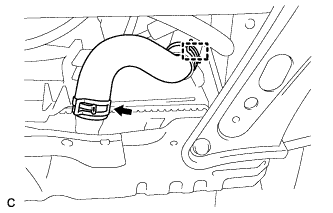
14. DISCONNECT NO. 2 RADIATOR HOSE


    A255303
  1. Disconnect the No. 2 radiator hose and clamp.


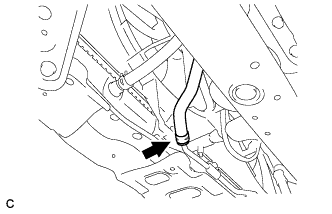
15. DISCONNECT INLET NO. 1 OIL COOLER HOSE


    A255889
  1. Disconnect the inlet No. 1 oil cooler hose.


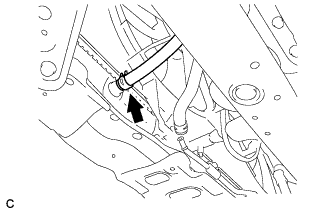
16. DISCONNECT OUTLET NO. 1 OIL COOLER HOSE


    A255890
  1. Disconnect the outlet No. 1 oil cooler hose.


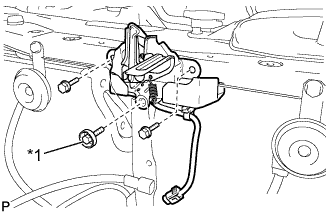
17. REMOVE HOOD LOCK ASSEMBLY


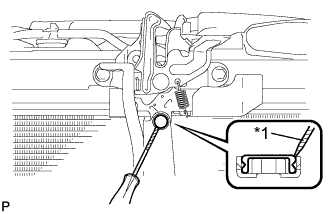
    B281661E01
  1. Using a screwdriver, remove the hood lock nut cap.
    Text in Illustration 
    *1
    Protective Tape

    HINT:
    Tape the screwdriver tip before use.


    B281667
  1. Disconnect the connector.


    B281671E01
  1. Remove the 2 bolts and hood lock bolt.
    Text in Illustration 
    *1
    Hood Lock Bolt


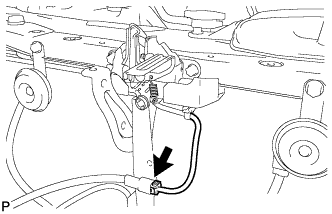
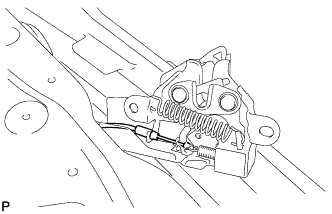
    B281672
  1. Disconnect the hood lock control cable assembly and remove the hood lock assembly.


18. REMOVE UPPER RADIATOR SUPPORT


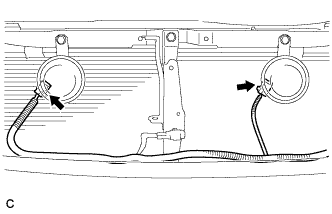
    A263146
  1. Disconnect the 2 connectors.


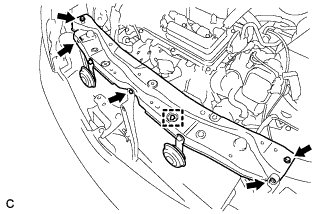
    A265982
  1. Disconnect the hood lock control cable clamp and remove the 5 bolts and upper radiator support.

  1. Remove the 2 radiator support cushions from the radiator assembly.


19. REMOVE RADIATOR ASSEMBLY


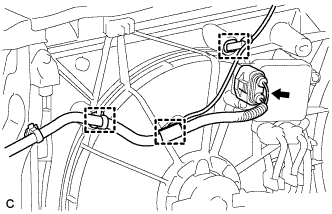
    A255310
  1. Disconnect the 3 clamps and connector.


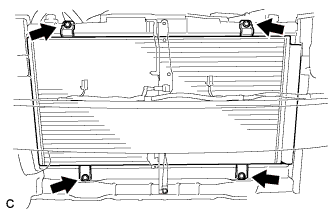
    A259413
  1. Remove the 4 bolts and separate the condenser assembly from the radiator assembly.


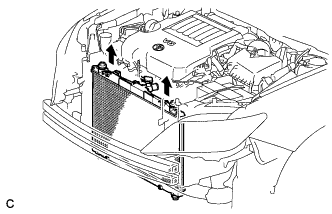
    A255315
  1. Remove the radiator assembly with fan assembly.

    NOTICE:
    Do not apply any excessive force to the cooler condenser assembly or pipe when removing the radiator assembly.

  1. Remove the 2 lower radiator supports from the radiator assembly.


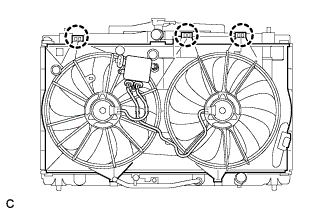
    A255517
  1. Release the 3 claws and lift the fan assembly from the radiator.