Home › Steering › STEERING GEAR / LINKAGE › STEERING GEAR

STEERING GEAR > REMOVAL

for Preparation Click here


NOTICE:
  1. Be sure to align the front wheels straight ahead when removing and installing the steering gear assembly.
  2. When disconnecting the steering intermediate shaft assembly and the pinion shaft of the steering gear assembly, be sure to place matchmarks before servicing.


1. PLACE FRONT WHEELS FACING STRAIGHT AHEAD


2. REMOVE FRONT WHEELS


3. SECURE STEERING WHEEL


    C238510
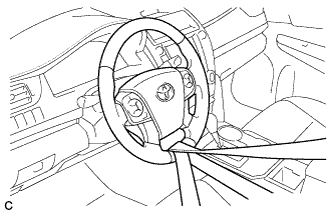
  1. Secure the steering wheel with the seat belt in order to prevent rotation.

    HINT:
    This operation is useful to prevent damage to the spiral cable.


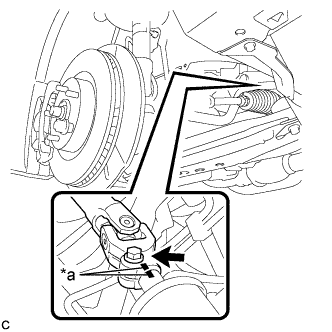
4. SEPARATE STEERING INTERMEDIATE SHAFT ASSEMBLY


    C238511E02
  1. Put matchmarks on the steering intermediate shaft assembly and steering link assembly.
    Text in Illustration 
    *a
    Matchmark

  1. Remove the bolt.

  1. Separate the steering intermediate shaft assembly from the steering link assembly.


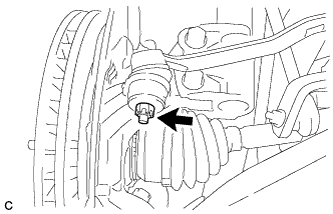
5. SEPARATE TIE ROD ASSEMBLY LH


    C238512
  1. Remove the cotter pin and nut.


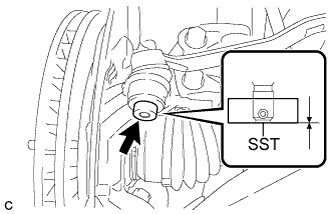
    C238513E01
  1. Install SST to the tie rod assembly LH.

    SST
    09960-20010   (09961-02060)

    NOTICE:
    Make sure that the lower ends of the tie rod assembly LH and SST are aligned.

  1. Secure SST using a string.

    NOTICE:
    Be sure to tighten the string firmly to secure SST to the steering knuckle to prevent SST from falling off.


  1. Using SST, separate the tie rod assembly LH from the steering knuckle.
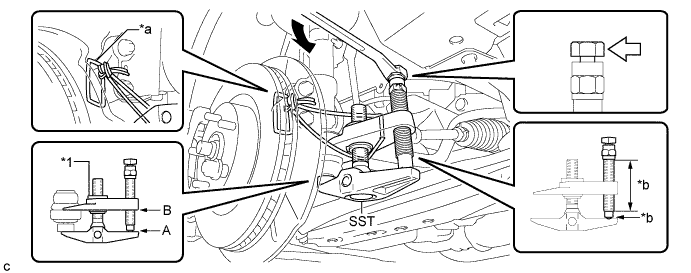

    C238514E02


    Text in Illustration 
    *1
    Center Nut
    -
    -
    *a
    String
    *b
    Grease Application Area
    V100136
    Place the wrench here.
    -
    -
    SST
    09960-20010   (09961-02010)

    CAUTION:
    Apply grease to the bolt threads and the tip of SST.

    NOTICE:
    1. Install SST with the center nut so that A and B shown in the illustration are parallel. Otherwise, the dust cover may be damaged.
    1. Be sure to place the wrench on the part indicated in the illustration.
    1. Do not damage the front disc brake dust cover.
    1. Do not damage the ball joint dust cover.
    1. Do not damage the steering knuckle.


6. SEPARATE TIE ROD ASSEMBLY RH

HINT:
Perform the same procedure as for the LH side.


7. REMOVE ENGINE ASSEMBLY WITH TRANSAXLE
  1. for 1AZ-FE: (Click here)
  2. for 2AR-FE: (Click here)
  3. for 2GR-FE: (Click here)


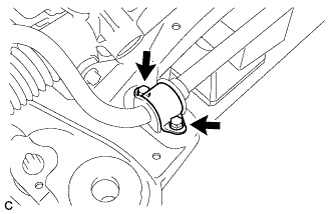
8. REMOVE NO. 1 FRONT STABILIZER BRACKET LH


    C238973
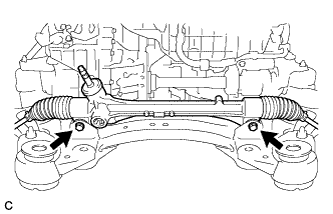
  1. Remove the 2 bolts and front No. 1 stabilizer bracket LH from the front frame assembly.


9. REMOVE NO. 1 FRONT STABILIZER BRACKET RH

HINT:
Perform the same procedure as for the LH side.


10. REMOVE FRONT STABILIZER BAR
  1. Remove the front stabilizer bar from the front frame assembly.


11. REMOVE STEERING LINK ASSEMBLY


    C238515
  1. Remove the 2 bolts, 2 nuts and steering link assembly.

    NOTICE:
    Keep the nut from rotating while turning the bolt because the nut has its own stopper.


12. SECURE STEERING LINK ASSEMBLY


    C238516E01
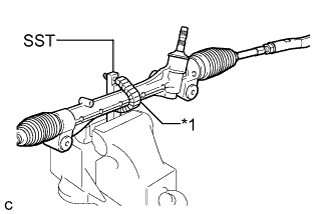
  1. Using SST, secure the steering link assembly in a vise.
    Text in Illustration 
    *1
    Protective Tape

    SST
    09612-00012  

    HINT:
    Tape SST before use.


13. REMOVE TIE ROD ASSEMBLY LH


    C238518E01
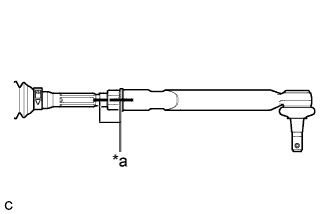
  1. Put matchmarks on the tie rod assembly LH and the steering rack end sub-assembly.
    Text in Illustration 
    *a
    Matchmark

  1. Remove the tie rod assembly LH and lock nut.


14. REMOVE TIE ROD ASSEMBLY RH

HINT:
Perform the same procedure as for the LH side.