 |
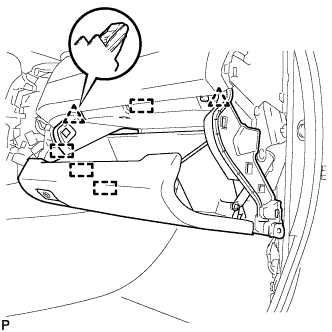
Engage the 2 clips and 4 guides.
AIR CONDITIONING AMPLIFIER > INSTALLATION |
| 1. INSTALL AIR CONDITIONING AMPLIFIER ASSEMBLY |
Engage the 2 guides.
Install the air conditioning amplifier assembly with the 2 screws.
Connect each connector.
| 2. INSTALL ECU INTEGRATION BOX RH (for LHD) |
Install the ECU integration box RH with the 2 nuts and bolt.
Connect each connector.
| 3. INSTALL LOWER INSTRUMENT PANEL SUB-ASSEMBLY |
|
Engage the 2 clips and 4 guides.
Install the 3 screws <C>.
Close the lower instrument panel door.
Install the lower instrument panel sub-assembly with the bolt <B> and screws <C>.
| 4. INSTALL NO. 2 INSTRUMENT PANEL UNDER COVER SUB-ASSEMBLY |
Connect the connector.
Engage the 2 guides and 4 claws to install the No. 2 instrument panel under cover sub-assembly.
| 5. INSTALL FRONT PANEL GARNISH |
| 6. INSTALL INSTRUMENT SIDE PANEL |
| 7. CONNECT FRONT DOOR OPENING TRIM WEATHERSTRIP |
| 8. INSTALL COWL SIDE TRIM SUB-ASSEMBLY |
| 9. INSTALL FRONT DOOR SCUFF PLATE |
| 10. CONNECT CABLE TO NEGATIVE BATTERY TERMINAL (for LHD) |