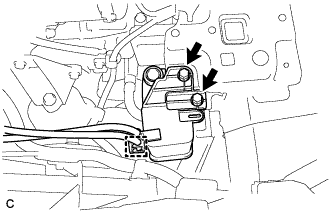
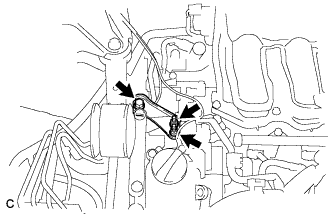
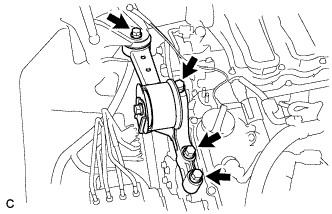
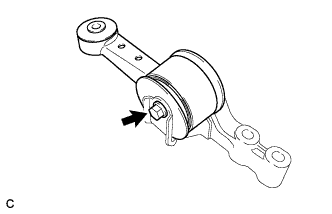
Home › Engine / Hybrid System ยท 2GR-FE › ENGINE MECHANICAL › ENGINE ASSEMBLY

ENGINE ASSEMBLY > REMOVAL

for Preparation Click here


1. PRECAUTION

CAUTION:
The engine assembly with transmission is very heavy. Be sure to follow the procedure described in the repair manual, or the engine lifter may suddenly drop.

NOTICE:
After turning the engine switch off, waiting time may be required before disconnecting the cable from the negative (-) battery terminal. Therefore, make sure to read the disconnecting the cable from the negative (-) battery terminal notices before proceeding with work (Click here).


2. RECOVER REFRIGERANT FROM AIR CONDITIONING SYSTEM
  1. Turn the A/C switch on.

  1. Operate the air conditioning with a set temperature of 25°C (77°F) and the blower at low for 10 minutes to circulate the refrigerant. This causes most of the compressor oil from the various components of the air conditioning system to collect in the air conditioning compressor.

  1. Turn the ignition switch off.

  1. Recover the refrigerant from the air conditioning system using a refrigerant recovery unit.


3. DISCHARGE FUEL SYSTEM PRESSURE
(Click here)


4. ALIGN FRONT WHEELS FACING STRAIGHT AHEAD


5. DISCONNECT CABLE FROM NEGATIVE BATTERY TERMINAL

NOTICE:
When disconnecting the cable, some systems need to be initialized after the cable is reconnected (Click here).


6. REMOVE FRONT WHEELS


7. REMOVE FRONT WHEEL OPENING EXTENSION PAD RH


8. REMOVE ENGINE UNDER COVER RH


9. REMOVE FRONT FENDER APRON SEAL RH


10. REMOVE FRONT WHEEL OPENING EXTENSION PAD LH


11. REMOVE ENGINE UNDER COVER LH


12. REMOVE FRONT FENDER APRON SEAL LH


13. DRAIN ENGINE OIL
  1. Remove the oil filler cap.

  1. Remove the oil drain plug and drain the oil into a container.

  1. Clean the oil drain plug.

  1. Install the oil drain plug with a new gasket.

    Torque:
    40 N*m{ 408 kgf*cm , 30 ft.*lbf }


14. DRAIN ENGINE COOLANT

NOTICE:
Do not remove the radiator cap sub-assembly, cylinder block drain cock plugs and radiator drain cock plug while the engine and radiator assembly are still hot. Pressurized, hot engine coolant and steam may be released and cause serious burns.

  1. Loosen the radiator drain cock plug.

  1. Loosen the cylinder block drain cock plug (for Bank 1).

  1. Loosen the cylinder block drain cock plug (for Bank 2, w/ Cylinder Block Drain Cock Plug).


  1. Remove the radiator cap sub-assembly.
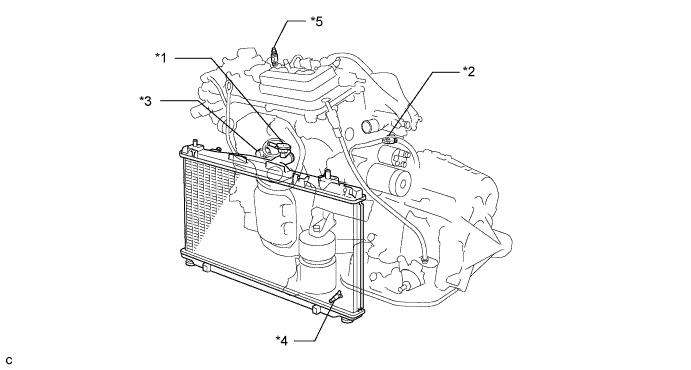

    A255284E02


    Text in Illustration 
    *1
    Radiator Cap Sub-assembly
    *2
    Cylinder Block Drain Cock Plug (for Bank 1)
    *3
    Cylinder Block Drain Cock Plug (for Bank 2, w/ Cylinder Block Drain Cock Plug)
    *4
    Radiator Drain Cock Plug
    *5
    Air Drain Cock Plug
    -
    -

    HINT:
    Collect the engine coolant in a container and dispose of it according to the regulations in your area.
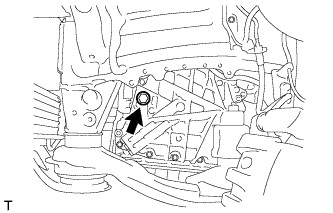
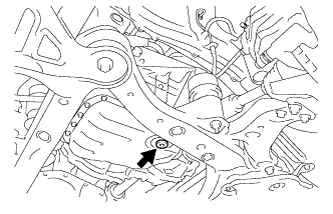
15. DRAIN AUTOMATIC TRANSAXLE FLUID
  1. Remove the front wheel opening extension pad LH, engine under cover LH and front fender apron seal LH.


    C201682
  1. Remove the refill plug and gasket from the automatic transaxle assembly.


    C239660
  1. Using a 6 mm hexagon socket wrench, remove the overflow plug and gasket from the automatic transaxle assembly.


    C201684E04
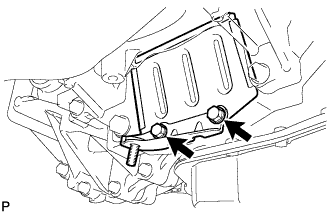
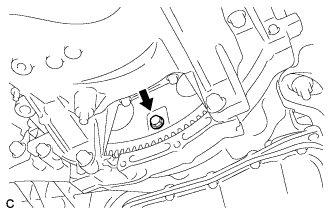
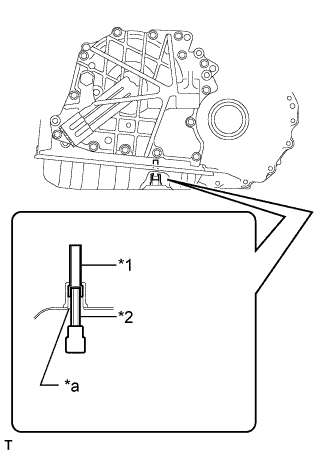
  1. Using a 6 mm hexagon socket wrench, remove the No. 1 transmission oil filler tube from the automatic transaxle assembly.
    Text in Illustration 
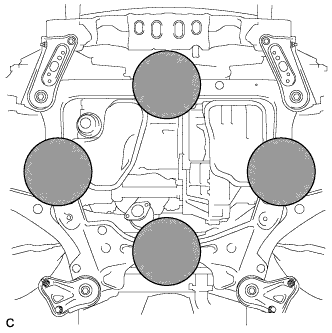
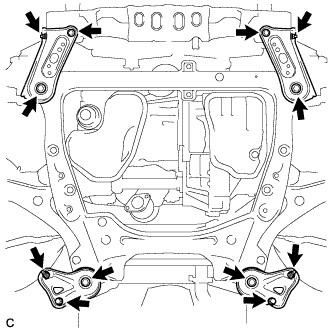
    *1
    No. 1 Transmission Oil Filler Tube
    *2
    Hexagon Socket Wrench
    *a
    Overflow Plug Hole

  1. Drain automatic transaxle fluid from the automatic transaxle assembly.


    C201684E04
  1. Using a 6 mm hexagon socket wrench, install the No. 1 transmission oil filler tube to the automatic transaxle assembly.
    Text in Illustration 
    *1
    No. 1 Transmission Oil Filler Tube
    *2
    Hexagon Socket Wrench
    *a
    Overflow Plug Hole

    Torque:
    1.7 N*m{ 17 kgf*cm , 15 in.*lbf }


    C239660
  1. Using a 6 mm hexagon socket wrench, install a new gasket and the overflow plug to the automatic transaxle assembly.

    Torque:
    40 N*m{ 408 kgf*cm , 30 ft.*lbf }


    C201682
  1. Temporarily install the gasket and refill plug to the automatic transaxle assembly.


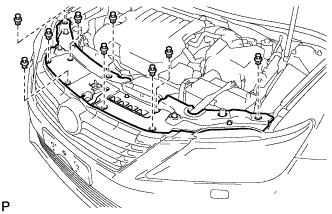
16. REMOVE COOL AIR INTAKE DUCT SEAL


    B282103
  1. Remove the 9 clips and cool air intake duct seal.


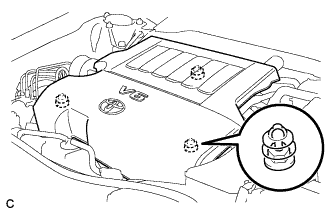
17. REMOVE V-BANK COVER SUB-ASSEMBLY


    A255420
  1. Hold the front of the V-bank cover sub-assembly and raise it to disengage the 2 retainers on the front of the V-bank cover sub-assembly. Continue to raise the V-bank cover sub-assembly to disengage the retainer on the rear of the V-bank cover sub-assembly and remove the V-bank cover sub-assembly.

    NOTICE:
    Attempting to disengage both front and rear retainers at the same time may cause the V-bank cover sub-assembly to break.


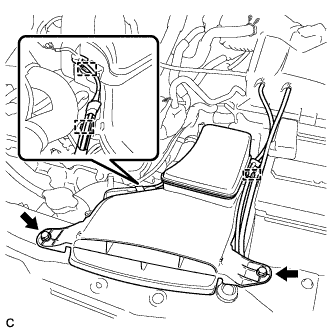
18. REMOVE INLET NO. 2 AIR CLEANER


    A255421
  1. Disconnect the 2 wire harness clamps and vacuum hose clamp.

  1. Remove the 2 bolts and inlet No. 2 air cleaner.


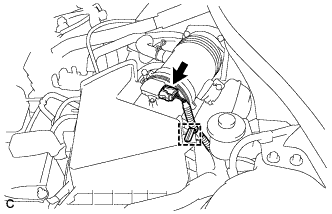
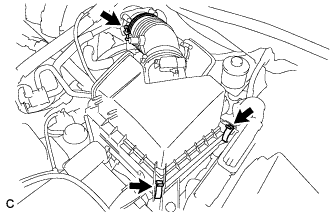
19. REMOVE AIR CLEANER CAP SUB-ASSEMBLY


    A254996
  1. Disconnect the mass air flow meter connector and wire harness clamp.


    A254997
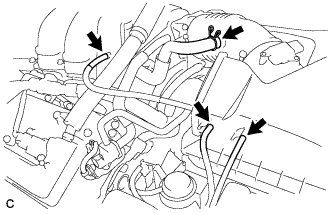
  1. Disconnect the 3 hoses.

  1. Separate the ventilation hose.


    A254998
  1. Loosen the hose clamp and separate the air cleaner cap sub-assembly from the throttle with motor body assembly.

  1. Release the 2 clamps and remove the air cleaner cap with hose.


20. REMOVE AIR CLEANER FILTER ELEMENT SUB-ASSEMBLY


21. REMOVE AIR CLEANER CASE SUB-ASSEMBLY


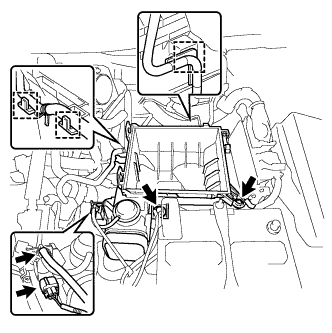
    A255892
  1. Disconnect the wire harness clamp, connector, vacuum hose and No. 1 fuel vapor feed hose.

  1. Remove the 2 bolts and air cleaner case sub-assembly.


22. REMOVE BATTERY


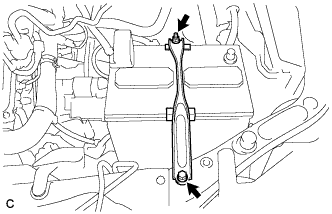
    A256224
  1. Disconnect the positive (+) cable from the positive (+) battery terminal.

  1. Loosen the nut and remove the bolt.

  1. Remove the battery and battery tray.


23. REMOVE INLET NO. 1 AIR CLEANER


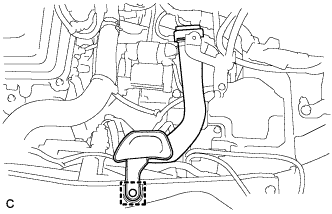
    A256225
  1. Disengage the pin and remove the inlet No. 1 air cleaner.


24. REMOVE INTAKE AIR RESONATOR SUB-ASSEMBLY


    A256226
  1. Disengage the claw and disconnect the 2 vacuum hoses.

  1. Remove the 2 bolts and intake air resonator sub-assembly.


25. REMOVE NO. 2 ENGINE MOUNTING STAY RH


    A255426
  1. Remove the bolt, 2 nuts and No. 2 engine mounting stay RH.


26. REMOVE ENGINE MOVING CONTROL ROD BRACKET


    A255427
  1. Remove the 4 bolts and engine moving control rod bracket with engine moving control rod.


27. REMOVE ENGINE MOVING CONTROL ROD


    A255428
  1. Remove the bolt and engine moving control rod from the engine moving control rod bracket.

    HINT:
    Perform this procedure only when replacement of the engine moving control rod is necessary.


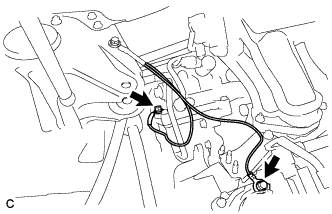
28. SEPARATE EARTH WIRE


    A255429
  1. Remove the 2 bolts and separate the earth wire from the engine assembly.


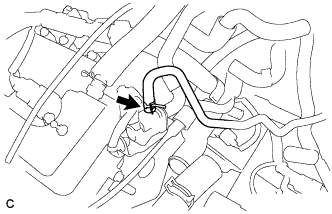
29. DISCONNECT NO. 1 FUEL VAPOR FEED HOSE


    A255431
  1. Disconnect the No. 1 fuel vapor feed hose.


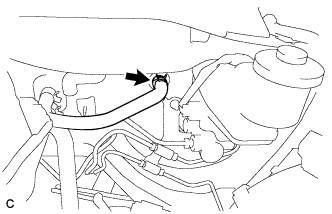
30. DISCONNECT UNION TO CHECK VALVE HOSE


    A255432
  1. Disconnect the union to check valve hose from the brake booster.


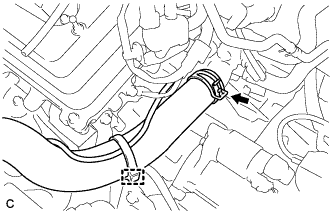
31. DISCONNECT NO. 1 RADIATOR HOSE


    A256228
  1. Remove the hose clamp to separate the air fuel ratio sensor wire from the No. 1 radiator hose.

  1. Disconnect the No. 1 radiator hose.


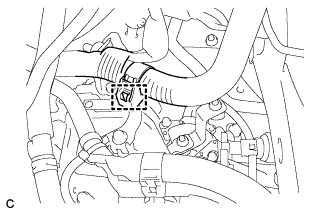
32. DISCONNECT NO. 2 RADIATOR HOSE


    A255430
  1. Disconnect the No. 2 radiator hose.


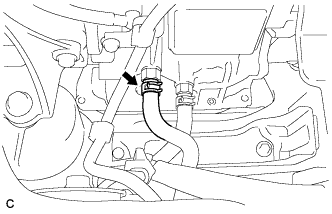
33. DISCONNECT OUTLET NO. 1 OIL COOLER HOSE


    A256231
  1. Disconnect the outlet No. 1 oil cooler hose from the automatic transaxle assembly.


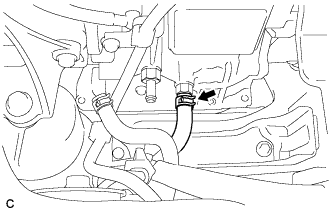
34. DISCONNECT INLET NO. 1 OIL COOLER HOSE


    A256232
  1. Disconnect the inlet No. 1 oil cooler hose from the automatic transaxle assembly.


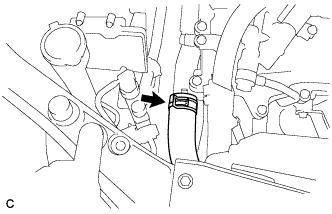
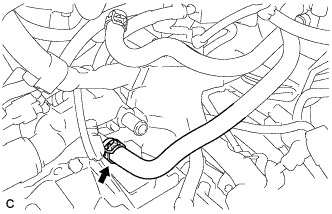
35. DISCONNECT INLET HEATER WATER HOSE


    A256229
  1. Disconnect the inlet heater water hose.


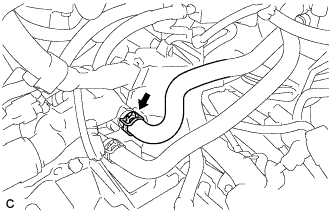
36. DISCONNECT OUTLET HEATER WATER HOSE


    A256230
  1. Disconnect the outlet heater water hose.


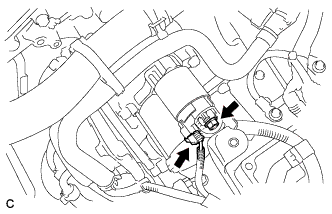
37. REMOVE STARTER ASSEMBLY


    A255475
  1. Disconnect the starter connector.

  1. Remove the terminal cap.

  1. Remove the nut and disconnect the starter wire.


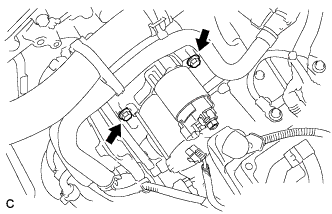
    A255476
  1. Remove the 2 bolts and starter assembly.


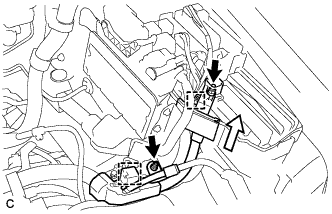
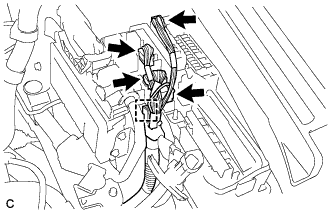
38. DISCONNECT ENGINE WIRE
  1. Remove the No. 1 relay block cover.


    A255436
  1. Remove the 2 nuts and disconnect the wire clamp.

  1. Using a screwdriver, unlock the claw and separate the engine wire from the engine room relay block.


    A255438
  1. Disconnect the 4 connectors.

  1. Using a screwdriver, unlock the claw and separate the engine wire from the engine room relay block.


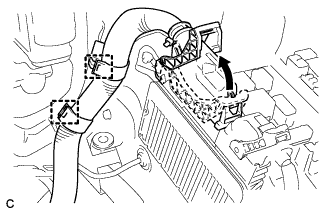
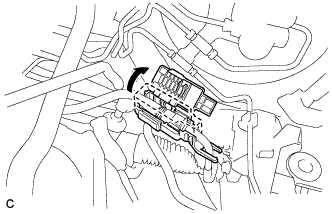
    A255462
  1. Pull up the lever to disconnect the ECM connector.

  1. Disconnect the 2 wire clamps.


39. REMOVE AIR CLEANER BRACKET


    A255409
  1. Disconnect the 2 wire clamps.

  1. Remove the bolt and No. 1 air cleaner bracket from the battery carrier.


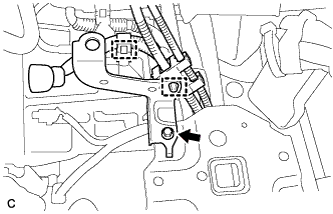
40. SEPARATE TRANSMISSION CONTROL CABLE ASSEMBLY
  1. Move the shift lever to N.


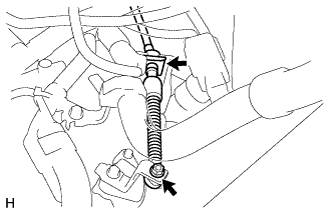
    C239656
  1. Disconnect the wire harness clamp.


    C239668
  1. Remove the nut from the transmission control shaft lever.

  1. Remove the clip and disconnect the transmission control cable assembly from the control cable bracket.


41. DISCONNECT FUEL MAIN TUBE


    A255434
  1. Remove the No. 1 fuel pipe clamp.


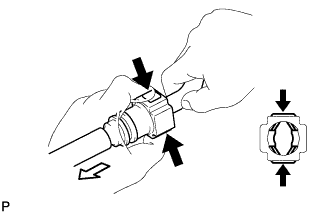
    A167796
  1. Disconnect the connector from the pipe by hand. When the connector and the pipe are stuck, push in and pull on the connector to release it. Pull the connector out of the pipe carefully.
    Text in Illustration 
    V100135
    Push
    V100136
    Pull

    NOTICE:
    1. Check for any dirt and foreign matter contamination in the pipe and around the connector. Clean if necessary. Foreign matter may damage the O-rings or cause leaks in the seal between the pipe and connector.
    2. Do not use any tools to separate the pipe and connector.
    3. Do not forcefully bend or twist the nylon tube.
    4. Check for any dirt and foreign matter on the pipe seal surface. Clean if necessary.
    5. Put the pipe and connector ends in plastic bags to prevent damage and dirt contamination.
    6. If the pipe and connector are stuck together, pinch the tube between your fingers and turn it carefully to free it. Then disconnect the hose.


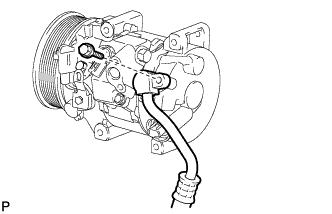
42. DISCONNECT NO. 1 COOLER REFRIGERANT DISCHARGE HOSE


    E227141
  1. Disconnect the 3 connectors.

  1. Disengage the 2 clamps.


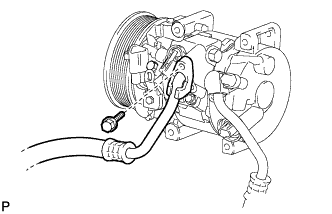
    E227235
  1. Remove the bolt and disconnect the No. 1 cooler refrigerant discharge hose from the compressor and magnetic clutch.

  1. Remove the O-ring from the No. 1 cooler refrigerant discharge hose.

    NOTICE:
    Seal the openings of the disconnected parts using vinyl tape to prevent moisture and foreign matter from entering them.


43. DISCONNECT NO. 1 COOLER REFRIGERANT SUCTION HOSE


    E227236
  1. Remove the bolt and disconnect the No. 1 cooler refrigerant suction hose from the compressor and magnetic clutch.

  1. Remove the O-ring from the No. 1 cooler refrigerant suction hose.

    NOTICE:
    Seal the openings of the disconnected parts using vinyl tape to prevent moisture and foreign matter from entering them.


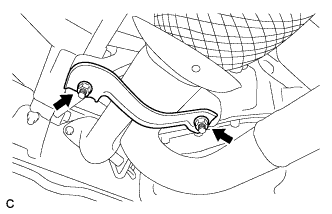
44. REMOVE NO. 1 EXHAUST PIPE SUPPORT BRACKET


    A255354
  1. Remove the 2 nuts and No. 1 exhaust pipe support bracket (for Front Side).


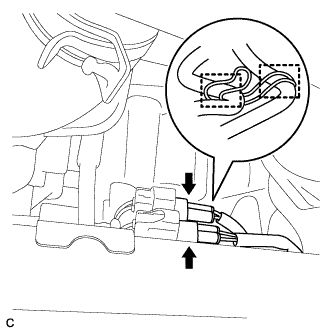
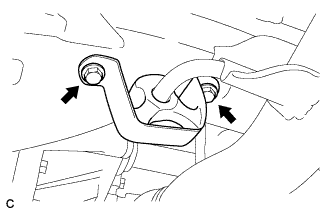
45. REMOVE FRONT EXHAUST PIPE ASSEMBLY


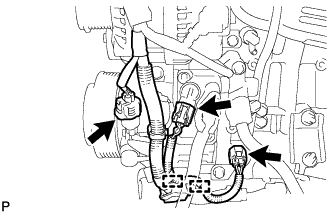
    A255349
  1. Disconnect the 2 wire harnesses from the clamp.

  1. Disconnect the 2 heated oxygen sensor connectors.


    A255350
  1. Remove the 2 bolts and No. 1 exhaust pipe support bracket (for Rear Side).


    A255351
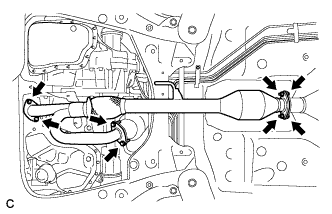
  1. Remove the 4 bolts, 4 nuts and front exhaust pipe assembly.

  1. Remove the 3 gaskets from the front exhaust pipe assembly.


46. SECURE STEERING WHEEL


    C238510
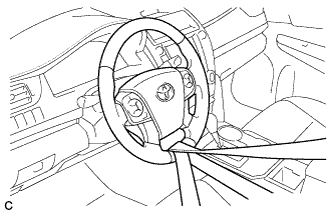
  1. Secure the steering wheel with the seat belt in order to prevent rotation.

    HINT:
    This operation is useful to prevent damage to the spiral cable.


47. SEPARATE STEERING INTERMEDIATE SHAFT ASSEMBLY


    C238511E02
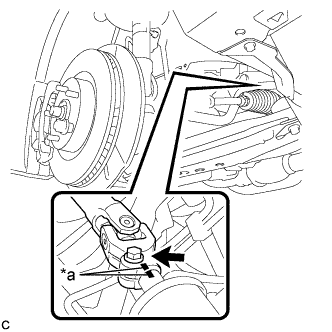
  1. Put matchmarks on the steering intermediate shaft assembly and steering link assembly.
    Text in Illustration 
    *a
    Matchmark

  1. Remove the bolt.

  1. Separate the steering intermediate shaft assembly from the steering link assembly.


48. REMOVE FRONT AXLE SHAFT NUT LH


    C167528E01
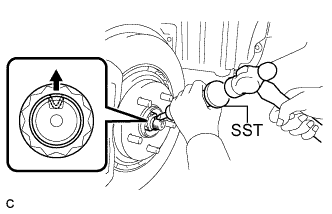
  1. Using SST and a hammer, release the staked part of the front axle shaft nut.

    SST
    09930-00010  

    NOTICE:
    Loosen the staked part of the nut completely, otherwise the threads of the drive shaft may be damaged.

  1. While applying the brakes, remove the front axle shaft nut.


49. REMOVE FRONT AXLE SHAFT NUT RH

HINT:
Perform the same procedure as for the LH side.


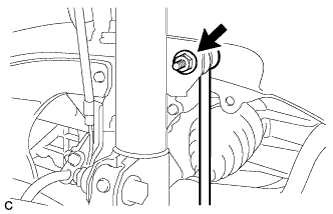
50. SEPARATE FRONT STABILIZER LINK ASSEMBLY LH


    C242672
  1. Remove the nut and separate the front stabilizer link assembly from the front shock absorber assembly.
    If the ball joint turns together with the nut, use a hexagon wrench to hold the stud bolt.


51. SEPARATE FRONT STABILIZER LINK ASSEMBLY RH

HINT:
Perform the same procedure as for the LH side.


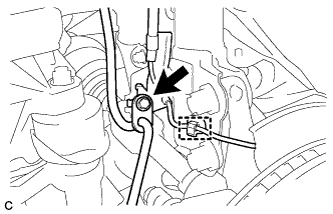
52. SEPARATE FRONT SPEED SENSOR LH


    C238961
  1. Remove the bolt, disengage the clamp and separate the front speed sensor and front flexible hose.

    NOTICE:
    Be sure to separate the front speed sensor from the front shock absorber assembly completely.


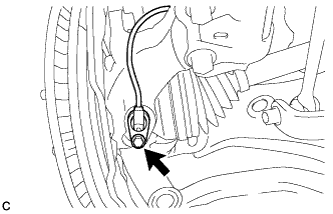
    C238448
  1. Remove the bolt and front speed sensor from the steering knuckle.

    NOTICE:
    1. Prevent foreign matter from contacting the sensor tip.
    2. Be careful not to damage the front speed sensor.
    3. Clean the speed sensor installation hole and the contact surfaces every time the speed sensor is removed.


53. SEPARATE FRONT SPEED SENSOR RH

HINT:
Perform the same procedure as for the LH side.


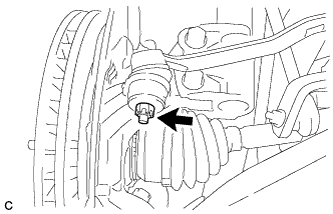
54. SEPARATE TIE ROD ASSEMBLY LH


    C238512
  1. Remove the cotter pin and nut.


    C238513E01
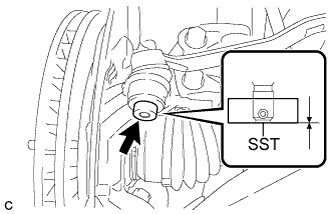
  1. Install SST to the tie rod assembly LH.

    SST
    09960-20010   (09961-02060)

    NOTICE:
    Make sure that the lower ends of the tie rod assembly LH and SST are aligned.

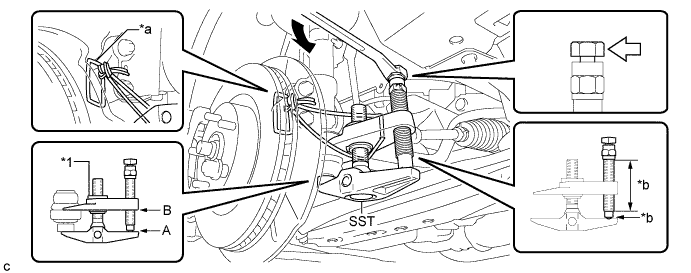
  1. Secure SST using a string.

    NOTICE:
    Be sure to tighten the string firmly to secure SST to the steering knuckle to prevent SST from falling off.


  1. Using SST, separate the tie rod assembly LH from the steering knuckle.


    C238514E02


    Text in Illustration 
    *1
    Center Nut
    -
    -
    *a
    String
    *b
    Grease Application Area
    V100136
    Place the wrench here.
    -
    -
    SST
    09960-20010   (09961-02010)

    CAUTION:
    Apply grease to the bolt threads and the tip of SST.

    NOTICE:
    1. Install SST with the center nut so that A and B shown in the illustration are parallel. Otherwise, the dust cover may be damaged.
    1. Be sure to place the wrench on the part indicated in the illustration.
    1. Do not damage the front disc brake dust cover.
    1. Do not damage the ball joint dust cover.
    1. Do not damage the steering knuckle.


55. SEPARATE TIE ROD ASSEMBLY RH

HINT:
Perform the same procedure as for the LH side.


56. SEPARATE FRONT LOWER NO. 1 SUSPENSION ARM SUB-ASSEMBLY LH


    C238969
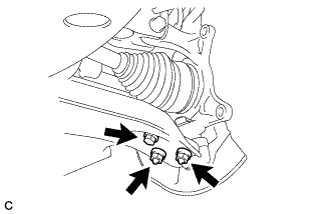
  1. Remove the bolt and 2 nuts, and separate the front lower No. 1 suspension arm sub-assembly from the front lower ball joint assembly.


57. SEPARATE FRONT LOWER NO. 1 SUSPENSION ARM SUB-ASSEMBLY RH

HINT:
Perform the same procedure as for the LH side.


58. SEPARATE FRONT DRIVE SHAFT ASSEMBLY


    C238968E01
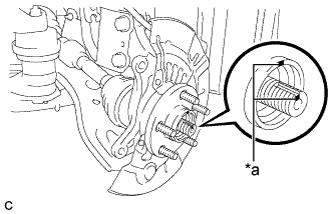
  1. Put matchmarks on the front drive shaft assembly and the front axle hub sub-assembly.
    Text in Illustration 
    *a
    Matchmark

  1. Using a plastic hammer, separate the front drive shaft assembly from the front axle assembly.
    If it is difficult to separate, tap the end of the front drive shaft assembly using a brass bar and a hammer.


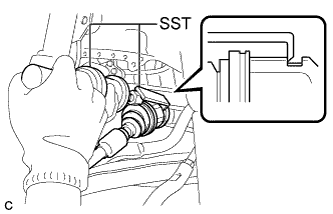
59. REMOVE FRONT DRIVE SHAFT ASSEMBLY LH


    C239400E01
  1. Using SST, remove the front drive shaft assembly LH.

    SST
    09520-00031  
    09520-01010  

    NOTICE:
    1. Do not damage the transaxle case oil seal.
    2. Do not damage the front axle inboard joint boot.
    3. Do not drop the front drive shaft assembly LH.


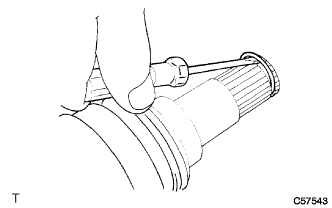
60. REMOVE FRONT DRIVE SHAFT HOLE SNAP RING LH


    C057543
  1. Using a screwdriver, remove the front drive shaft hole snap ring LH.


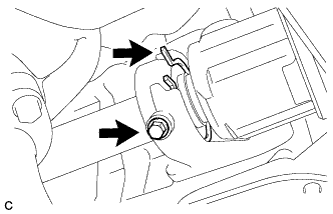
61. REMOVE FRONT DRIVE SHAFT ASSEMBLY RH


    C239399
  1. Separate the bearing bracket hole snap ring from the drive shaft bearing bracket.

  1. Remove the bolt and front drive shaft assembly RH from the drive shaft bearing bracket.

    NOTICE:
    1. Do not damage the front transaxle case oil seal.
    2. Do not damage the front axle inboard joint boot.
    3. Do not drop the front drive shaft assembly RH.

  1. Remove the bearing bracket hole snap ring from the front drive shaft assembly RH.


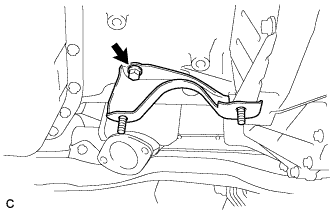
62. REMOVE NO. 1 EXHAUST PIPE SUPPORT BRACKET


    A255439
  1. Remove the bolt and No. 1 exhaust pipe support bracket.


63. REMOVE NO. 1 EXHAUST PIPE SUPPORT BRACKET SUB-ASSEMBLY


    C135005
  1. Remove the 2 bolts and No. 1 exhaust pipe support bracket sub-assembly.


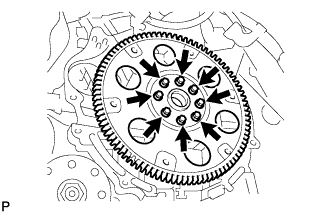
64. REMOVE DRIVE PLATE AND TORQUE CONVERTER SETTING BOLT


    A205885
  1. Turn the crankshaft to gain access to the removable locations of the 6 torque converter setting bolts and remove each bolt while holding the crankshaft pulley bolt with a wrench.

    HINT:
    There will be one black colored bolt.


65. REMOVE ENGINE ASSEMBLY WITH TRANSAXLE


    A255440
  1. Set the engine lifter.
    Text in Illustration 
    V100144
    Attachment Installation Position

    NOTICE:
    1. Install a height adjustment attachment and plate lift attachment onto the engine assembly with transaxle.
    2. Securely support the engine assembly to prevent it from turning upside down until it is secured to an engine stand.
    3. To prevent the oil pan from deforming, do not place any attachments onto the oil pan of the engine assembly with transaxle.
    4. Do not perform any procedure while the engine assembly is suspended because doing so may cause the engine assembly to drop, resulting in injury. However, the engine assembly needs to be suspended when it is installed to or removed from an engine stand.


    A255441
  1. Remove the 4 bolts, 2 nuts and frame side rail plates RH and LH.

  1. Remove the 4 bolts, 2 nuts and front suspension member rear braces RH and LH.

  1. Operate the engine lifter, then remove the engine assembly from the vehicle.

    NOTICE:
    1. Make sure that the engine is clear of all wiring and hoses.
    2. While lowering the engine from the vehicle, do not allow it to contact the vehicle.

  1. Install the engine hangers .


66. REMOVE V-RIBBED BELT


    A205850
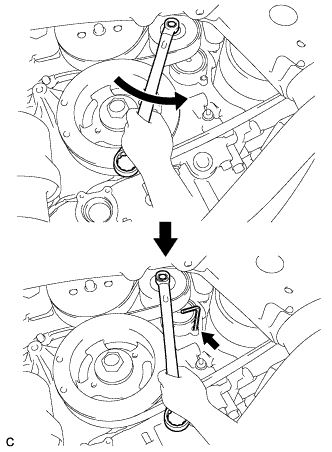
  1. Release the V-ribbed belt tension by turning the V-ribbed belt tensioner counterclockwise, and remove the V-ribbed belt from the V-ribbed belt tensioner.

  1. While turning the V-ribbed belt tensioner counterclockwise, align its holes, and then insert a 5 mm hexagon wrench into the holes to fix the V-ribbed belt tensioner.


67. REMOVE GENERATOR ASSEMBLY


    A255477
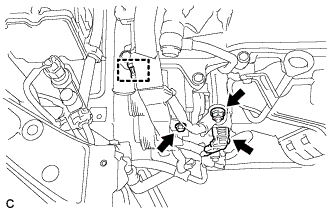
  1. Remove the terminal cap.

  1. Remove the nut and disconnect the wire harness from terminal B.

  1. Disconnect the generator connector from the generator assembly.

  1. Remove the bolt and disconnect the wire harness clamp.


    A255479
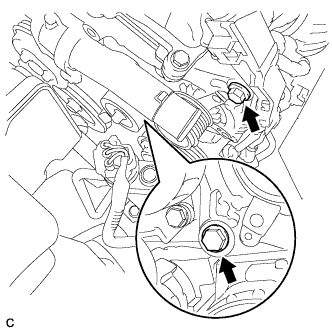
  1. Remove the 2 bolts.


    A255478
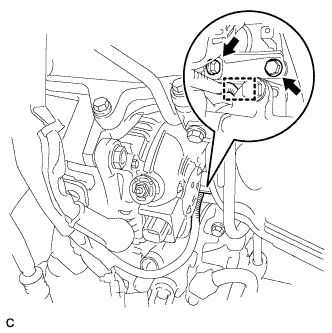
  1. Remove the 2 bolts and generator assembly.

  1. Disconnect the wire harness clamp and remove the generator bracket.


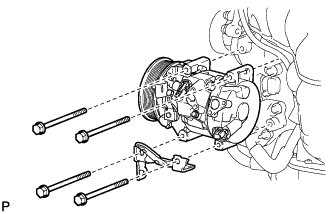
68. REMOVE COMPRESSOR AND MAGNETIC CLUTCH


E227237
  1. Remove the 4 bolts and compressor and magnetic clutch and bracket.


69. REMOVE FRONT FRAME ASSEMBLY


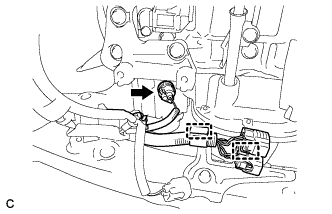
    A255445
  1. Disconnect the oil pressure switch connector and 2 clamps.


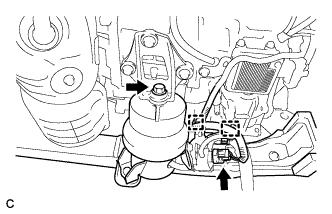
    A256233
  1. Disconnect the 2 clamps and vacuum switching valve connector.

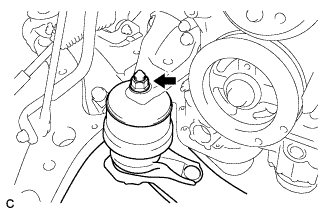
  1. Remove the bolt and disconnect the front engine mounting insulator.


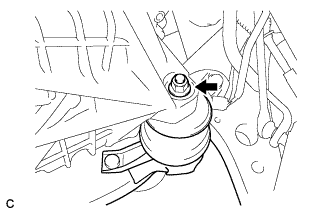
    A255443
  1. Remove the nut and disconnect the engine mounting insulator LH.


    A255444
  1. Remove the nut and disconnect the engine mounting insulator RH.

  1. Remove the front frame assembly.


70. REMOVE FRONT ENGINE MOUNTING INSULATOR ASSEMBLY


    A255447
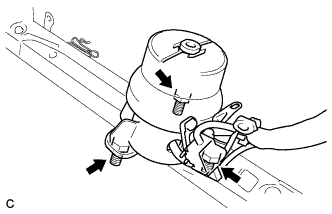
  1. Remove the 3 nuts and front engine mounting insulator assembly.

    HINT:
    Perform this procedure only when replacement of the front engine mounting insulator assembly is necessary.


71. REMOVE ENGINE MOUNTING INSULATOR LH


    A255448
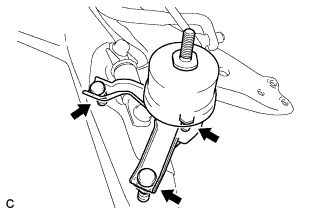
  1. Remove the 2 hole plugs from the front frame assembly.

  1. Remove the 3 nuts and engine mounting insulator LH.

    HINT:
    Perform this procedure only when replacement of the engine mounting insulator LH is necessary.


72. REMOVE ENGINE MOUNTING INSULATOR RH


    A255449
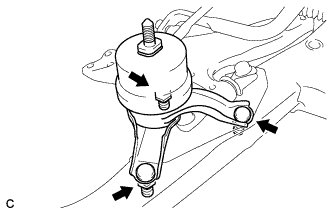
  1. Remove the 2 hole plugs from the front frame assembly.

  1. Remove the 3 nuts and engine mounting insulator RH.

    HINT:
    Perform this procedure only when replacement of the engine mounting insulator RH is necessary.


73. REMOVE ENGINE WIRE
  1. Remove the engine wire from the engine with transaxle.


74. REMOVE AUTOMATIC TRANSAXLE ASSEMBLY
  1. Using the transmission jack attachment, set the automatic transaxle assembly on a transmission jack.

    NOTICE:
    1. Secure the automatic transaxle assembly to the transmission jack using a suitable adapter, such as a rope or attachment.
    2. To prevent the oil pan from deforming, do not place any attachments onto the oil pan of the automatic transaxle assembly.
    3. Hold the engine assembly with a suitable adapter, such as a rope, during the operation.


    C135007
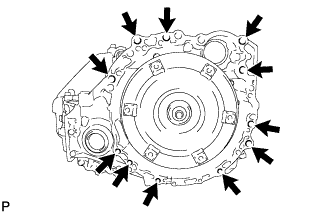
  1. Remove the 11 bolts and transaxle.

    NOTICE:
    To prevent damage to the knock pins, do not pry between the transaxle and engine.


75. REMOVE ENGINE MOUNTING BRACKET RH


    A129642
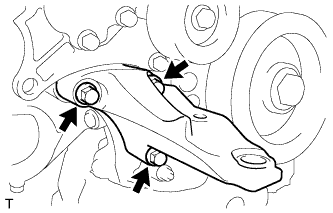
  1. Remove the 3 bolts and engine mounting bracket RH.


76. REMOVE DRIVE SHAFT BEARING BRACKET


    A129643
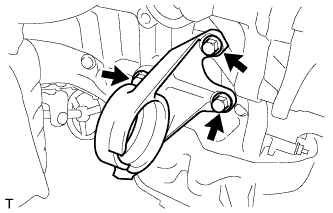
  1. Remove the 3 bolts and drive shaft bearing bracket.


77. REMOVE DRIVE PLATE AND RING GEAR SUB-ASSEMBLY


    A205853E01
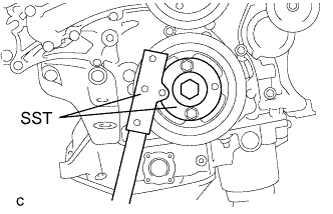
  1. Using SST, hold the crankshaft pulley.

    SST
    09213-70011   (09213-70020)
    09330-00021  


    A132243
  1. Remove the 8 bolts, front drive plate spacer, drive plate and ring gear sub-assembly and rear drive plate spacer.


78. INSTALL ENGINE ON ENGINE STAND
  1. Install the engine onto an engine stand with the bolts.