 |
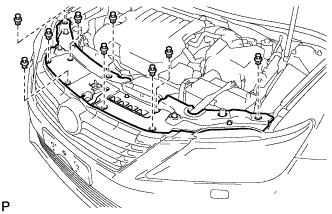
Remove the 9 clips and cool air intake duct seal.
CAMSHAFT > REMOVAL |
| 1. DISCONNECT CABLE FROM NEGATIVE BATTERY TERMINAL |
| 2. REMOVE FRONT WHEEL RH |
| 3. REMOVE FRONT WHEEL OPENING EXTENSION PAD RH |
| 4. REMOVE ENGINE UNDER COVER RH |
| 5. REMOVE FRONT FENDER APRON SEAL RH |
| 6. REMOVE COOL AIR INTAKE DUCT SEAL |
|
Remove the 9 clips and cool air intake duct seal.
| 7. REMOVE NO. 1 ENGINE COVER SUB-ASSEMBLY |
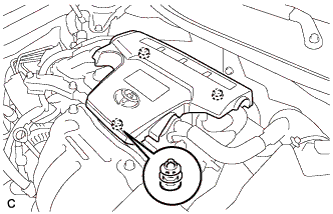 |
Lift the rear of the engine cover to detach the cover from the 2 pins, and then lift the front of the engine cover to detach the cover from the pin and remove the engine cover.
| 8. REMOVE INLET AIR CLEANER ASSEMBLY |
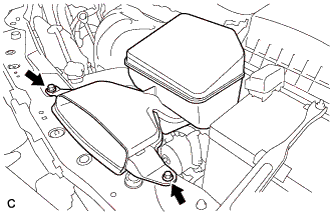 |
Remove the 2 bolts and inlet air cleaner assembly.
| 9. REMOVE AIR CLEANER CAP SUB-ASSEMBLY |
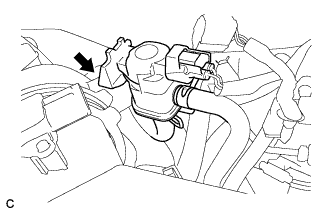 |
Disconnect the vacuum switching valve assembly from the air cleaner hose.
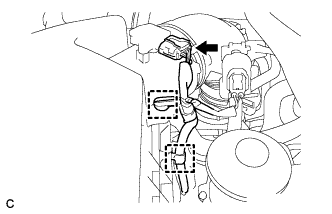 |
Disconnect the mass air flow meter connector and 2 wire harness clamps from the air cleaner cap sub-assembly.
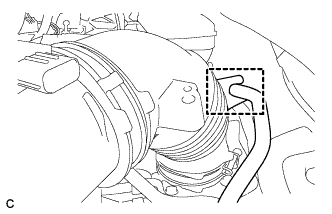 |
Separate the fuel vapor feed hose from the air cleaner hose.
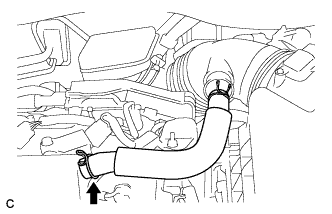 |
Disconnect the ventilation hose from the cylinder head cover.
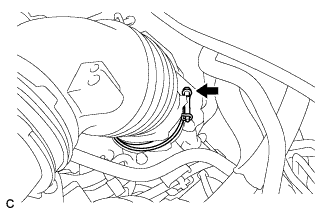 |
Loosen the hose clamp and disconnect the air cleaner hose from the throttle with motor body assembly.
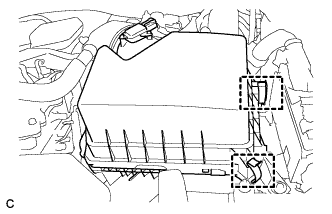 |
Release the 2 clamps and remove the air cleaner cap sub-assembly.
| 10. REMOVE AIR CLEANER FILTER ELEMENT |
| 11. REMOVE AIR CLEANER CASE SUB-ASSEMBLY |
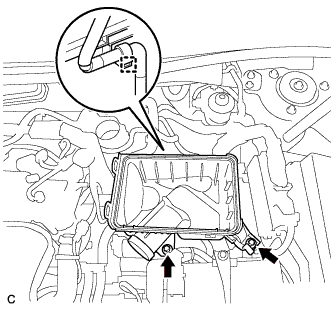 |
Disconnect the wire harness clamp.
Remove the 2 bolts and air cleaner case sub-assembly.
| 12. REMOVE NO. 2 ENGINE MOUNTING STAY RH |
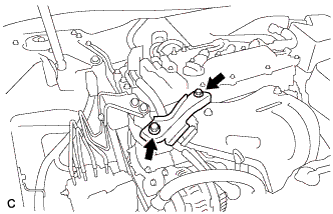 |
Remove the 2 bolts and No. 2 engine mounting stay RH.
| 13. REMOVE ENGINE MOVING CONTROL ROD |
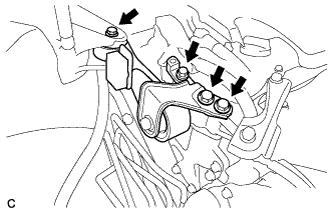 |
Remove the 4 bolts and engine moving control rod bracket.
| 14. DISCONNECT ENGINE WIRE |
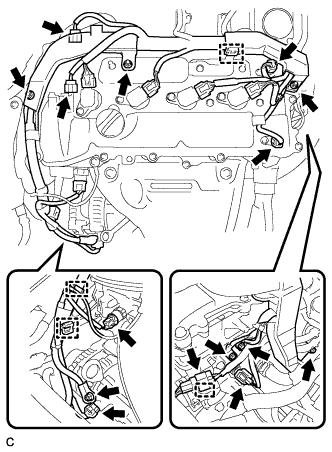 |
Disconnect the connectors and clamps.
Remove the bolts and nuts and disconnect the engine wire from the engine.
| 15. REMOVE IGNITION COIL ASSEMBLY |
Disconnect the 4 ignition coil assembly connectors.
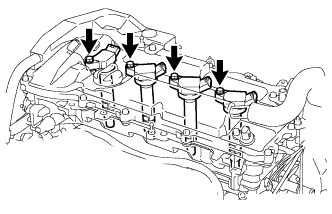 |
Remove the 4 bolts and 4 ignition coil assemblies.
| 16. REMOVE CYLINDER HEAD COVER SUB-ASSEMBLY |
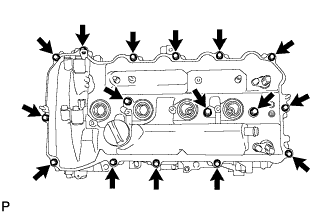 |
Remove the 16 bolts, 3 seal washers, cylinder head cover and gasket.
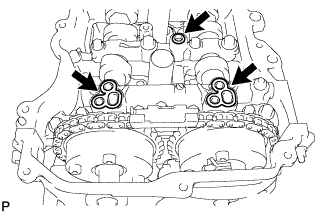 |
Remove the 3 gaskets from the camshaft bearing caps.
| 17. SET NO. 1 CYLINDER TO TDC/COMPRESSION |
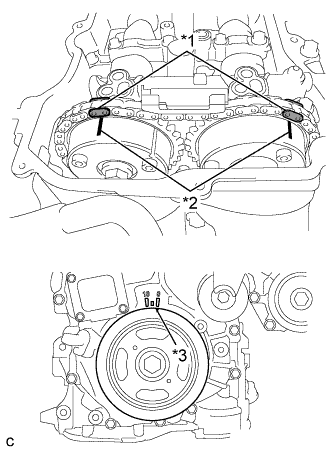 |
Turn the crankshaft pulley until its timing notch (groove) and the timing mark "0" of the timing chain cover are aligned.
| *1 | Paint Mark |
| *2 | Matchmark |
| *3 | Timing Notch |
Check that each matchmark of the camshaft timing gear and camshaft timing exhaust gear are aligned with each matchmark located as shown in the illustration. If not, turn the crankshaft 1 revolution (360°) to align the timing marks as shown in the illustration.
Place paint marks on the chain in alignment with the timing marks on the camshaft timing gear and camshaft timing exhaust gear.
| 18. REMOVE TIMING CHAIN COVER PLATE |
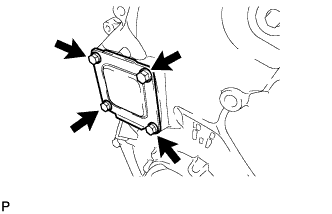 |
Remove the 4 bolts, timing chain cover plate and gasket.
| 19. REMOVE NO. 1 CHAIN TENSIONER ASSEMBLY |
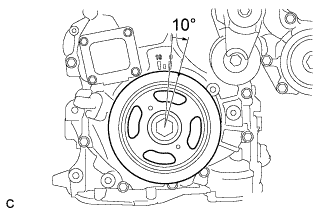 |
Turn the crankshaft approximately 10° clockwise.
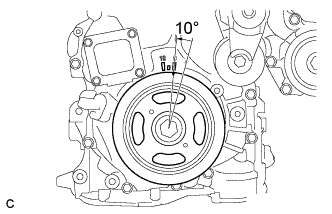 |
Turn the crankshaft approximately 10° counterclockwise.
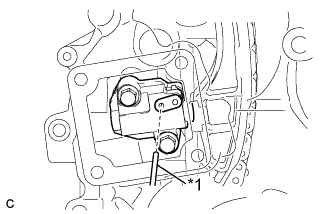 |
Align the holes of the stopper plate and tensioner, and insert a pin into the stopper plate hole to lock the tensioner.
| *1 | Pin |
|
Turn the crankshaft approximately 10° clockwise.
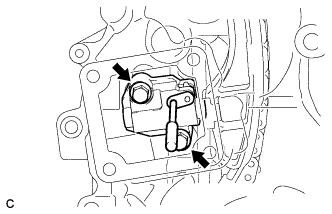 |
Remove the 2 bolts, chain tensioner and gasket.
|
Turn the crankshaft approximately 10° counterclockwise.
| 20. REMOVE TIMING CHAIN GUIDE |
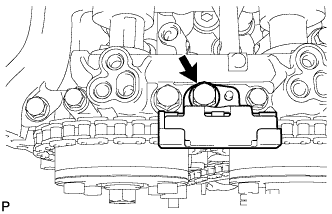 |
Remove the bolt and timing chain guide.
| 21. REMOVE TIMING CHAIN COVER TIGHT PLUG |
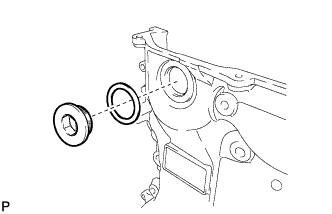 |
Using a 14 mm hexagon wrench, remove the plug and gasket.
| 22. REMOVE CAMSHAFT TIMING GEAR ASSEMBLY |
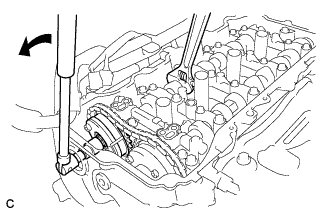 |
Hold the hexagonal portion of the camshaft with a wrench and remove the bolt from the camshaft.
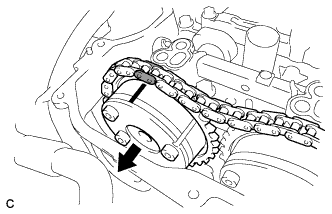 |
Separate the camshaft timing gear assembly from the camshaft.
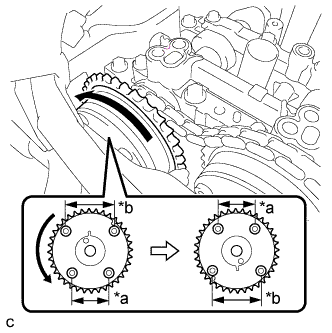 |
Remove the timing chain from the camshaft timing gear assembly, and turn the camshaft timing gear assembly approximately 180°.
| *a | Narrow |
| *b | Wide |
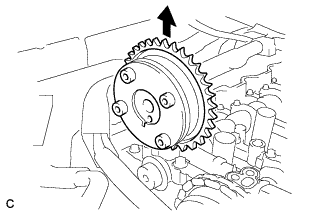 |
Remove the camshaft timing gear assembly.
| 23. REMOVE CAMSHAFT BEARING CAP |
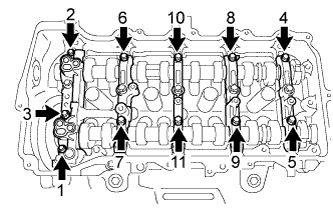 |
Using several steps, remove the 11 bearing cap bolts in the sequence shown in the illustration.
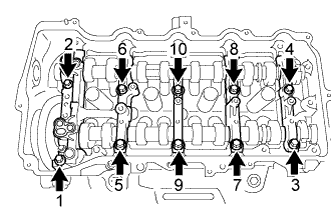 |
Using several steps, remove the 10 bearing cap bolts in the sequence shown in the illustration.
Remove the 5 bearing caps.
| 24. REMOVE CAMSHAFT |
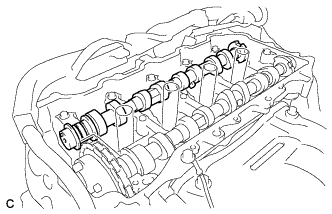 |
Remove the camshaft from the camshaft housing.
| 25. REMOVE NO. 2 CAMSHAFT |
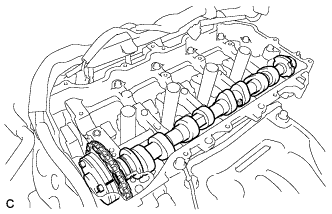 |
Hold up the chain and remove the No. 2 camshaft from the camshaft housing.
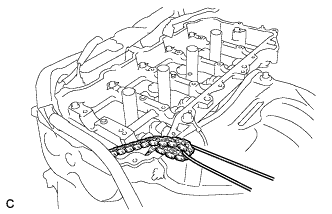 |
Suspend the chain with a string or equivalent as shown in the illustration.
| 26. REMOVE CAMSHAFT TIMING EXHAUST GEAR ASSEMBLY |
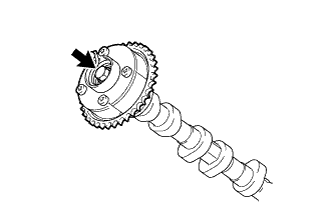 |
Remove the flange bolt and camshaft timing exhaust gear assembly.
| 27. REMOVE OIL CONTROL VALVE FILTER |
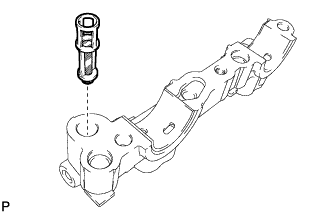 |
Remove the oil control valve filter from the No. 1 camshaft bearing cap.
| 28. REMOVE NO. 1 CAMSHAFT BEARING |
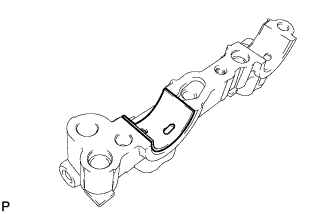 |
Remove the No. 1 camshaft bearing.
| 29. REMOVE NO. 2 CAMSHAFT BEARING |
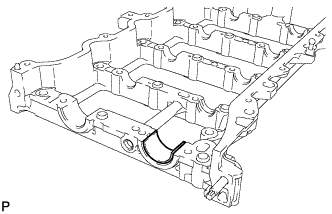 |
Remove the No. 2 camshaft bearing.