 |
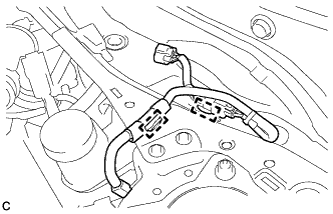
Disengage the 2 clamps and separate the wire harness from the front outer cowl top panel sub-assembly.
FRONT LOWER SUSPENSION ARM (for 1AZ-FE) > REMOVAL |
| 1. PRECAUTION |
| 2. DISCONNECT CABLE FROM NEGATIVE BATTERY TERMINAL |
| 3. REMOVE FRONT WHEELS |
| 4. REMOVE WINDSHIELD WIPER MOTOR AND LINK ASSEMBLY |
| 5. REMOVE FRONT OUTER COWL TOP PANEL SUB-ASSEMBLY |
|
Disengage the 2 clamps and separate the wire harness from the front outer cowl top panel sub-assembly.
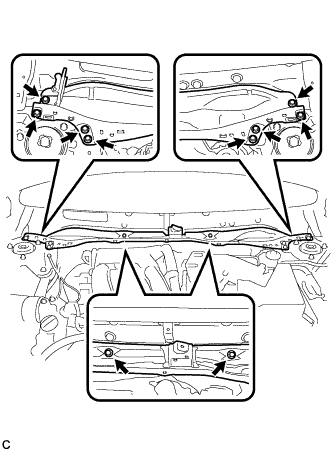 |
Remove the 10 bolts and front outer cowl top panel sub-assembly.
| 6. REMOVE NO. 1 ENGINE COVER SUB-ASSEMBLY |
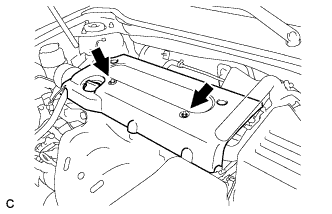 |
Remove the 2 nuts and No. 1 engine cover sub-assembly.
| 7. REMOVE AIR CLEANER CAP SUB-ASSEMBLY |
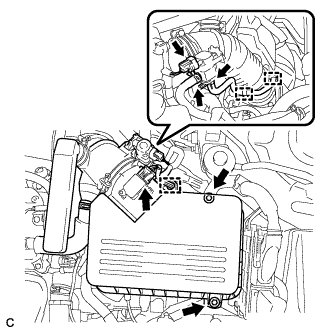 |
Disconnect the vacuum switching valve connector.
Disconnect the 2 vacuum switching valve vacuum hoses.
Disconnect the purge line hose from the 2 clamps.
Disconnect the mass air flow meter connector.
Disconnect the wire harness clamp.
Loosen the 2 bolts and separate the air cleaner cap sub-assembly.
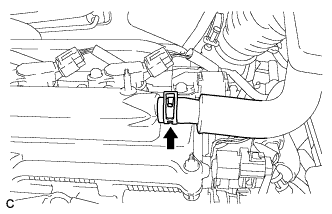 |
Disconnect the ventilation hose from the cylinder head cover sub-assembly.
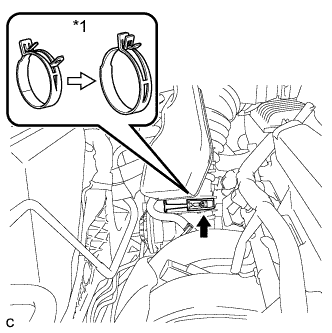 |
Lock the air cleaner hose clamp as shown in the illustration, and disconnect the air cleaner cap sub-assembly from the throttle with motor body assembly.
| *1 | Air Cleaner Hose Clamp |
Remove the air cleaner filter element from the air cleaner case sub-assembly.
| 8. REMOVE AIR CLEANER CASE SUB-ASSEMBLY |
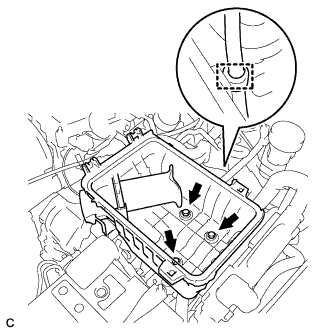 |
Disconnect the wire harness clamp.
Remove the 3 bolts and air cleaner case sub-assembly.
| 9. REMOVE ENGINE MOVING CONTROL ROD SUB-ASSEMBLY |
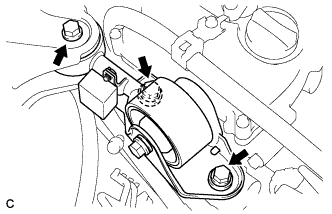 |
Remove the 3 bolts and engine moving control rod sub-assembly.
| 10. REMOVE FRONT WHEEL OPENING EXTENSION PAD LH |
| 11. REMOVE FRONT WHEEL OPENING EXTENSION PAD RH |
| 12. REMOVE ENGINE UNDER COVER LH |
| 13. REMOVE ENGINE UNDER COVER RH |
| 14. REMOVE FRONT FENDER APRON SEAL LH (for LH Side) |
| 15. REMOVE FRONT FENDER APRON SEAL RH (for RH Side) |
| 16. DISCONNECT OXYGEN SENSOR |
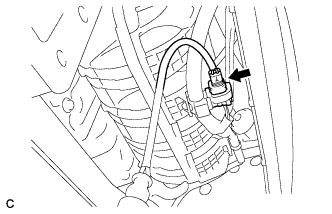 |
Disconnect the oxygen sensor connector.
| 17. SEPARATE FRONT ENGINE MOUNTING INSULATOR |
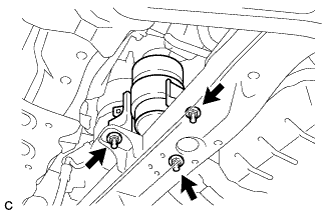 |
Remove the 3 nuts to separate the front engine mounting insulator from the front frame assembly.
| 18. REMOVE ENGINE MOUNTING INSULATOR LH (for LH Side) |
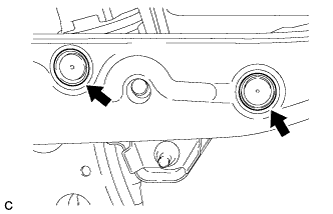 |
Remove the 2 hole plugs.
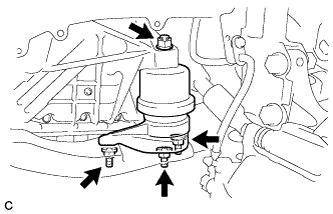 |
Remove the 4 nuts from the engine mounting insulator LH.
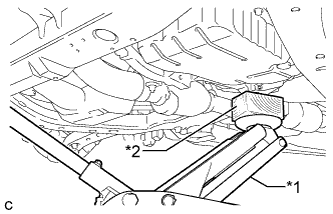 |
Using a jack and a wooden block, support the engine assembly with transaxle at the position shown in the illustration. While ensuring that there is no interference from the components surrounding the engine, tilt the engine assembly with transaxle to a position that allows the engine mounting insulator LH to be removed.
| *1 | Jack |
| *2 | Wooden Block |
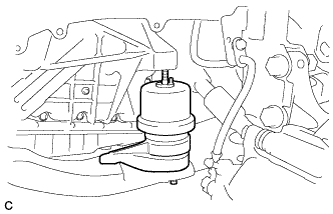 |
Remove the engine mounting insulator LH from the front frame assembly.
| 19. REMOVE FRONT LOWER NO. 1 SUSPENSION ARM SUB-ASSEMBLY LH (for LH Side) |
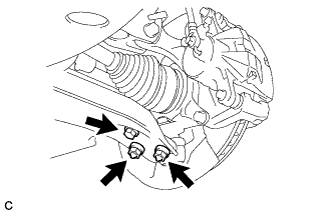 |
Remove the bolt and 2 nuts, and separate the front lower No. 1 suspension arm sub-assembly LH from the front lower ball joint assembly.
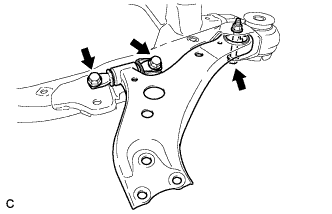 |
Remove the 3 bolts, nut and front lower No. 1 suspension arm sub-assembly LH from the front frame assembly.
Remove the front lower arm bushing stopper from the front lower No. 1 suspension arm sub-assembly LH.
| 20. REMOVE ENGINE MOUNTING INSULATOR RH (for RH Side) |
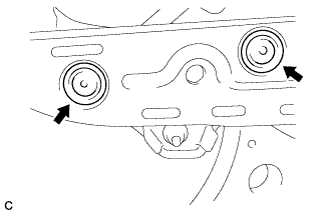 |
Remove the 2 hole plugs.
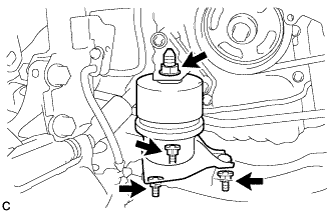 |
Remove the 4 nuts from the engine mounting insulator RH.
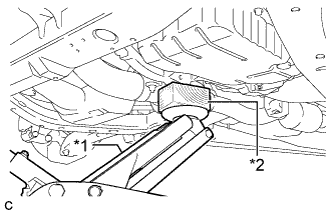 |
Using a jack and a wooden block, support the engine assembly with transaxle at the position shown in the illustration. While ensuring that there is no interference from the components surrounding the engine, tilt the engine assembly with transaxle to a position that allows the engine mounting insulator RH to be removed.
| *1 | Jack |
| *2 | Wooden Block |
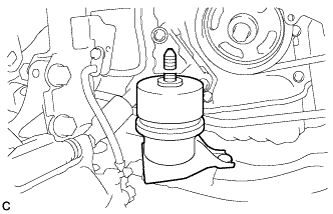 |
Remove the engine mounting insulator RH from the front frame assembly.
| 21. REMOVE FRONT LOWER NO. 1 SUSPENSION ARM SUB-ASSEMBLY RH (for RH Side) |
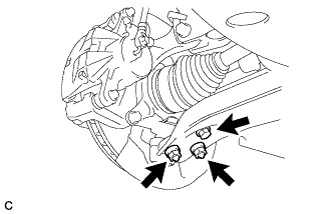 |
Remove the bolt and 2 nuts, and separate the front lower No. 1 suspension arm sub-assembly RH from the front lower ball joint assembly.
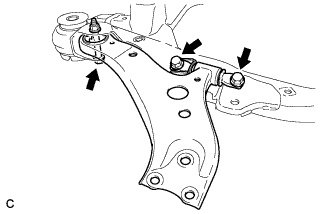 |
Remove the 3 bolts, nut and front lower No. 1 suspension arm sub-assembly RH from the front frame assembly.
Remove the front lower arm bushing stopper from the front lower No. 1 suspension arm sub-assembly RH.