 |
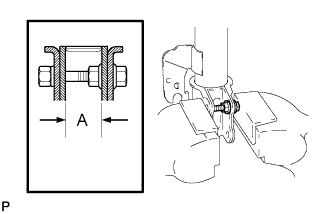
Install the bolt and nut to the front shock absorber assembly as shown in the illustration and secure the front shock absorber assembly in a vise using aluminum plates.
- Standard length A:
- 28 mm (1.10 in.)
FRONT SHOCK ABSORBER > INSTALLATION |
| 1. SECURE FRONT SHOCK ABSORBER ASSEMBLY |
|
Install the bolt and nut to the front shock absorber assembly as shown in the illustration and secure the front shock absorber assembly in a vise using aluminum plates.
| 2. INSTALL FRONT LOWER COIL SPRING INSULATOR |
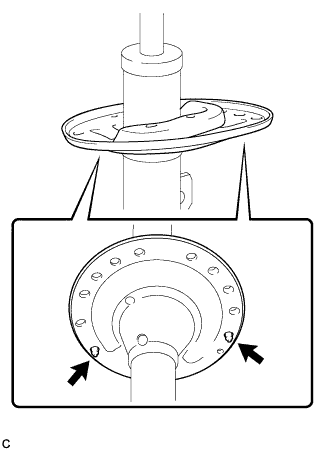 |
Install the front lower coil spring insulator to the front shock absorber assembly.
 | Positioning Pin |
| 3. INSTALL FRONT SPRING BUMPER |
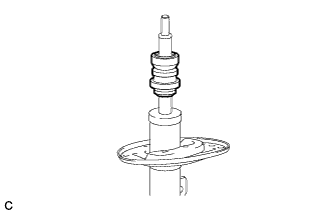 |
Install the front spring bumper to the front shock absorber assembly.
| 4. INSTALL FRONT COIL SPRING |
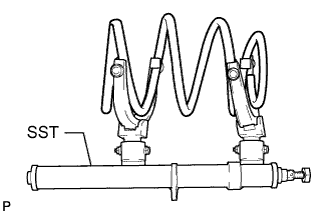 |
Install SST to the front coil spring with the hooks spread as far apart as possible from each other.
Using SST, compress the front coil spring.
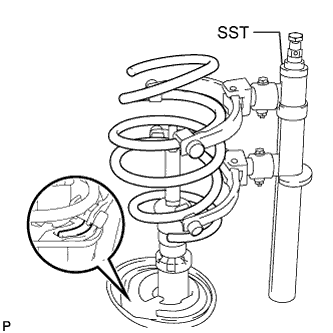 |
Install the front coil spring to the front shock absorber assembly.
| 5. INSTALL FRONT UPPER COIL SPRING INSULATOR |
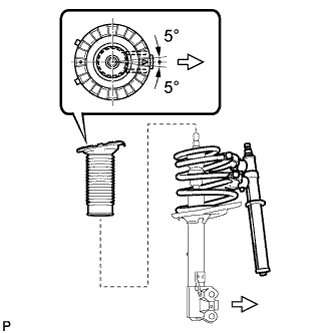 |
Install the front upper coil spring insulator as shown in the illustration.
 | Outside of the Vehicle |
| 6. INSTALL FRONT UPPER COIL SPRING SEAT |
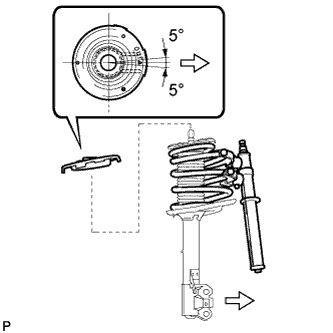 |
Install the front upper coil spring seat with the mark facing the outside of the vehicle.
| Outside of the Vehicle |
| 7. INSTALL FRONT SUSPENSION SUPPORT BEARING |
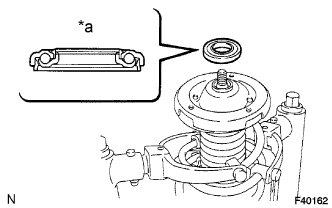 |
Install the front suspension support bearing as shown in the illustration.
| *a | Upper Side |
| 8. INSTALL FRONT SUSPENSION SUPPORT SUB-ASSEMBLY |
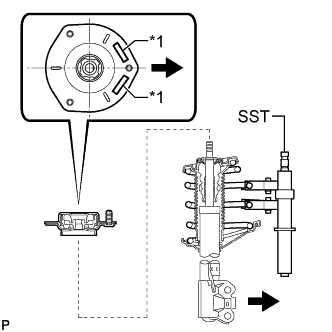 |
Install the front suspension support sub-assembly as shown in the illustration.
| *1 | Rubber Foam |
| Outside of the Vehicle |
Temporarily tighten a new front support to front shock absorber nut.
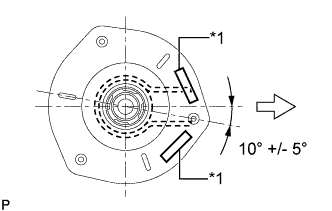 |
While aligning the stud bolt of the front suspension support sub-assembly and the front shock absorber lower bracket, remove SST from the front coil spring.
| *1 | Rubber Foam |
| Outside of the Vehicle |
| 9. INSTALL FRONT SHOCK ABSORBER WITH COIL SPRING |
Install the front shock absorber with coil spring (upper side) with the 3 nuts.
Install the front shock absorber with coil spring (lower side) to the steering knuckle and insert the 2 bolts and 2 nuts.
| 10. INSTALL FRONT STABILIZER LINK ASSEMBLY |
Install the front stabilizer link assembly to the front shock absorber assembly with the nut.
| 11. INSTALL FRONT SPEED SENSOR |
Install the front speed sensor and front flexible hose to the front shock absorber assembly with the bolt and clamp.
| 12. FULLY TIGHTEN FRONT SUPPORT TO FRONT SHOCK ABSORBER NUT |
Fully tighten the front support to front shock absorber nut.
| 13. INSTALL FRONT WHEEL |
| 14. STABILIZE SUSPENSION |
Lower the vehicle and bounce it up and down several times to stabilize the front suspension.
| 15. INSPECT AND ADJUST FRONT WHEEL ALIGNMENT |