 |
Coat the O-ring of the transmission wire with ATF.
VALVE BODY ASSEMBLY > INSTALLATION |
| 1. INSTALL MANUAL VALVE |
Coat the manual valve with ATF.
Install the manual valve into the transmission valve body assembly.
| 2. INSTALL NO. 1 GOVERNOR APPLY GASKET |
Coat 2 new No. 1 governor apply gaskets with ATF.
Install the 2 No. 1 governor apply gaskets onto the transaxle case sub-assembly.
| 3. INSTALL TRANSMISSION VALVE BODY ASSEMBLY |
|
Coat the O-ring of the transmission wire with ATF.
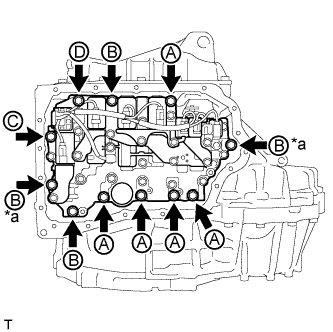
Insert the pin of the manual valve lever into the groove on the end of the manual valve and install the transmission valve body assembly onto the automatic transaxle assembly with the 11 bolts.
| *a | Positioning Bolt |
| Bolt | Length [mm (in.)] |
| A | 25 (0.984) |
| B | 30 (1.18) |
| C and D | 35 (1.38) |
| 4. INSTALL VALVE BODY OIL STRAINER ASSEMBLY |
Coat a new O-ring with ATF.
Install the O-ring onto the valve body oil strainer assembly.
Install the valve body oil strainer assembly onto the transmission valve body assembly with the 2 bolts.
| 5. INSTALL TRANSMISSION OIL CLEANER MAGNET |
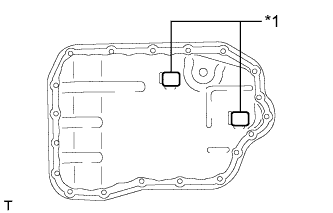 |
Install the 2 transmission oil cleaner magnets onto the automatic transaxle oil pan sub-assembly as shown in the illustration.
| *1 | Transmission Oil Cleaner Magnet |
| 6. INSTALL AUTOMATIC TRANSAXLE OIL PAN GASKET |
Install a new automatic transaxle oil pan gasket onto the automatic transaxle oil pan sub-assembly.
| 7. INSTALL AUTOMATIC TRANSAXLE OIL PAN SUB-ASSEMBLY |
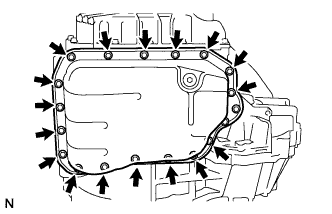 |
Install the automatic transaxle oil pan sub-assembly with the automatic transaxle oil pan gasket onto the automatic transaxle assembly with the 17 bolts.
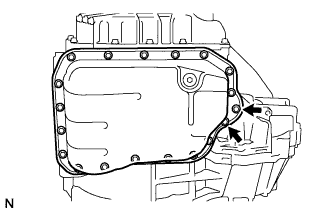 |
Clean and degrease the 2 bolts and the installation hole in the automatic transaxle assembly.
Apply adhesive to 2 or 3 threads on the ends of the bolt.
Install the 2 bolts.
| 8. INSTALL TORQUE CONVERTER ASSEMBLY |
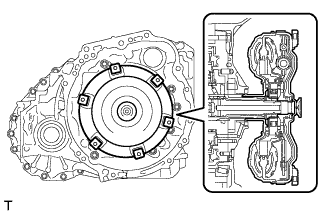 |
Engage the splines of the input shaft and turbine runner.
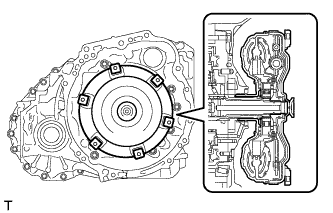 |
Engage the splines of the stator shaft and the stator while turning the torque converter assembly.
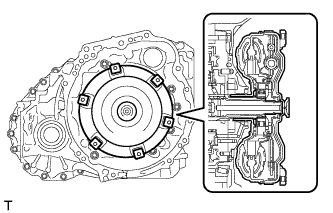 |
Turn the torque converter assembly to insert the key of the oil pump drive gear into the groove of the torque converter assembly.
Clean the torque converter set bolt holes.
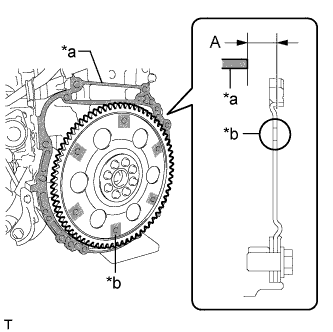 |
Using a vernier caliper and straightedge, measure dimension A between the transaxle contact surface of the engine and the torque converter contact surface of the drive plate.
| *a | Engine Surface |
| *b | Drive Plate Surface |
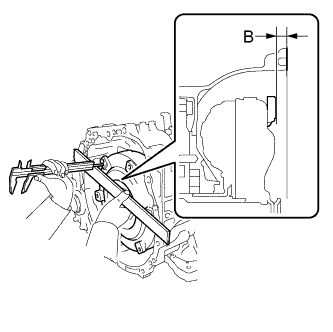 |
Using a vernier caliper and straightedge, measure dimension B shown in the illustration and check that dimension B is more than dimension A, which was measured in the previous step.
| 9. INSTALL AUTOMATIC TRANSAXLE ASSEMBLY |