 |
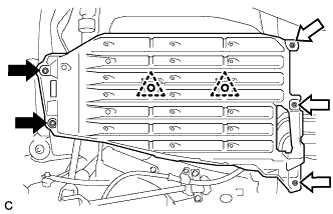
Remove the 2 bolts and 2 clips.
 | Bolt |
 | Nut (attached to under cover) |
REAR SUSPENSION MEMBER > REMOVAL |
| 1. REMOVE REAR WHEELS |
| 2. REMOVE CENTER EXHAUST PIPE ASSEMBLY |
| 3. REMOVE NO. 2 FLOOR UNDER COVER (w/ Floor Under Cover) |
|
Remove the 2 bolts and 2 clips.
| Bolt |
| Nut (attached to under cover) |
Disengage the 3 nuts and remove the No. 2 floor under cover.
| 4. REMOVE NO. 1 FLOOR UNDER COVER |
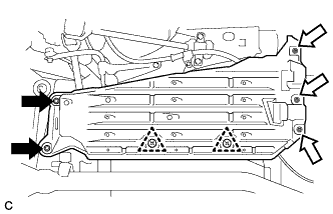 |
Remove the 2 bolts.
| Bolt |
| Nut (attached to under cover) |
Disengage the 3 nuts and 2 clips, and remove the No. 1 floor under cover.
| 5. REMOVE NO. 3 EXHAUST PIPE SUPPORT BRACKET |
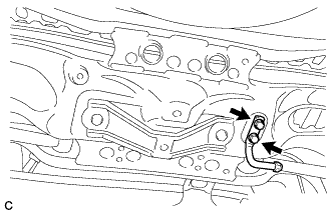 |
Remove the 2 bolts and No. 3 exhaust pipe support bracket from the rear suspension member sub-assembly.
| 6. REMOVE JACK UP BRACKET (for 2GR-FE) |
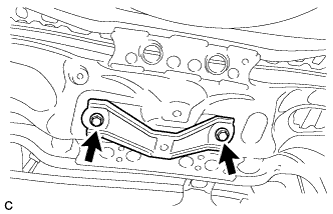 |
Remove the 2 bolts and jack up bracket from the rear suspension member sub-assembly.
| 7. REMOVE REAR SUSPENSION MEMBER DAMPER (w/ Dynamic Damper) |
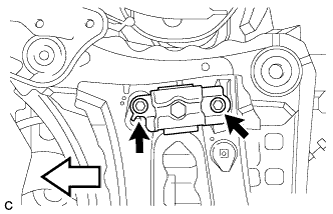 |
Remove the 2 bolts and rear suspension member damper from the rear suspension member sub-assembly.
| Front of the Vehicle |
| 8. SEPARATE REAR STABILIZER LINK ASSEMBLY LH |
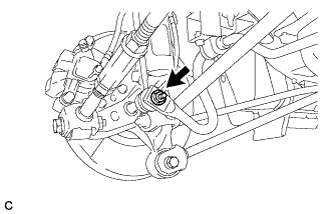 |
Remove the nut and separate the rear stabilizer link assembly LH from the rear stabilizer bar.
If the ball joint turns together with the nut, use a hexagon wrench to hold the stud.
| 9. SEPARATE REAR STABILIZER LINK ASSEMBLY RH |
| 10. REMOVE REAR STABILIZER BAR |
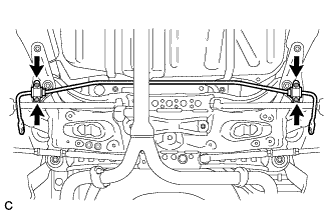 |
Remove the 4 bolts, rear stabilizer bar, 2 rear No. 1 stabilizer bar brackets, 2 rear No. 2 stabilizer bar brackets and 2 rear stabilizer bushings from the rear suspension member sub-assembly.
| 11. REMOVE REAR HEIGHT CONTROL SENSOR SUB-ASSEMBLY (w/ Height Control Sensor) |
| 12. SEPARATE REAR NO. 2 SUSPENSION ARM ASSEMBLY LH |
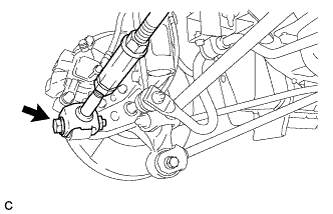 |
Remove the bolt and nut, and separate the rear No. 2 suspension arm assembly (outer side) from the rear axle carrier sub-assembly.
| 13. SEPARATE REAR NO. 2 SUSPENSION ARM ASSEMBLY RH |
| 14. REMOVE REAR NO. 2 SUSPENSION ARM ASSEMBLY LH |
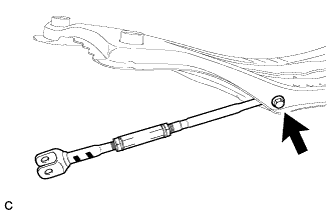 |
Remove the bolt and rear No. 2 suspension arm assembly from the rear suspension member sub-assembly.
| 15. REMOVE REAR NO. 2 SUSPENSION ARM ASSEMBLY RH |
| 16. SEPARATE REAR NO. 1 SUSPENSION ARM ASSEMBLY LH |
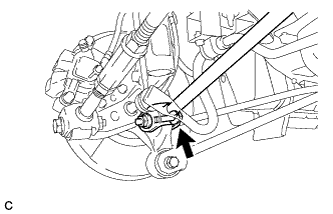 |
Remove the bolt and nut, and separate the rear No. 1 suspension arm assembly (outer side) from the rear axle carrier sub-assembly.
| 17. SEPARATE REAR NO. 1 SUSPENSION ARM ASSEMBLY RH |
| 18. REMOVE REAR SUSPENSION MEMBER SUB-ASSEMBLY |
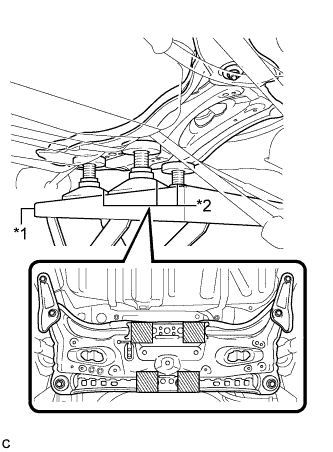 |
Support the rear suspension member sub-assembly with an engine lifter using 4 attachments or equivalent tools as shown in the illustration.
| *1 | Engine Lifter |
| *2 | Attachment |
 | Attachment Placement Location |
Remove the 2 bolts, 4 nuts, 2 rear suspension member lower stopper sub-assemblies and 2 rear suspension member lower stoppers.
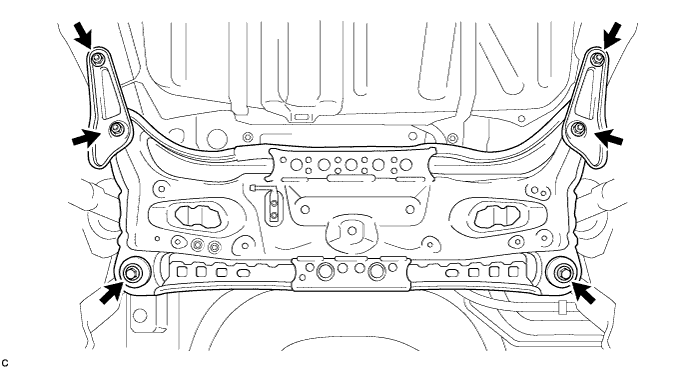
Slowly lower the rear suspension member sub-assembly.
w/ Member Cushion:
Remove the 2 differential support member cushions and 2 differential support member upper stoppers from the rear suspension member sub-assembly.
| 19. REMOVE REAR NO. 1 SUSPENSION ARM ASSEMBLY LH |
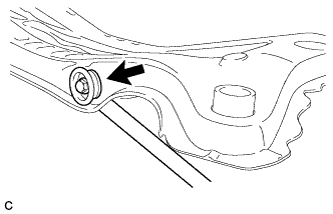 |
Remove the bolt and rear No. 1 suspension arm assembly from the rear suspension member sub-assembly.
| 20. REMOVE REAR NO. 1 SUSPENSION ARM ASSEMBLY RH |
| 21. REMOVE REAR SUSPENSION MEMBER BODY MOUNTING FRONT CUSHION LH |
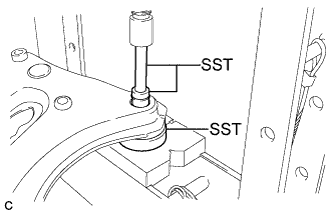 |
Using SST and a press, remove the rear suspension member body mounting front cushion LH from the rear suspension member sub-assembly.
| 22. REMOVE REAR SUSPENSION MEMBER BODY MOUNTING FRONT CUSHION RH |
| 23. REMOVE REAR SUSPENSION MEMBER BODY MOUNTING REAR CUSHION (for LH Side) |
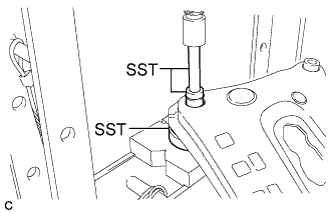 |
Using SST and a press, remove the rear suspension member body mounting rear cushion from the rear suspension member sub-assembly.
| 24. REMOVE REAR SUSPENSION MEMBER BODY MOUNTING REAR CUSHION (for RH Side) |
| 25. REMOVE HOLE PLUG |
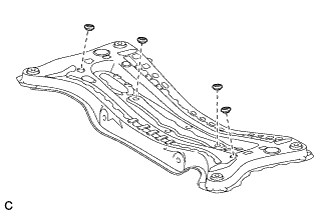 |
Remove the 4 hole plugs from the rear suspension member sub-assembly.